4. Click Port next to the first input of the I/O pair with a Wiegand device configured (in example 1,
Contact2; in example 2, AUX1).
5. Select from Input Type, and click Save.
This will label the subsequent input as Wiegand Device (Extended) and disable it from editing. Inputs cannot be
changed if they are already assigned to an entry.
Figure 4 Input settings in the Alta Control Center
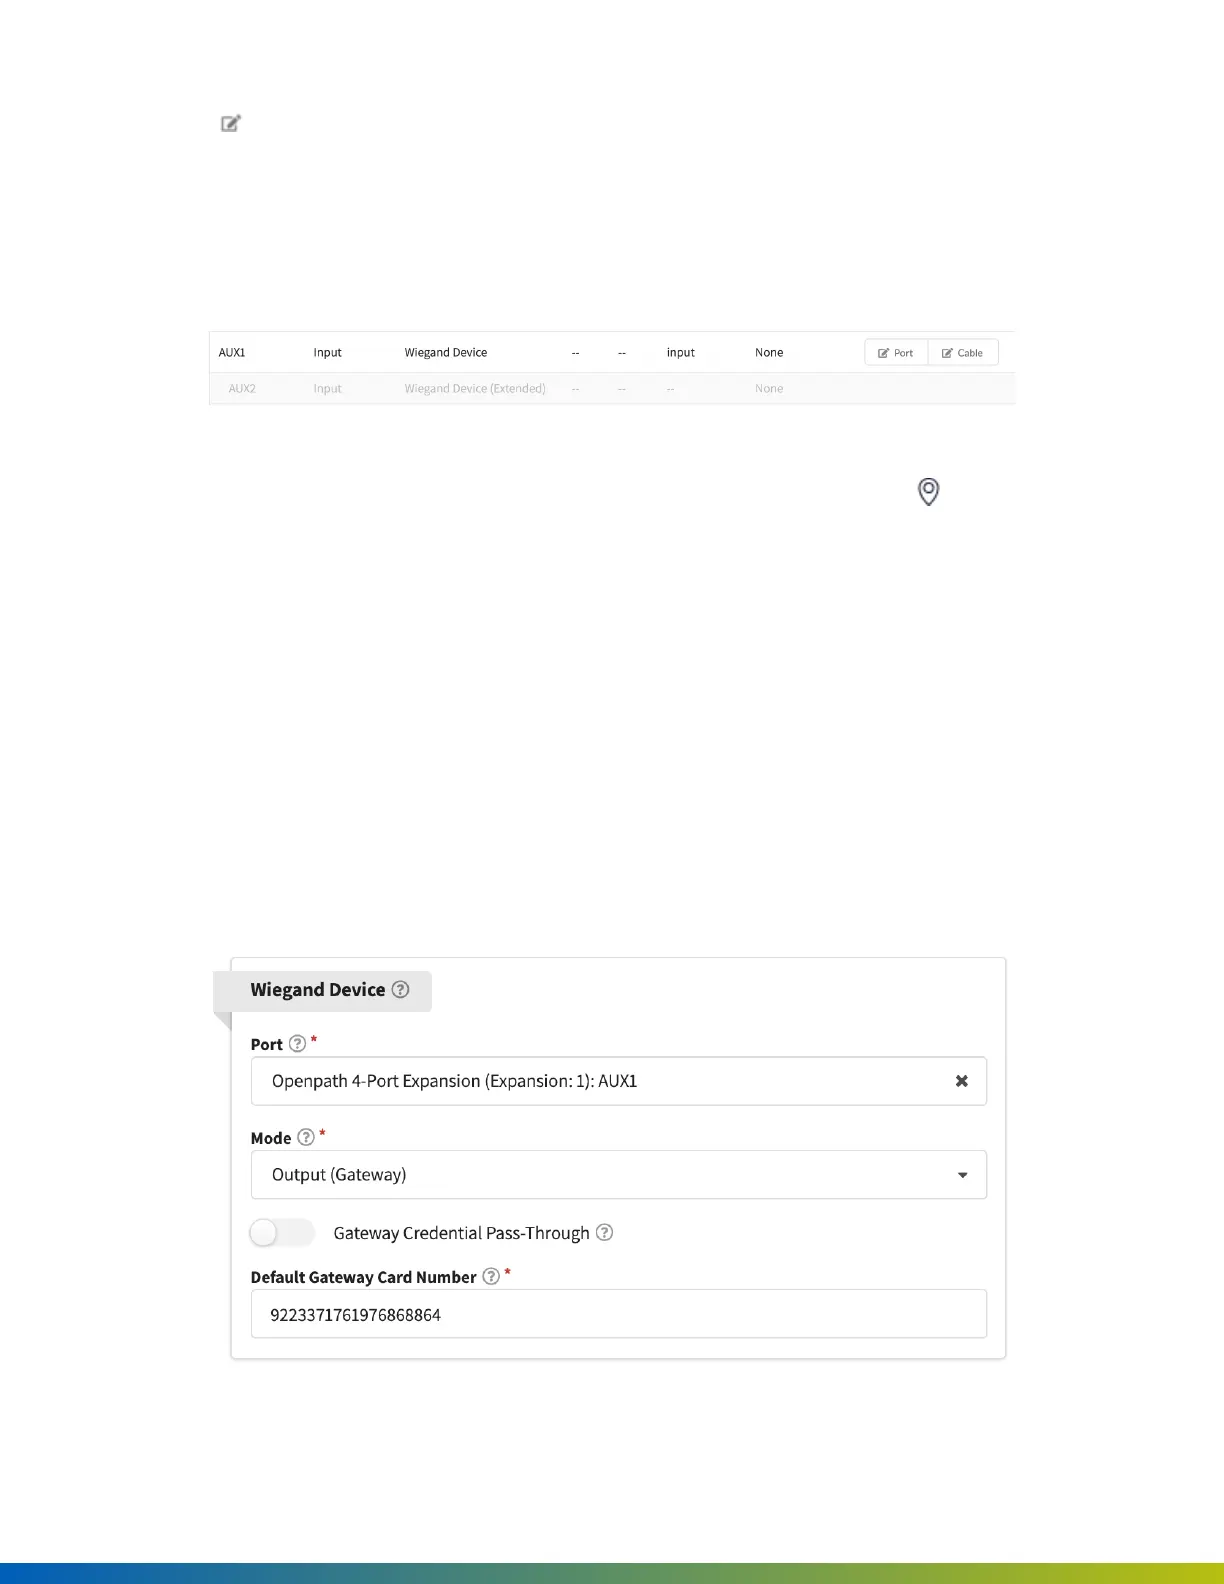
Once the Wiegand Device is configured on the ACU, it can be assigned to an entry. Go to Sites > Entries,
and create or edit an existing entry. In the Wiegand Device settings, configure the following:
l
Port— Select the port for the Wiegand Device to which this Entry is wired.
l
Mode— Select the Mode to set which direction the card credential data is sent:
o
Use Inputto receive data from devices such as a Wiegand reader.
o
Use Output(Gateway)to send credential data to a third-party control panel.
n
Enable Gateway Credential Pass-Throughif you do not want the Avigilon Alta system to
authenticate credentials, but rather send all data to the legacy panel for authentication.
n
Enter a Default Gateway Card Numberso that all credentials (including mobile credentials)
are sent to the legacy panel as a Wiegand ID.
Figure 5 Assigning a Wiegand Device to an Entry
55
 Loading...