R5906790 /04 Athena 109
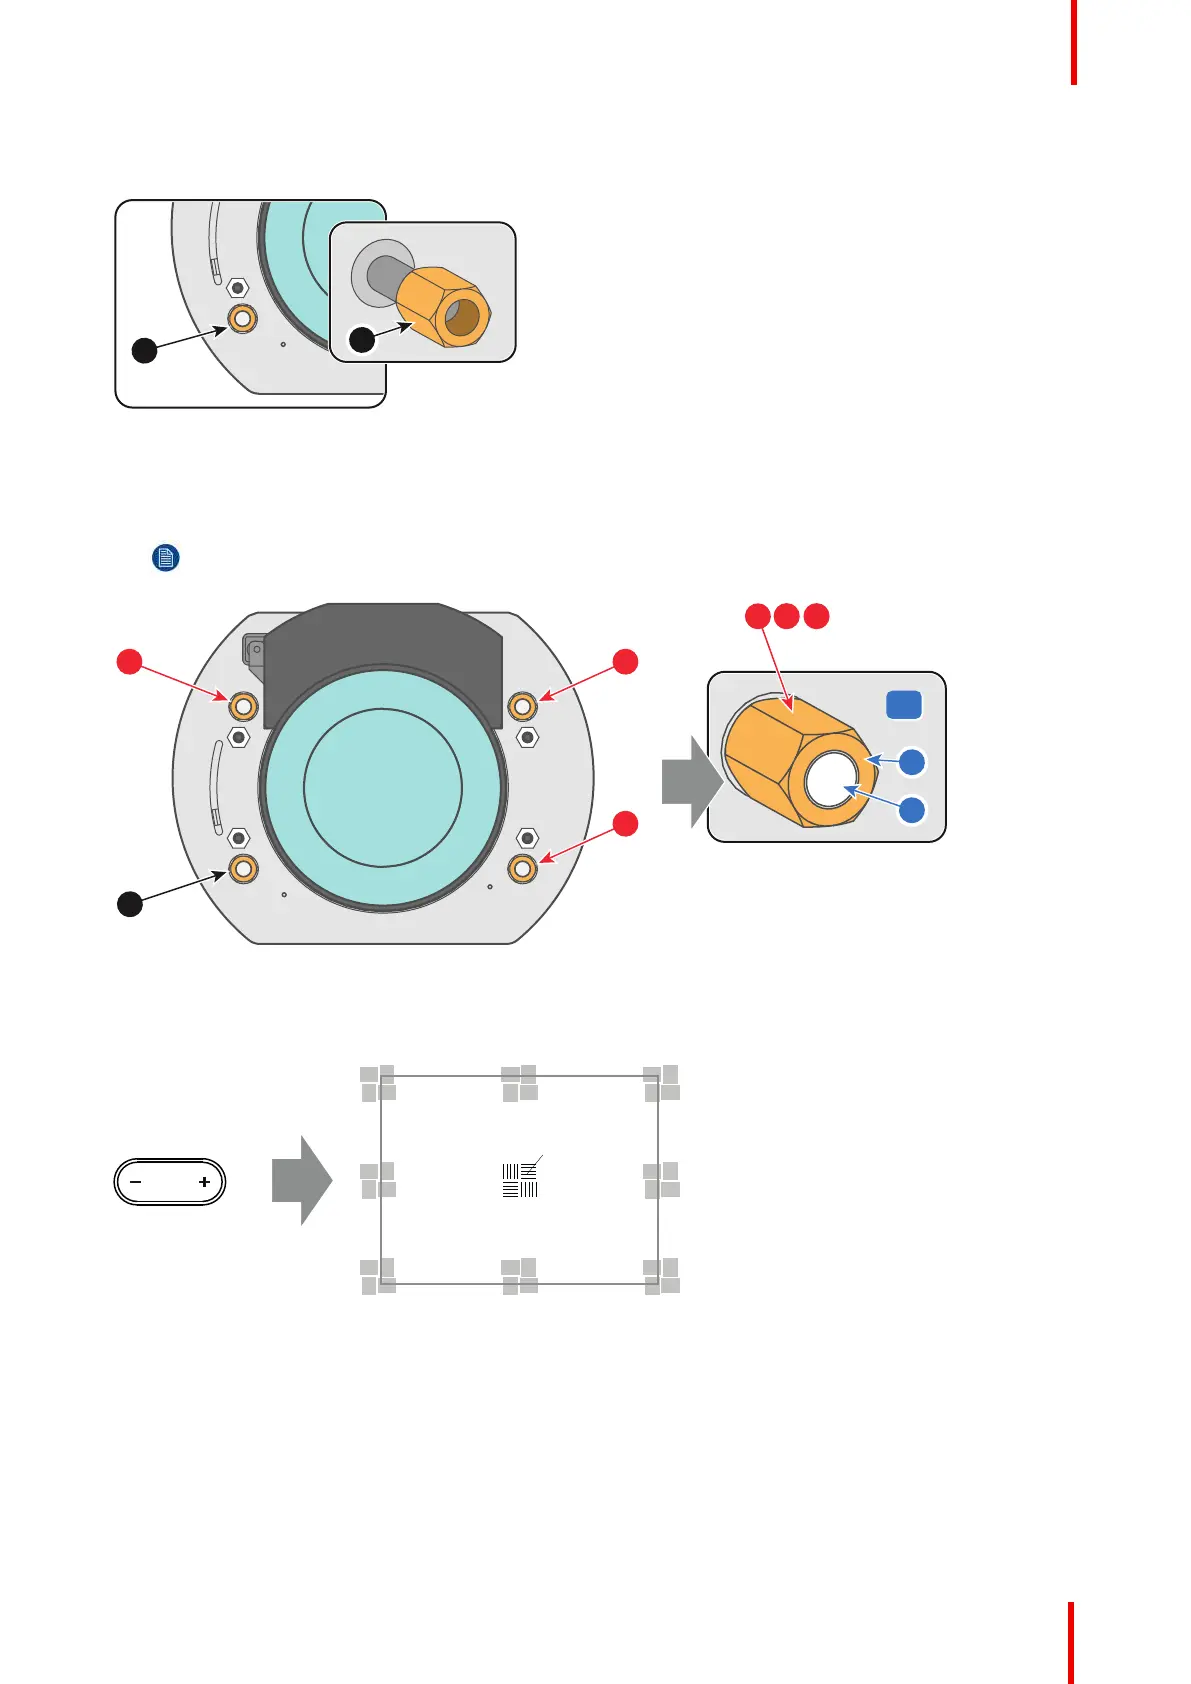
2. Fully loosen the Scheimpflug nut at the lower left of the Lens Holder (reference 4 Image 11-16). Use a 13mm
nut driver.
Image 11-16
3. Turn the three Scheimpflug adjustment nuts, reference 1, 2 and 3 Image 11-17, until the front of the nut
(reference 5 Image 11-17) is equally aligned with the front of the threaded rod (reference 6 Image 11-17). Use
a 13mm nut driver.
Note: This is the nominal position of the Lens Holder.
Image 11-17
4. Zoom the lens for maximum image on the screen (WIDE) and focus the center of the projected image using
the motorized focus control (Local Keypad).
Image 11-18
5. Is it possible to focus the center of the projected image using the motorized focus control (Local Keypad) ?
Ensure that the lens is zoomed for maximum image on the screen (WIDE).
► If yes, nominal position is good for sharp focus in the middle of the projected image. Proceed with step 6.
► If no, obtain the best possible focus in the center of the projected image using the motorized focus control
and then turn the three Scheimpflug adjustment nuts, reference 1, 2 and 3 Image 11-19, equally in or out until
the center of the projected image is sharp. Attention: Keep in mind the turning direction of the Scheimpflug
adjustment nuts for further adjustment instructions in this procedure.
Scheimpflug