Creative embroidering
145
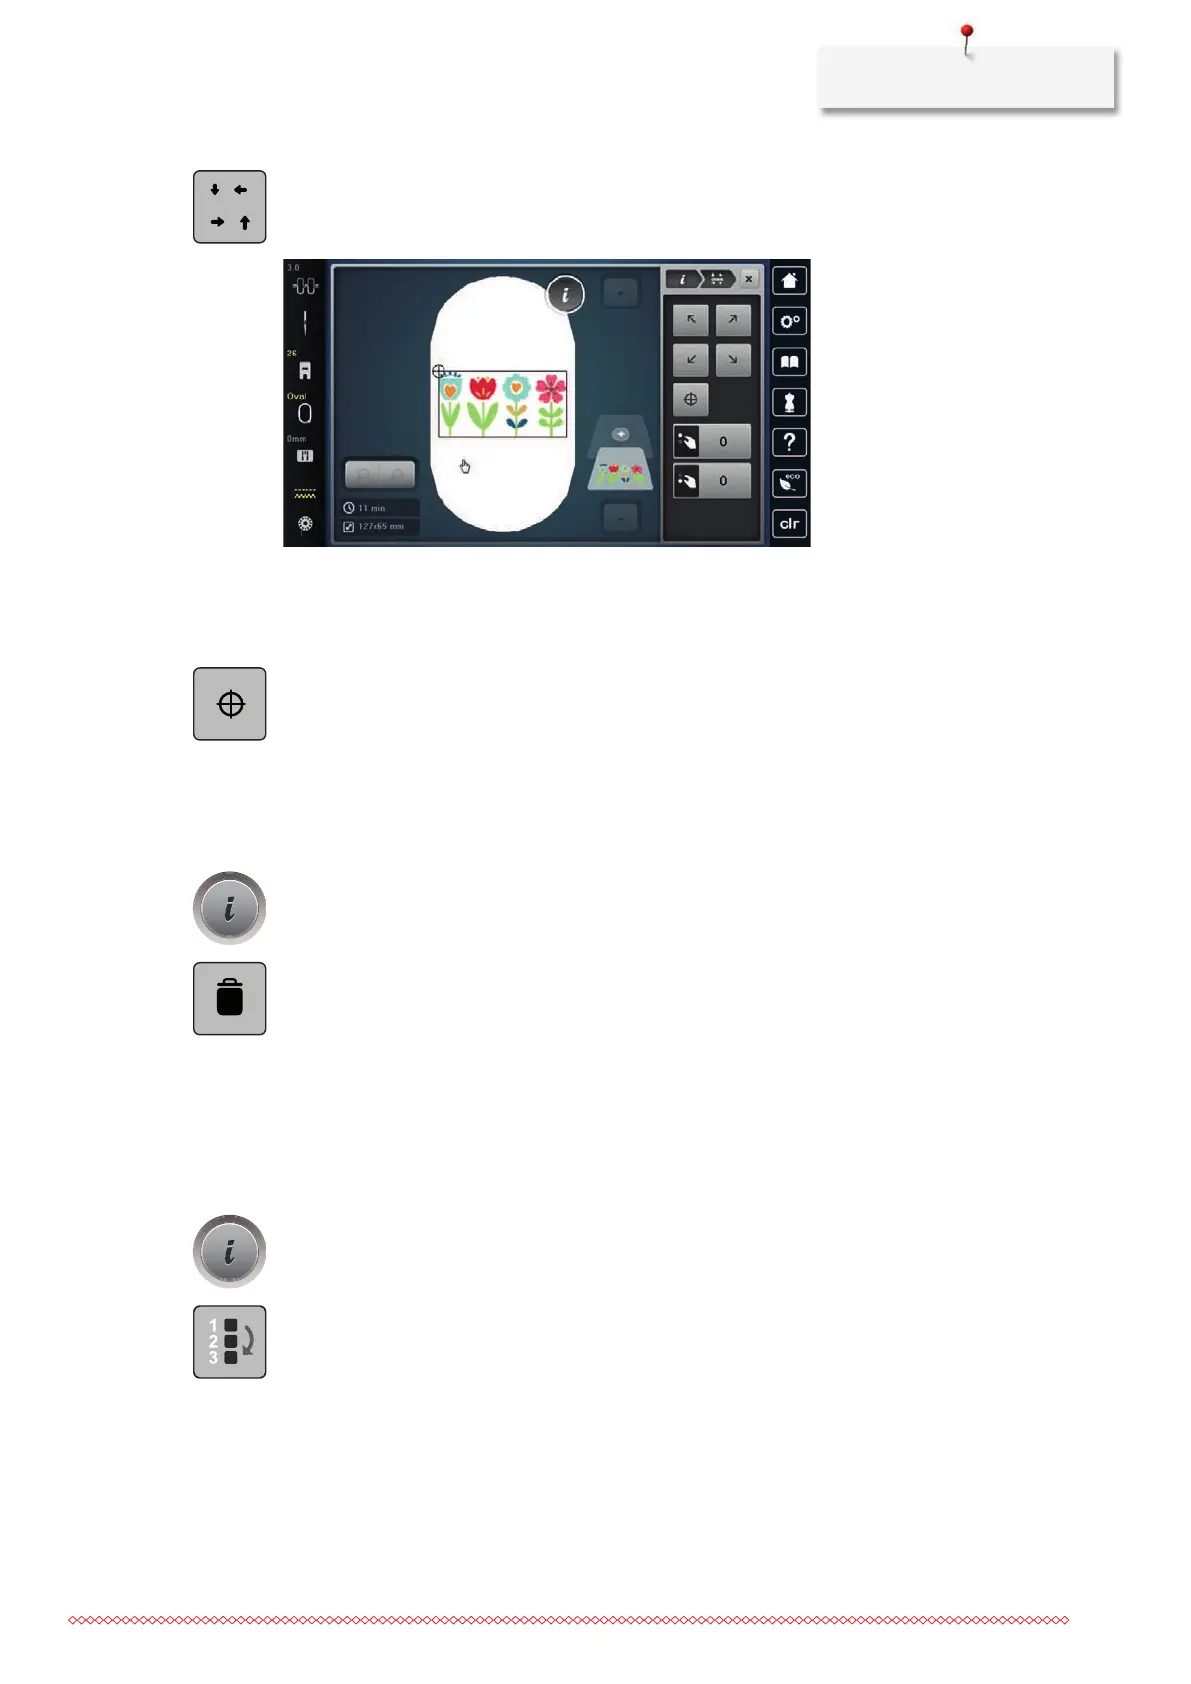
> Tap «Check Embroidery Motif Size».
– The embroidery hoop travels all the way until the needle is at the position as it is indicated in the
display.
> To select the desired corner of the embroidery motif, tap the respective arrow.
– The embroidery hoop travels all the way until the needle is at the position as it is indicated in the
display. If the embroidery motif hasn't been positioned correctly yet, the position can be altered via
the Upper/Lower Multi-function knobs and the complete embroidery positions can be checked again.
> To position the needle in the center of the embroidery motif, tap «Center Motif».
> Turn the «Upper Multi-function knob» to move the embroidery motif horizontally.
> Turn the «Lower Multi-function knob» to move the embroidery motif vertically.
Deleting an embroidery motif
The active embroidery motif is deleted.
> Select an embroidery motif.
> Tap «i-Dialog».
> Tap «Delete».
Changing the sequence within an embroidery motif combination
The sequence of the embroidery motifs in the embroidery motif combination can be changed.
Prerequisite:
• The embroidery motif combination has been created or the motif has been ungrouped.
> Tap «i-Dialog».
> Tap «Change Embroidery Motif Sequence».
> Select the required embroidery motif and move it to the corresponding position.
Grouping embroidery motifs
Embroidery motifs can be added to or removed from a group. The grouped embroidery motifs can be
processed in the same way as for one embroidery motif.
The sequence of the embroidery motifs in the group can be changed. (see page145)