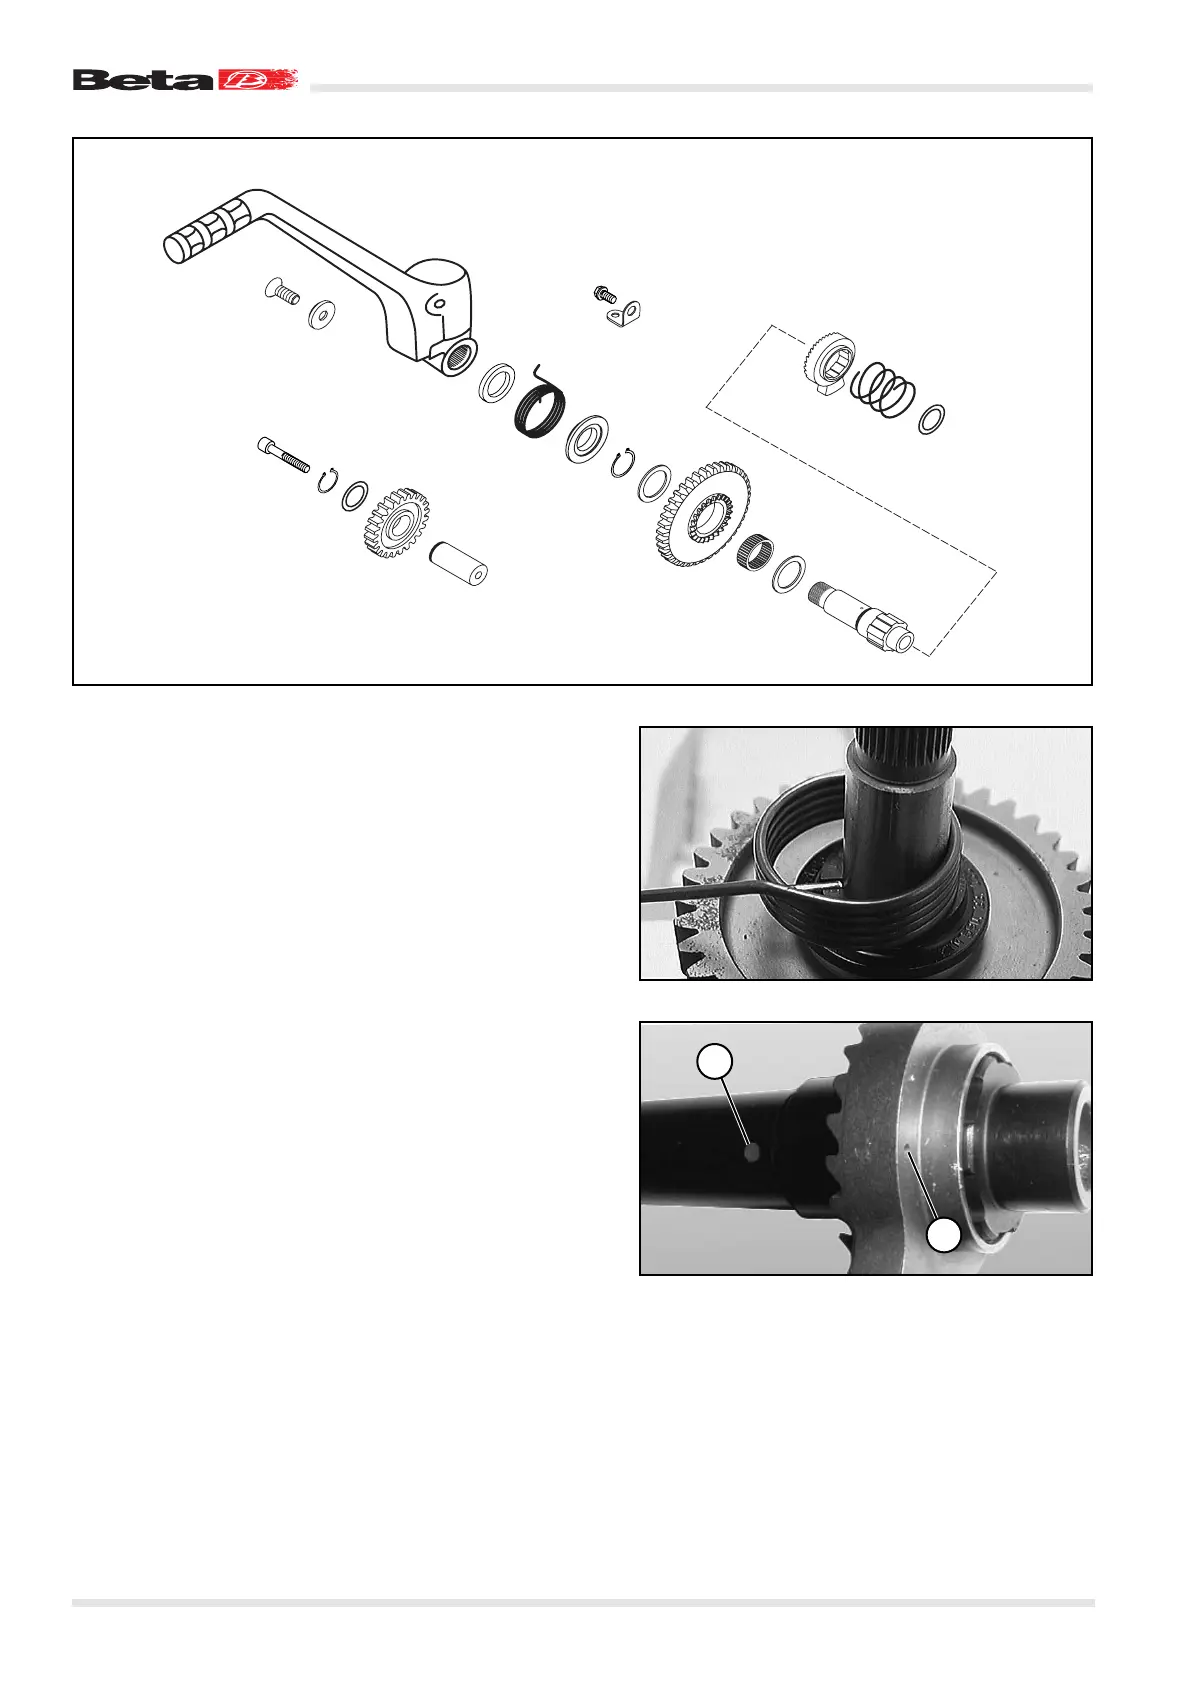
Checking the kickstart for wear
Remove all components from the kickstart shaft and clean them.
Starter gear 1
Check the wear of the teeth and the play of the support.
Starter idler gear 2
Check to see if there is any play or any sign of seizure on the sup-
port. Check the wear of the teeth, which are in constant mesh with
the clutch drum.
Starter coupling 3
Check the inclined surface and the teeth for signs of wear.
Kickstart shaft 4
Check the support points and the teeth for signs of wear or da-
mage and ensure that the starter gear oil hole is clear.
Preassembling the kickstart shaft
– Clamp kickstart shaft 4 in a vice (using protective jaws), with
its toothed end facing upwards.
– Fit thrust washer 5, needle roller cage 6 and starter gear 1
with the stop teeth facing downwards.
– Fit thrust washer 7 and Seeger ring 8 with the sharp edge fa-
cing upwards.
– Fit dragging hub 9 taking care to align its groove with the ho-
le in the kickstart shaft.
– Fit kickstart spring 10, inserting its inside end into the hub
groove and the kickstart shaft hole.
– Remove the kickstart shaft from the vice.
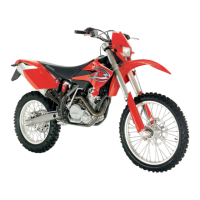
– Fit starter coupling 3 on the kickstart shaft taking care to align
mark A on the starter coupling with oil hole B in the kickstart
shaft.
– Fit the kickstart shaft with starter coupling spring 11 and thru-
st washer 12.
B
A