CFX96 and CFX384 Systems Manual
123
TIP: Click the Restore Default button to restore all settings to the default settings
shown in this image. Then click OK to save the settings, and close the window.
Email Tab
Select the Email tab (Figure 111) to enter the email addresses where you want to receive
confirmation of the completion of the run. The software can send an attached data file or
report file with the email when the check boxes next to these options are checked.
Configure Email Notification
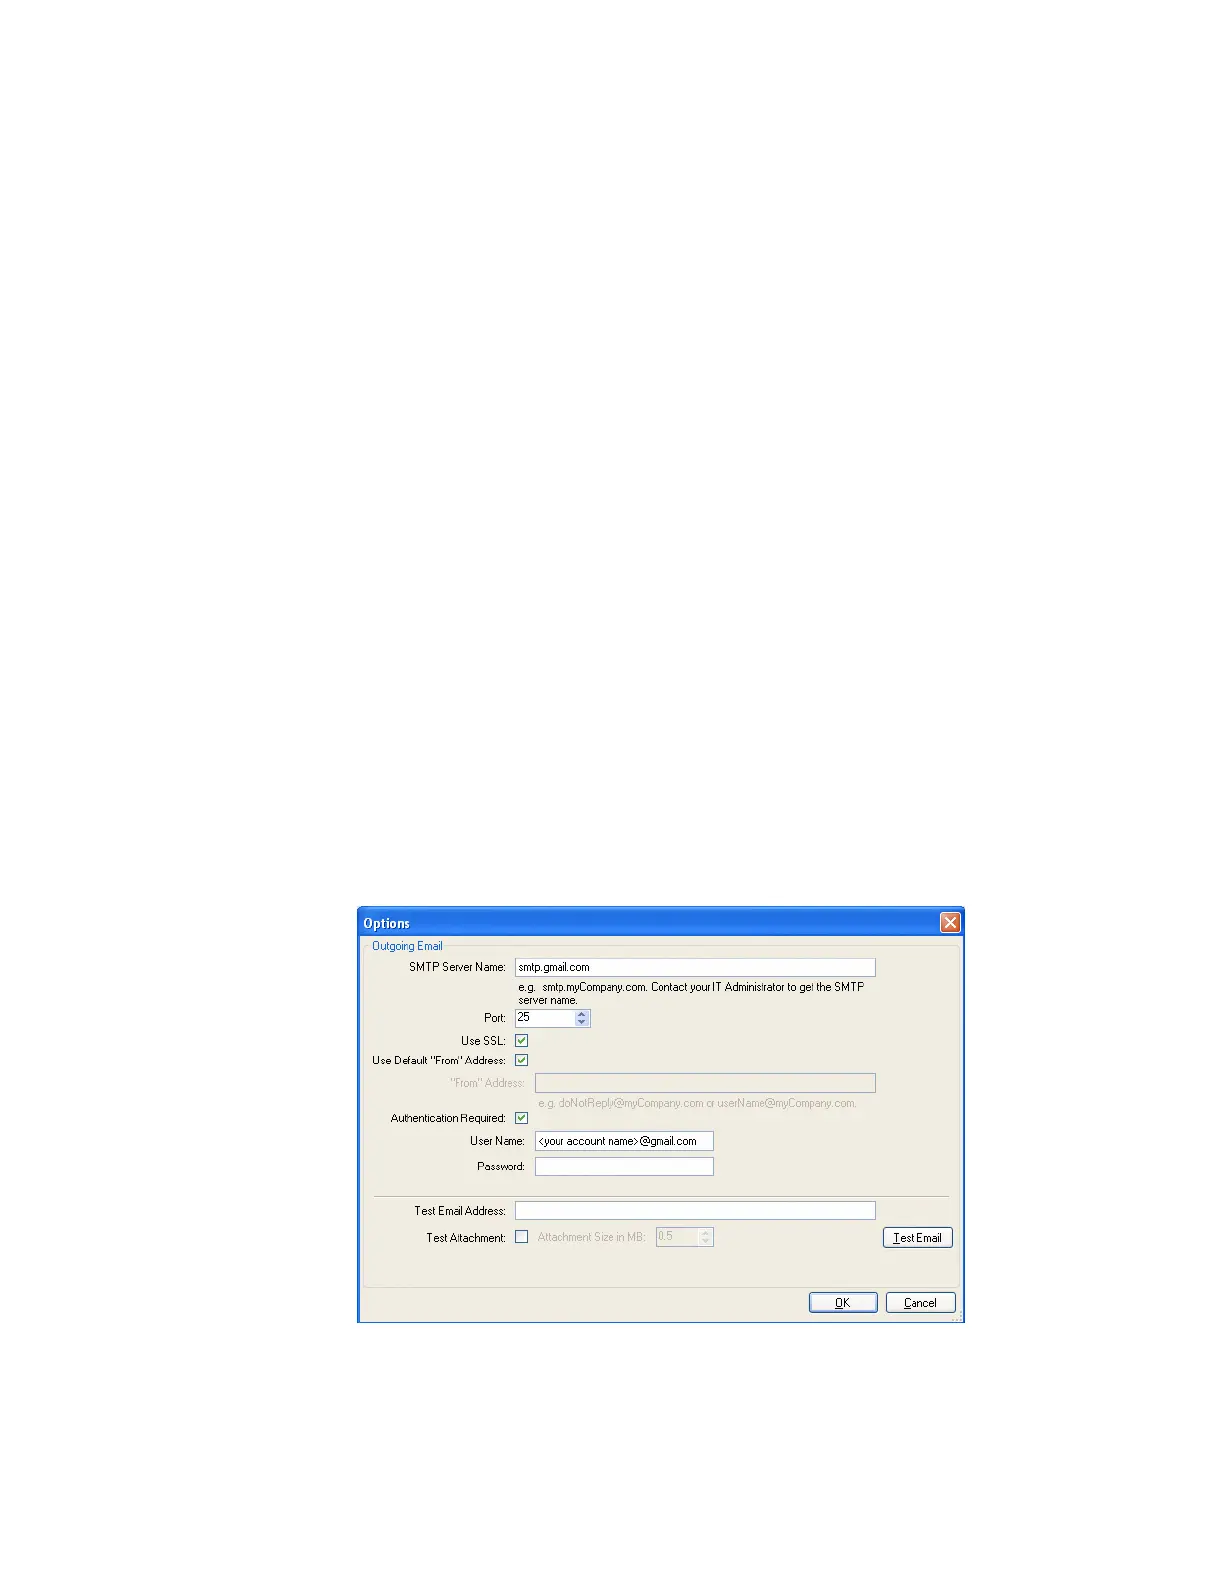
Click the Configure Outgoing Email button to open the Options window (Figure 112) to
configure the SMTP server and send a test email from the computer. Input the following:
• SMTP Server Name. The name of the SMTP server as provided by your ISP
•Port. The port number of your SMTP server, as provided by your ISP; this is usually 25
• Use SSL. Whether to use Secure Sockets Layer. Some SMTP servers require this to be
used, others require that it not be used
• Use Default “From” Address. This can usually be left in the default checked state.
However, some SMTP servers require all sent email to have a “from” address that is from
a certain domain, i.e.<name>@YourCompany.com. If that is the case, this checkbox
must be unchecked, and a valid “from” email address must be supplied in the box
labeled “From” Address:
• Authentication Required. Many SMTP servers require authentication. If so, this
checkbox must be checked, and a User Name and Password must be supplied.
• Test email. To test the email settings, enter one or more email addresses in Test Email
Address text box. Multiple email addresses can be separated by a comma. Then click
the Test Email button
Figure 112. Options to configure email.
NOTE: Some SMTP servers do not allow attachments, and others allow
attachments only up to certain sizes. If you will use CFX Manager software to email
 Loading...