Resources
132
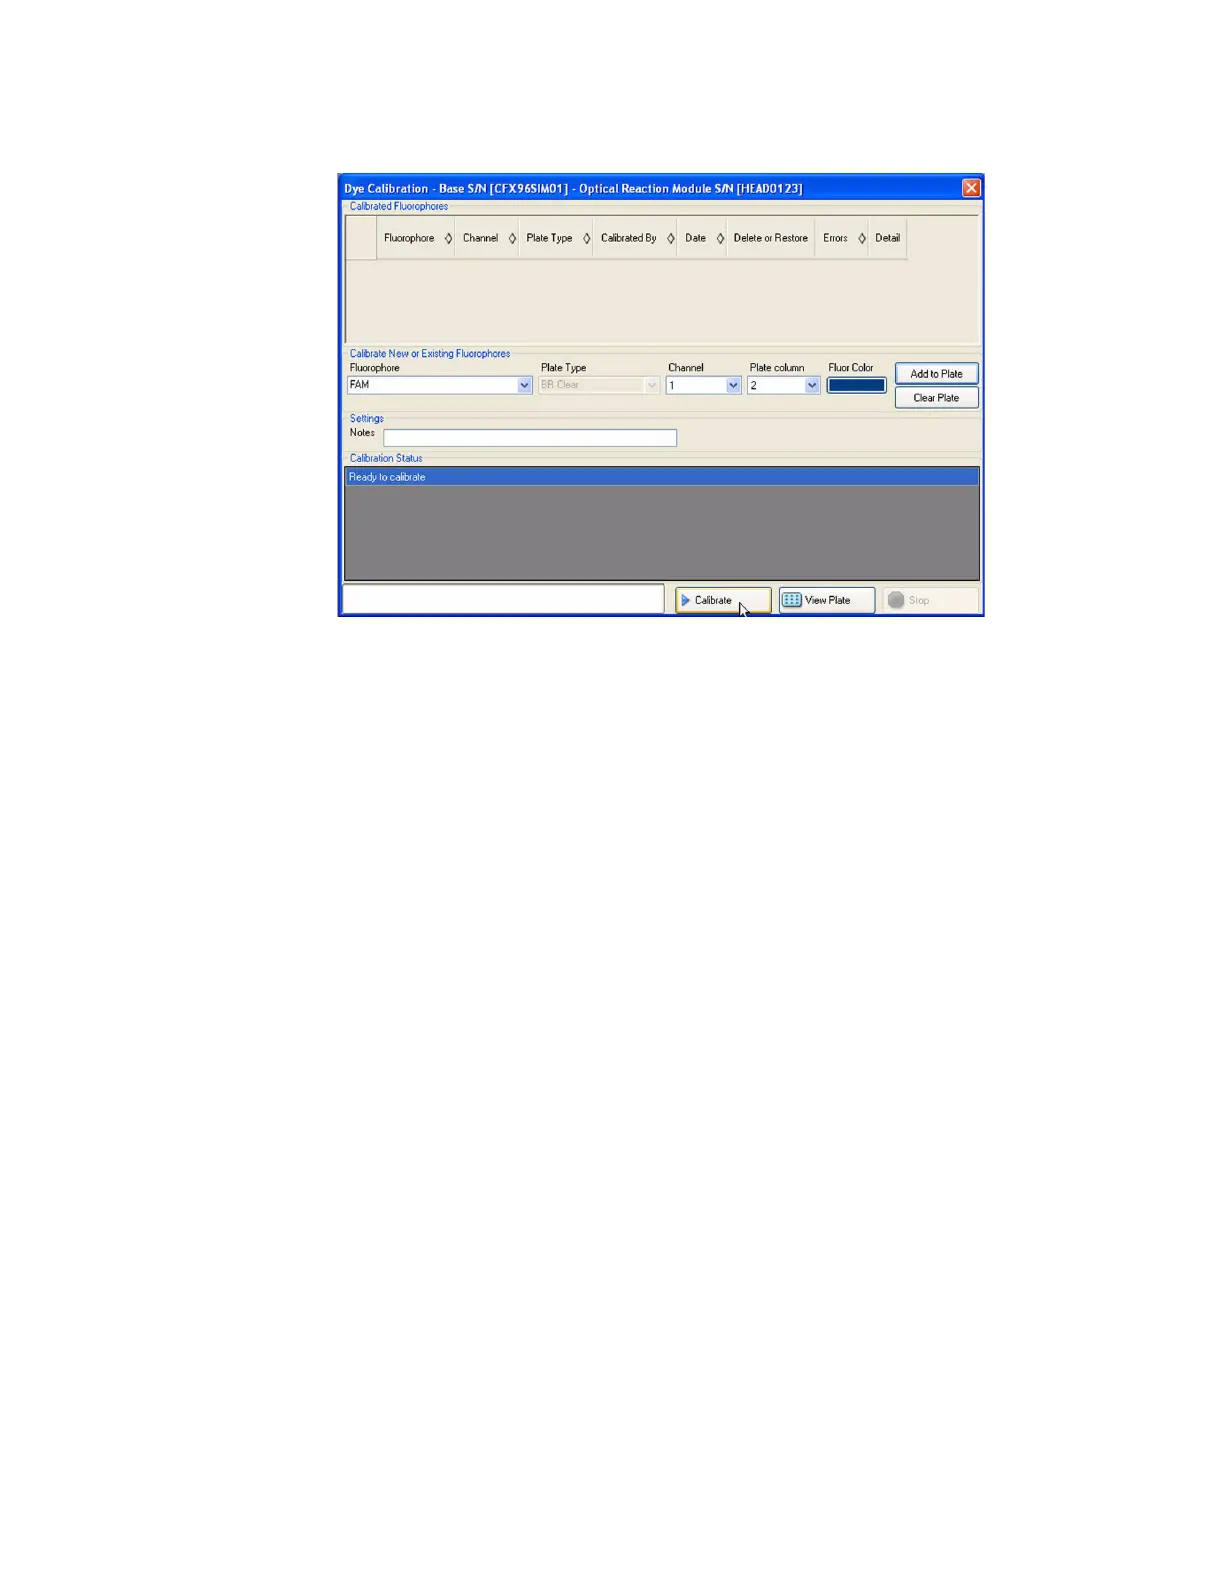
Figure 120 shows an example of the Dye Calibration window.
Figure 120. Dye Calibration window.
Calibrating the CFX96 or CFX384 System
To calibrate the CFX96 system or CFX384 system in the Dye Calibration window:
1. In the Calibrate New or Existing Fluorophores pane, select the fluorophore you want to
calibrate from the pull-down list. If the fluorophore name is not included in the list, type
the name in the box to add it to the list.
2. Select the Plate Type. If the plate type is not included in the list, type the name in the box
to add it to the list.
3. Select a Channel for the fluorophore.
4. Click the Add to List button to add the fluorophore. To clear the plate, click Clear List to
remove all the fluorophores.
5. (Optional) Repeat steps 1-6 to add each fluorophore you plan to calibrate for the plate.
6. When you finish adding fluorophores, click View Plate to open the Dye Plate Display.
Use this window as a guide for loading dyes into the plate.
7. Begin preparing a 96- or 384-well plate for dye calibration by pipetting dye solution into
each well, following the pattern shown in the Pure Dye Plate Display. For each
fluorophore, fill 4 wells with 50 μl (96-well plate) or 30 μl (384-well plate) of 300 nM dye
solution. Notice that at least half the plate contains blank wells.
8. Seal the plate using the sealing method you will use in your experiment.
9. Place the calibration plate in the block and close the lid. Then click Calibrate, and click
OK to confirm that the plate is in the block.
10.When the CFX Manager software completes the calibration run, a dialog box appears.
Click Yes to finish calibration and open the Dye Calibration Viewer.
11.Click OK to close the window.