Disassembly / Assembly SpaceStation
3
SpaceStation, 2.0 gb 3- 7
2.0
3.6 Power Supply
Designation Ord. No.
Power supply SPS . . . . . . . . . . . . . . . . . . . . . . . . . . . . . . 3452 1097
Connector holder, mains, SPS . . . . . . . . . . . . . . . . . . . . 3452 1143
Cover cap, screws, washer,
serrated lock washers and nuts
(see „Service Parts and Screw Kit“ ➨ S. 3 - 2)
Mains seal, bottom
(see „Service Parts and Screw Kit“ ➨ S. 3 - 2)
Disassembly
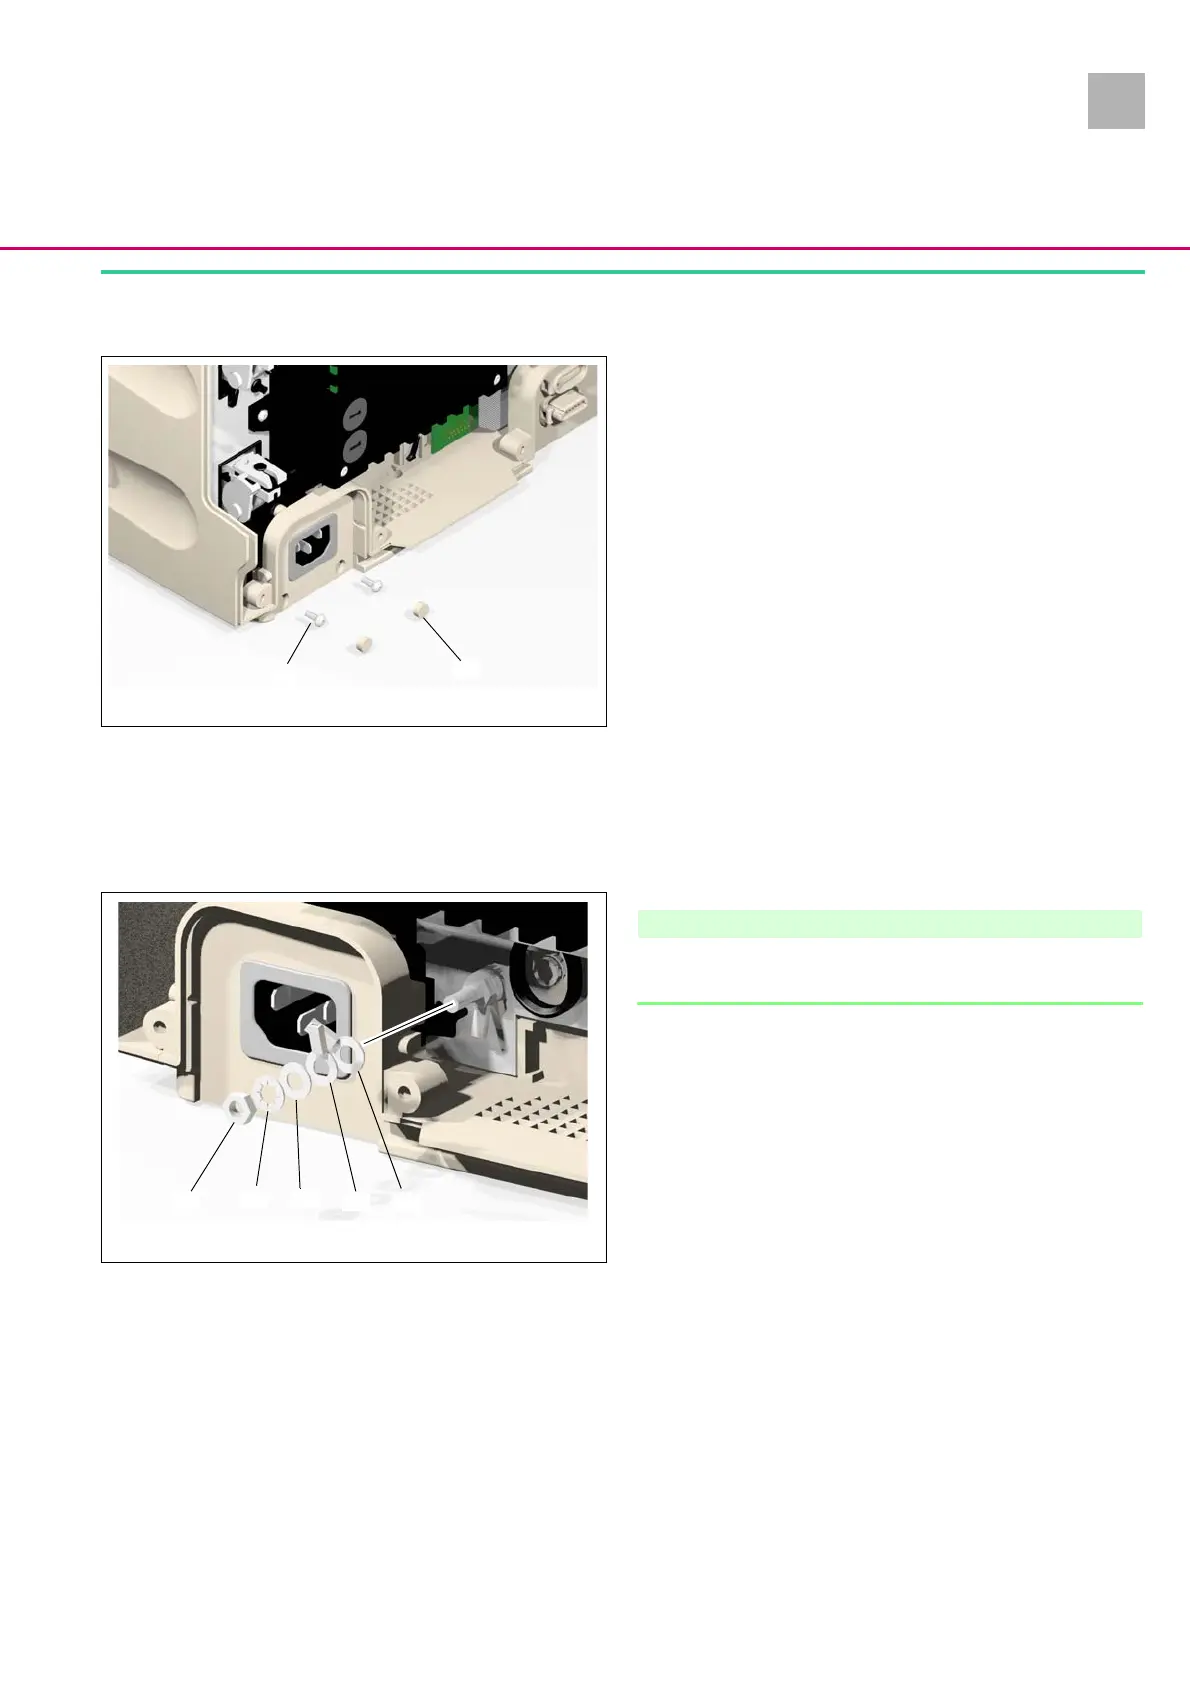
1. Pierce two cover caps (Abb.: 3 - 5 / Item 1) with a screwdriver
and pull caps out.
2. Unscrew two screws (Abb.: 3 - 5 / Item 2) and remove them
from the mains connector holder.
Note
Note the position of the protective conductor cable on the
grounding bolt.
3. Loosen the nut (Abb.: 3 - 6 / Item 5) and remove nut together
with the serrated lock washer (Abb.: 3 - 6 / Item 4), washer
(Abb.: 3 - 6 / Item 3), the protective conductor cable to the
power supply (Abb.: 3 - 6 / Item 1) and the protective con-
ductor cable to connector “F1B“ (Abb.: 3 - 6 / Item 2) from
the grounding bolt.
Abb.: 3 - 5
Legende zu Abb. 3 - 5:
ItemDesignation
1Cover cap
2 Screw EJOT 30x9 WN 5452 TORX 10IP A2
1
2
Abb.: 3 - 6
Legende zu Abb. 3 - 6:
ItemDesignation
1 Cable lug for connection to the power supply
2 Cable lug for connection to connector “F1B“
3Washer M4
4 Serrated lock washer M4
5 Nut M4
5 4 3
2 1