Disassembly / Assembly SpaceCom
4
SpaceStation, 2.0 gb 4- 11
2.0
4.8 SPCO PCB
Designation Ord. No.
SPCO PCB . . . . . . . . . . . . . . . . . . . . . . . . . . . . . . . . . . . . 3452 1053
SPCO connecting cable . . . . . . . . . . . . . . . . . . . . . . . . . 3452 1042
SPCO insulating piece . . . . . . . . . . . . . . . . . . . . . . . . . . 3452 1044
SPCO fastening sleeve . . . . . . . . . . . . . . . . . . . . . . . . . 3452 1047
Screws
(see „Service Parts and Screw Kit“ ➨ S. 4 - 2)
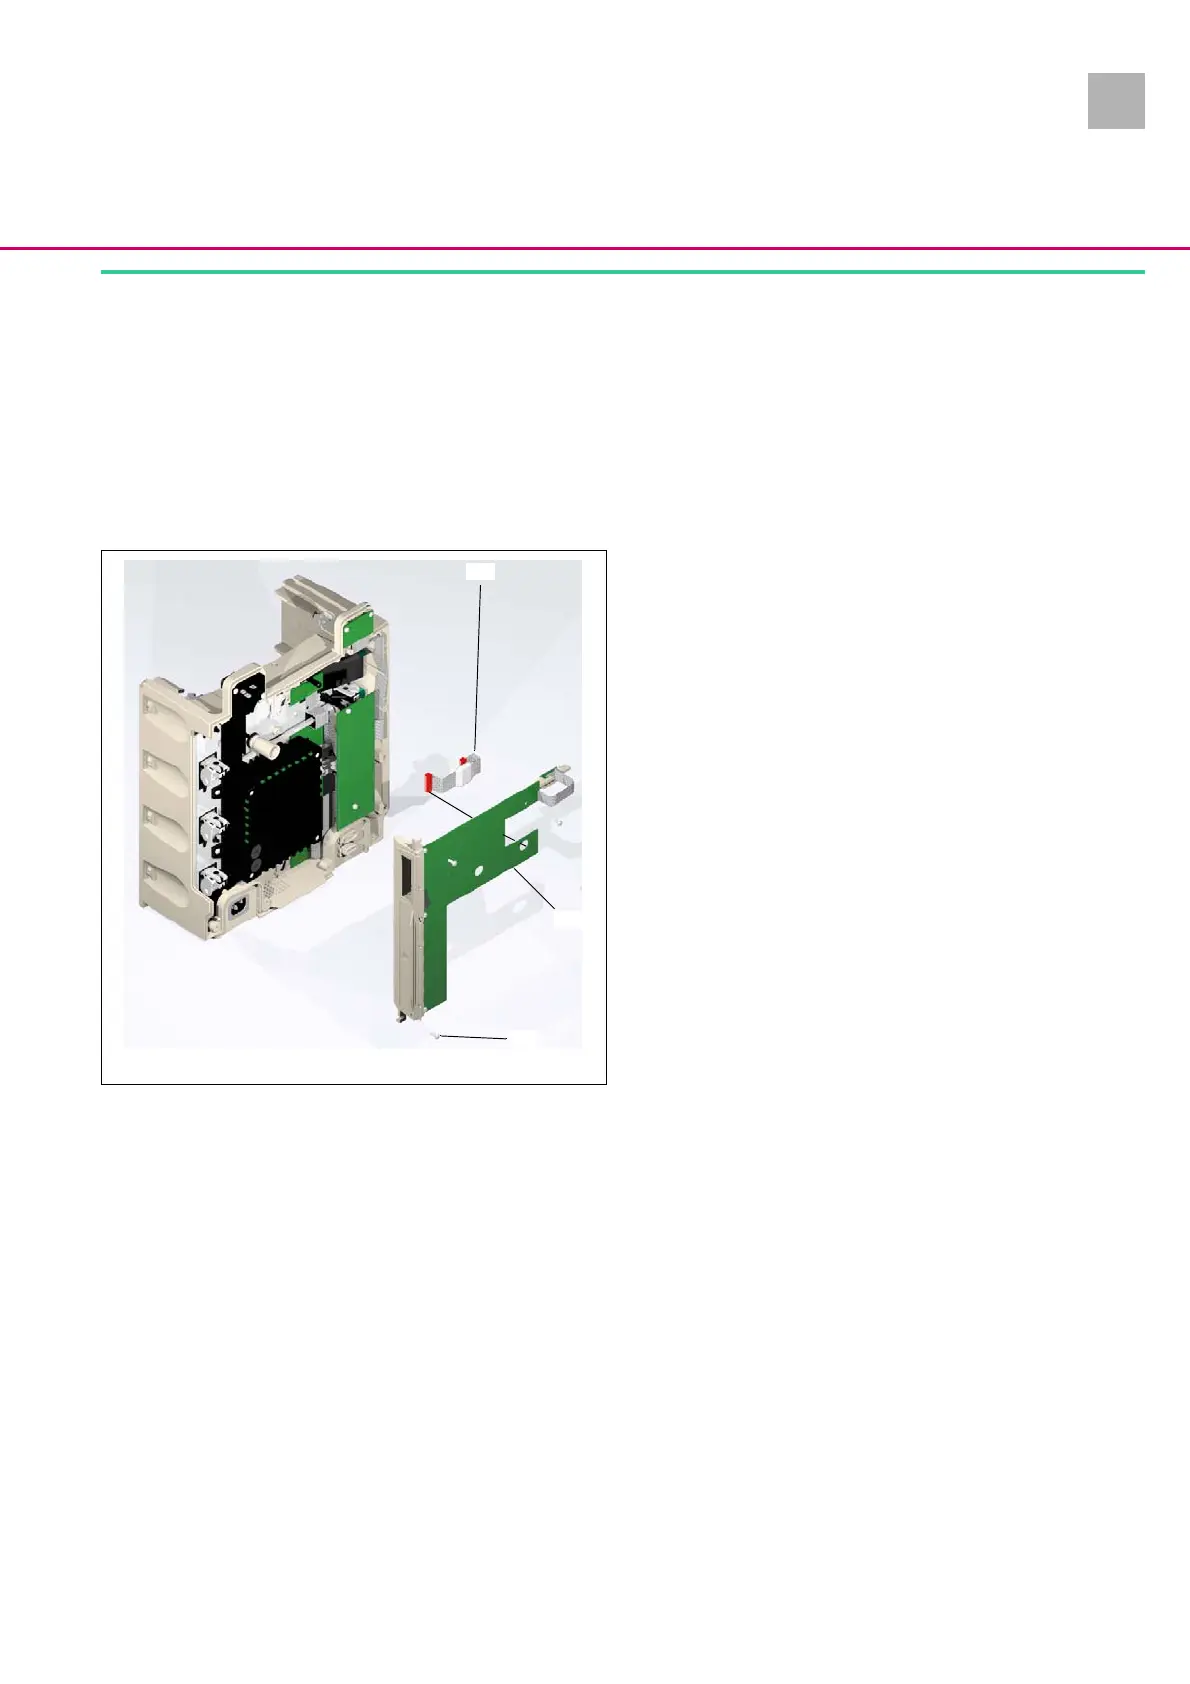
Disassembly
1. Unscrew two screws (Abb.: 4 - 10 / Item 3).
2. Remove SPCO PCB (Abb.: 4 - 10 / Item 2) carefully out of the
housing and fold aside; pay attention to the length of the
SPCO connecting cable (Abb.: 4 - 10 / Item 1).
3. Pull off the SPCO connecting cable on the SPCO PCB and re-
move the board out of the housing.
4. Loosen two screws of the interface board and lift the inter-
face board carefully until the SPCO connecting cable can be
pulled off.
5. Pull off the SPCO connecting cable at the interface board.
Abb.: 4 - 10
Legende zu Abb. 4 - 10:
ItemDesignation
1 SPCO connecting cable
2 SPCO PCB
3 Screw EJOT 30x9 WN 5452 TORX 10IP A2
1
2
3