19
8. UV Photocuring with 365 nm light – On/Off toggle switches for using 365 nm
photocrosslinking during or after printing. (Optional Fixed LED module available for extra
purchase.)
9. UV Photocuring with 405 nm light. On/Off toggle switches for using 405 nm
photocrosslinking during or after printing. (Optional Fixed LED module available for extra
purchase.)
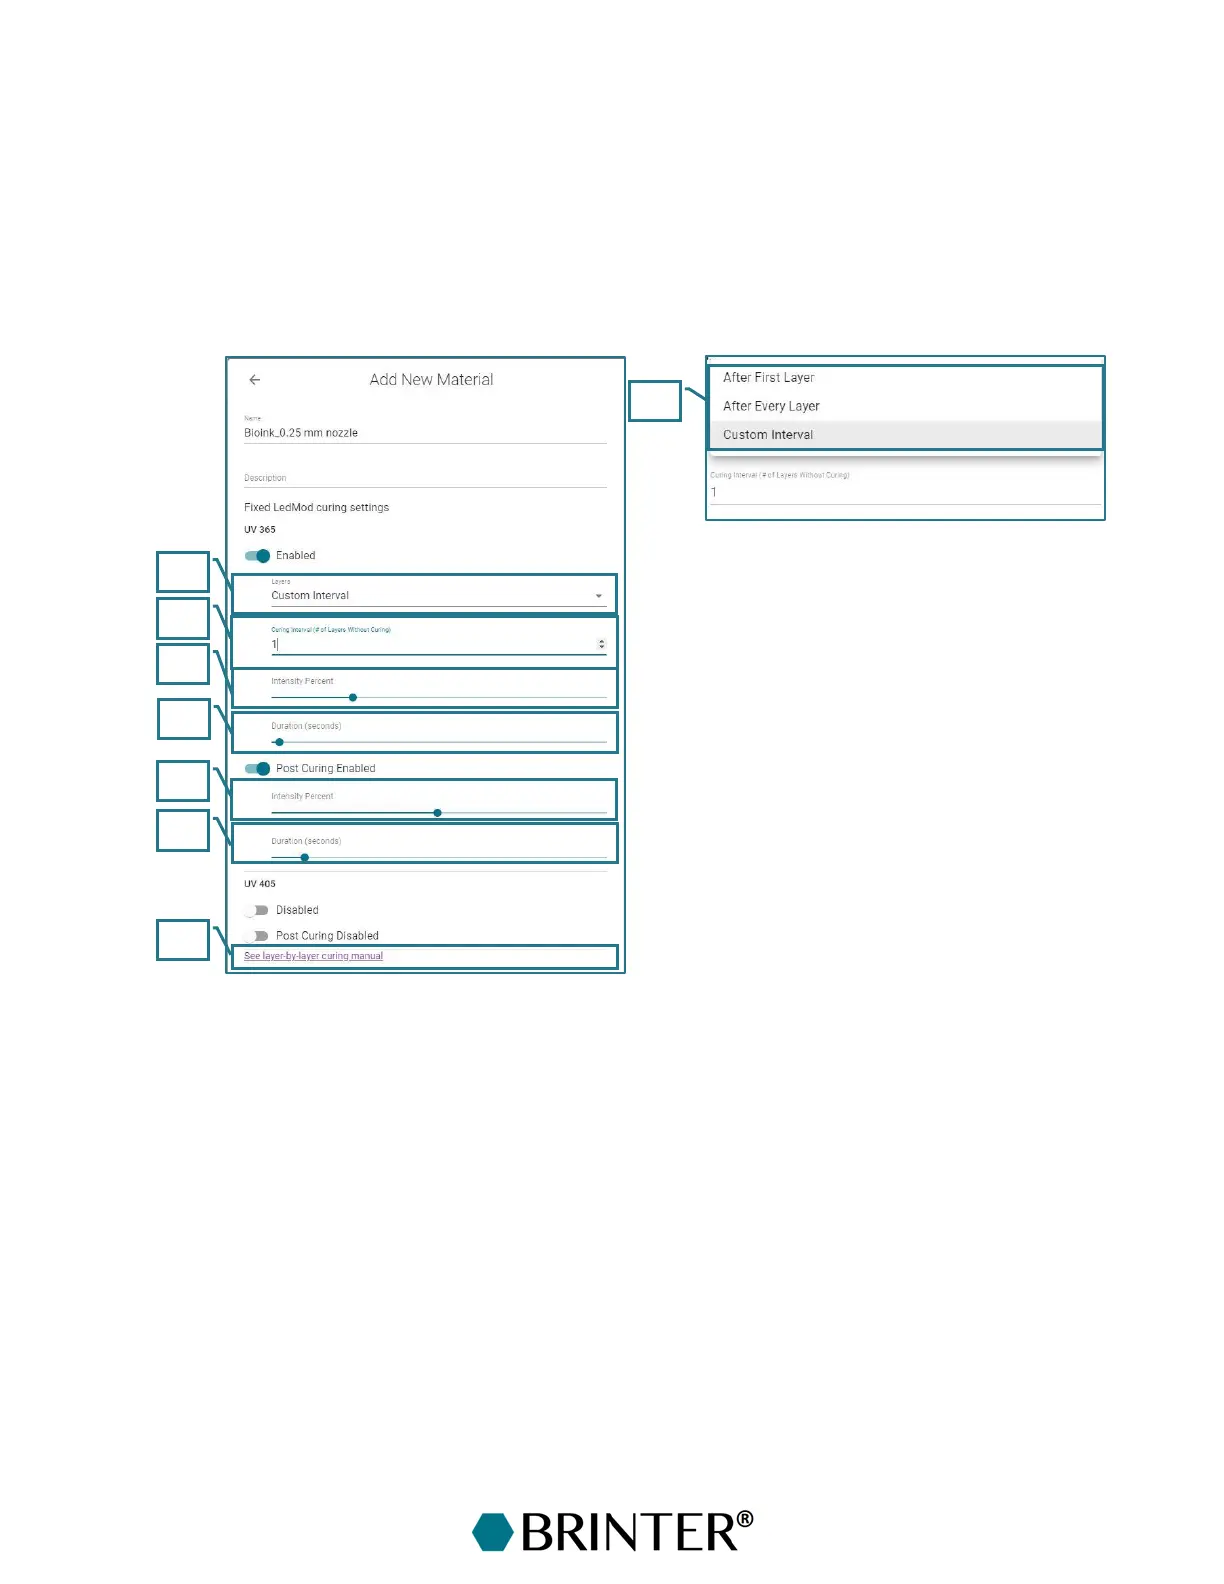
A new menu for the photocuring parameters with the Fixed Led module will be prompted after
switching the toggle switch from DISABLED into the ENABLED position.
10. Layers – Menu for the photocuring options.
11. Photocuring options – Perform curing after the first layer, after every layer, or set custom
interval for curing.
12. Curing interval – Number of layers printed without curing. Available only if the Custom interval
setting is chosen.
13. Intensity percent – Adjust the intensity of the UV light (0–100%) for layer-by-layer photocuring
during printing.
14. Duration – Adjust the duration of the layer-by-layer photocuring in seconds during printing.
15. Intensity percent – Adjust the intensity of the UV light (0–100%) for post-curing.
16. Duration – Adjust the duration of the post-curing in seconds.
17. Curing manual – Click the link to open a separate document about the measured intensity
values (mW/cm
2
)
for layer-by-layer curing with 365 nm and 405 nm LEDs.