Method of Acquiring DNS
Server Address
Select a method of obtaining the DNS server’s IP address.
Primary DNS Server Enter the primary DNS server’s IP address.
Secondary DNS Server Enter the secondary DNS server’s IP address.
IPv6 Check “Enable” to enable IPv6.
Obtain IPv6 address
automatically
Check “Enable” if the switch need to obtain router advertisement from IPv6-
compatible router.
DHCPv6 Client
Check “Enable” if using DHCPv6 client. When “Rapid Commit” is checked, the
communication speed with DHCPv6 server will be increased if the DHCPv6 server
is also compatible with rapid commit.
Link Local Address
Displays the switch’s link local address. This is generated automatically when IPv6
is enabled.
Static Global Address
Enter the global address and prefix length to configure an IPv6 address manually.
The prefix length may contain 1-128. When “EUI-64” is checked, the bottom 64-bit
of the IPv6 address will be generated automatically based on the switch’s MAC
address, in accordance with Modified EUI-64 (RFC4291).
Static Default Gateway
Enter the default gateway to configure an IPv6 default gateway manually. The
default gateway prefix should be the same as the static global address.
Dynamic Global Address
Displays the dynamic global address obtained from DHCPv6 or router
advertisement.
The address with the trailing “SF” means that the address was obtained from
DHCPv6. The address with the trailing “SL” means that the address was obtained
from router advertisement.
Dynamic Default Gateway Displays the default gateway obtained from router advertisement.
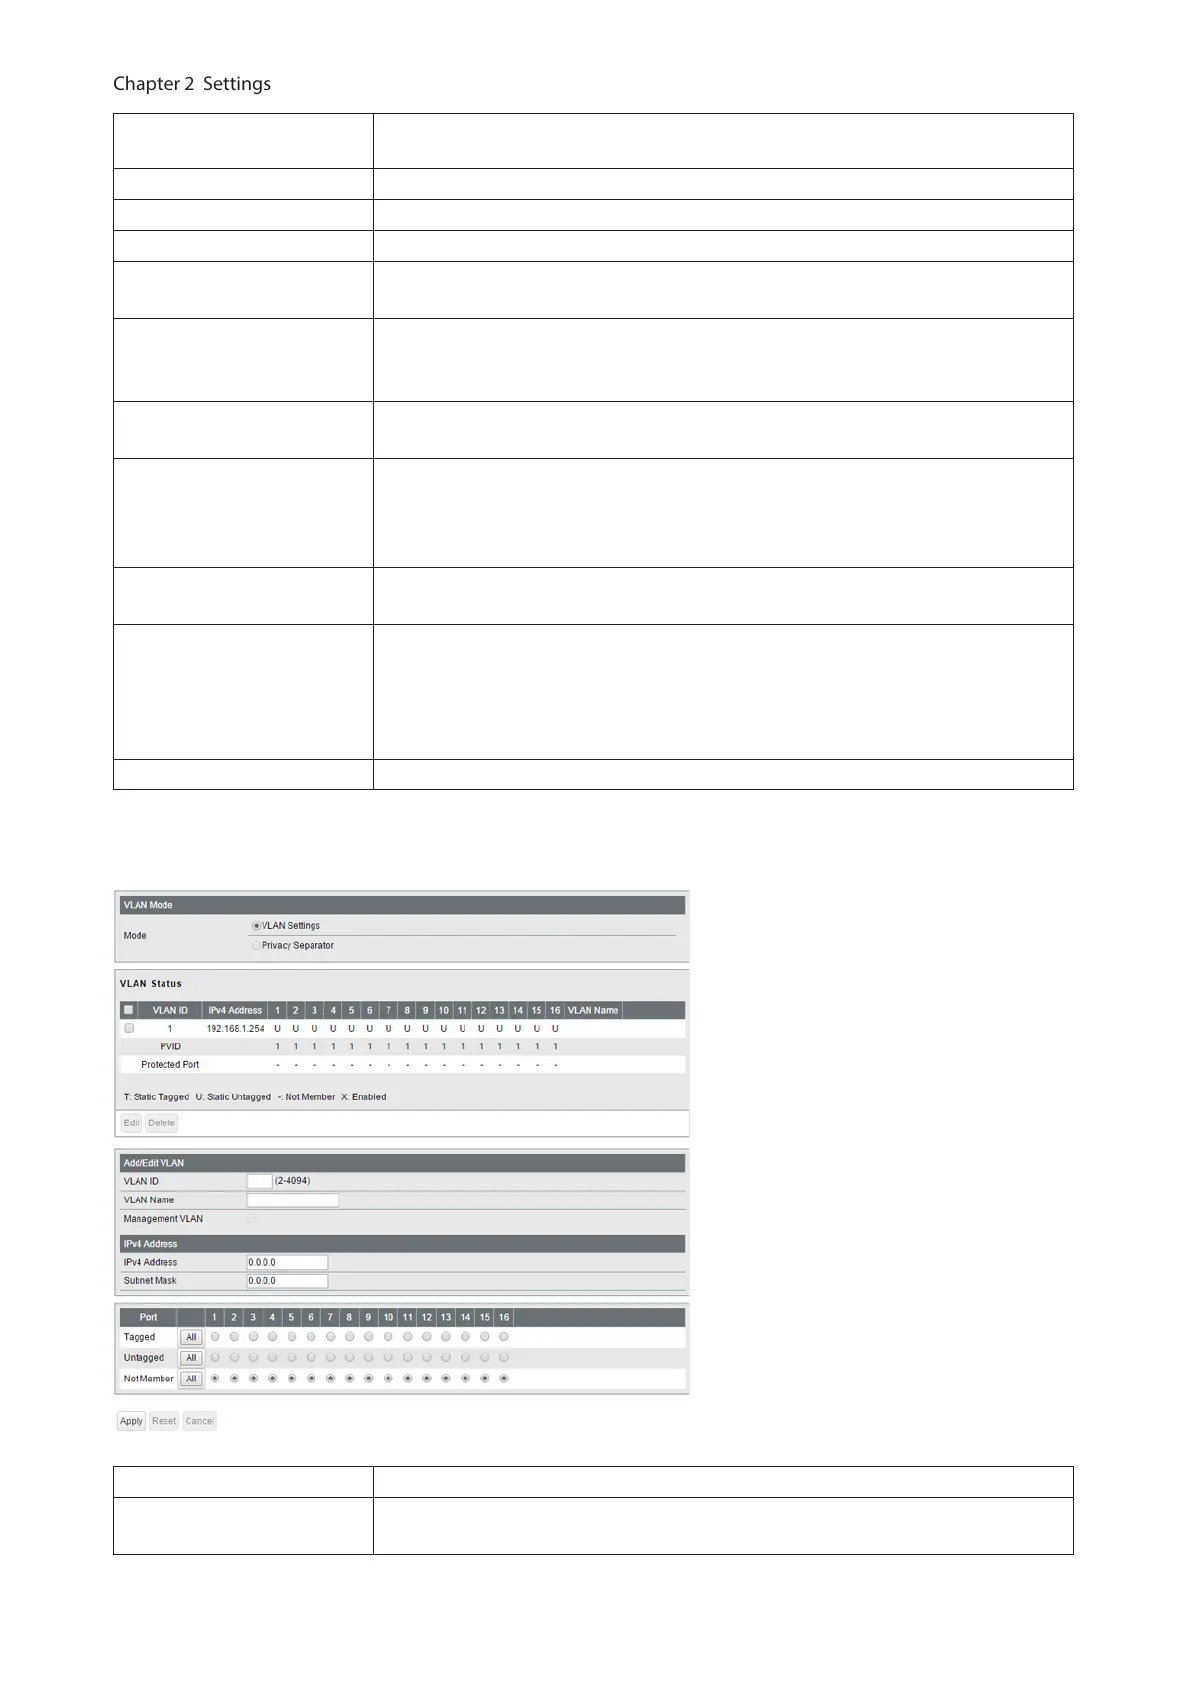
In L3 mode
Mode Privacy separator cannot be used when the switch is in L3 mode.
VLAN Status
Displays current VLAN and PVID (Port VLAN ID) status. Click [Edit] to edit the VLAN
selected. Click [Delete] to delete the VLAN selected. VLAN 1 cannot be deleted.
18