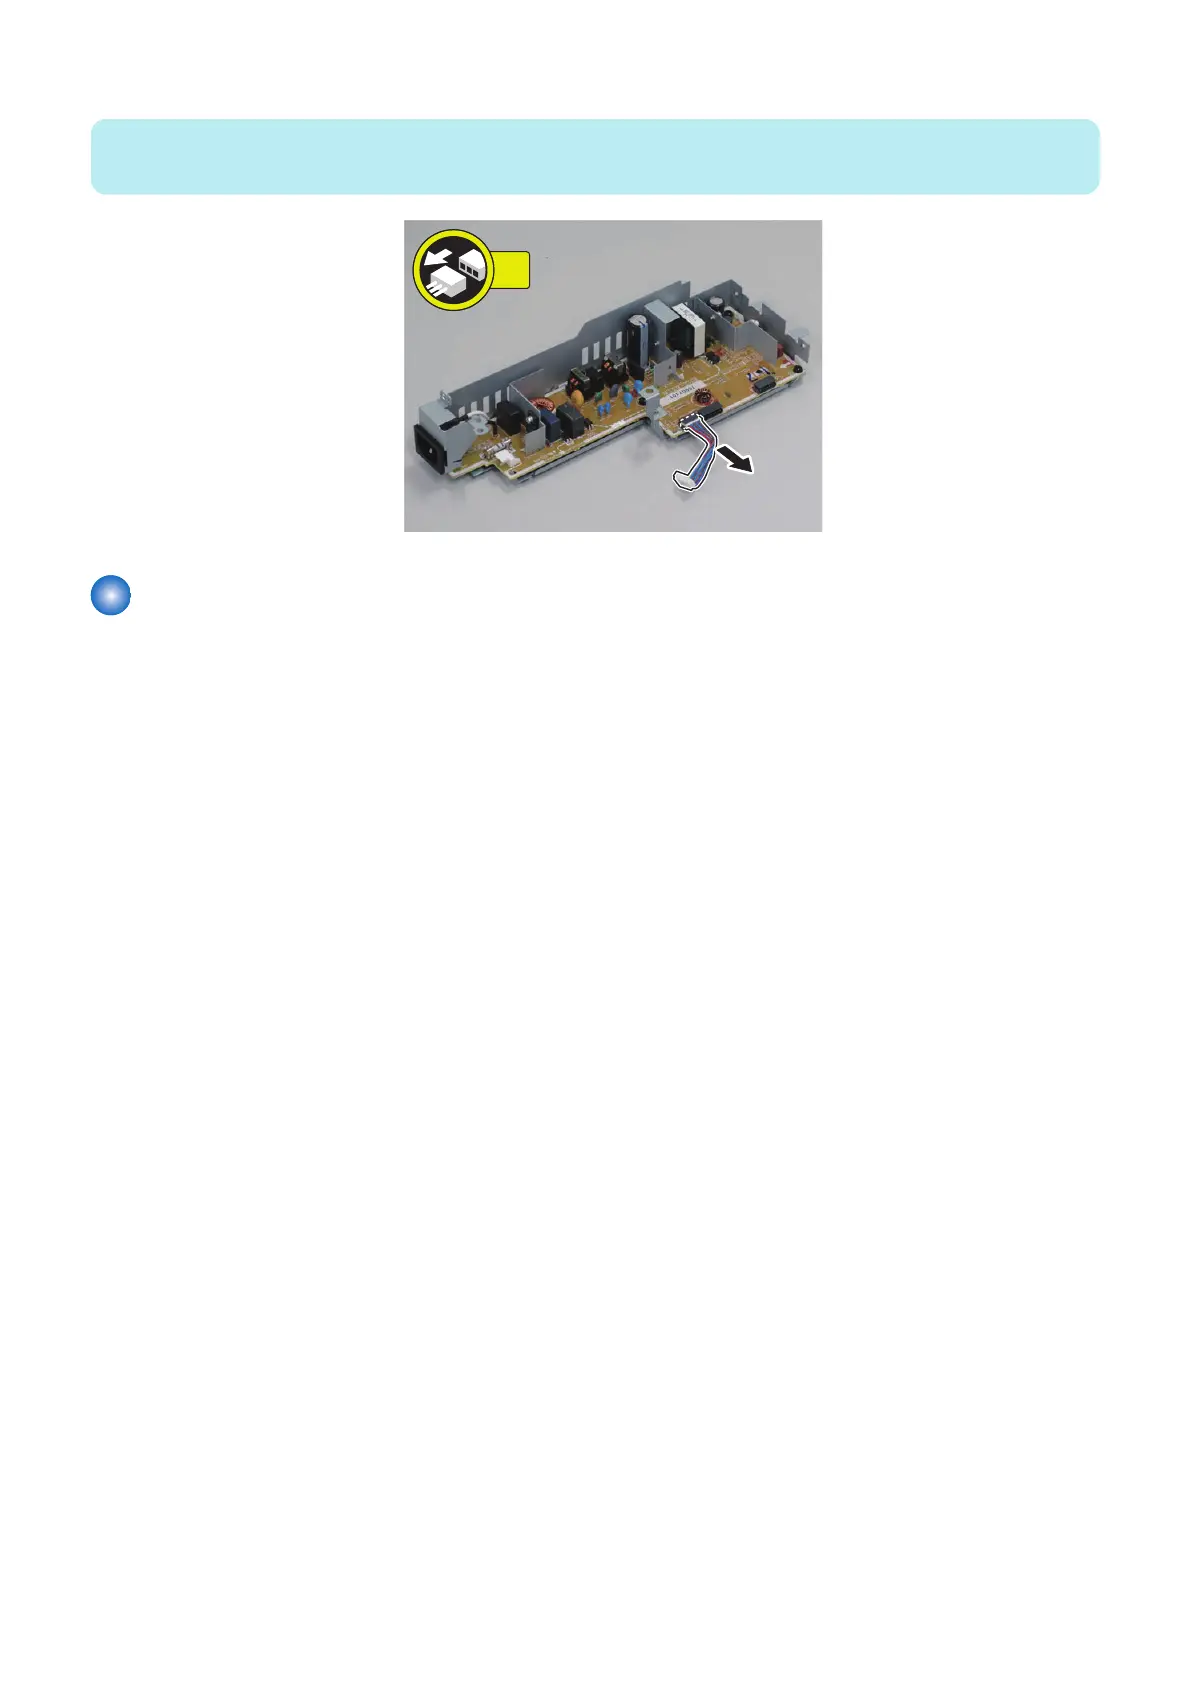
9.
NOTE:
When replacing the Low Voltage Power Supply Unit, be sure to disconnect the harness.
Removing the Engine Controller PCB
■ Preparation
1. “Removing the Cartridge” on page 77
2. “Removing the Right Cover” on page 78
3. “ Removing the Left Cover” on page 80
4. Depending on the model, perform one of the following operation.
• “Removing the DADF Unit + Reader Unit” on page 93
• “Removing the SADF Unit + Reader Unit” on page 126
• “Removing the Copyboard Cover + Reader Unit” on page 157
5. “ Removing the Toner Cover” on page 86
6. “ Removing the Upper Cover” on page 91
7. “Removing the Duplex Door” on page 90
8. “ Removing the Duplex Frame Unit” on page 212
9. “ Removing the Speaker (Fax Model)” on page 188
10. “Removing the Front Cover” on page 83
11. “ Removing the NCU PCB (Fax Model)” on page 190
12. “ Removing the Low-Voltage Power Supply Unit” on page 176
4. Parts Replacement and Cleaning
181