Chapter 4
4-21
4.3.7 Cutter
0024-9191
iPF6300 / iPF6350 / iPF6300S
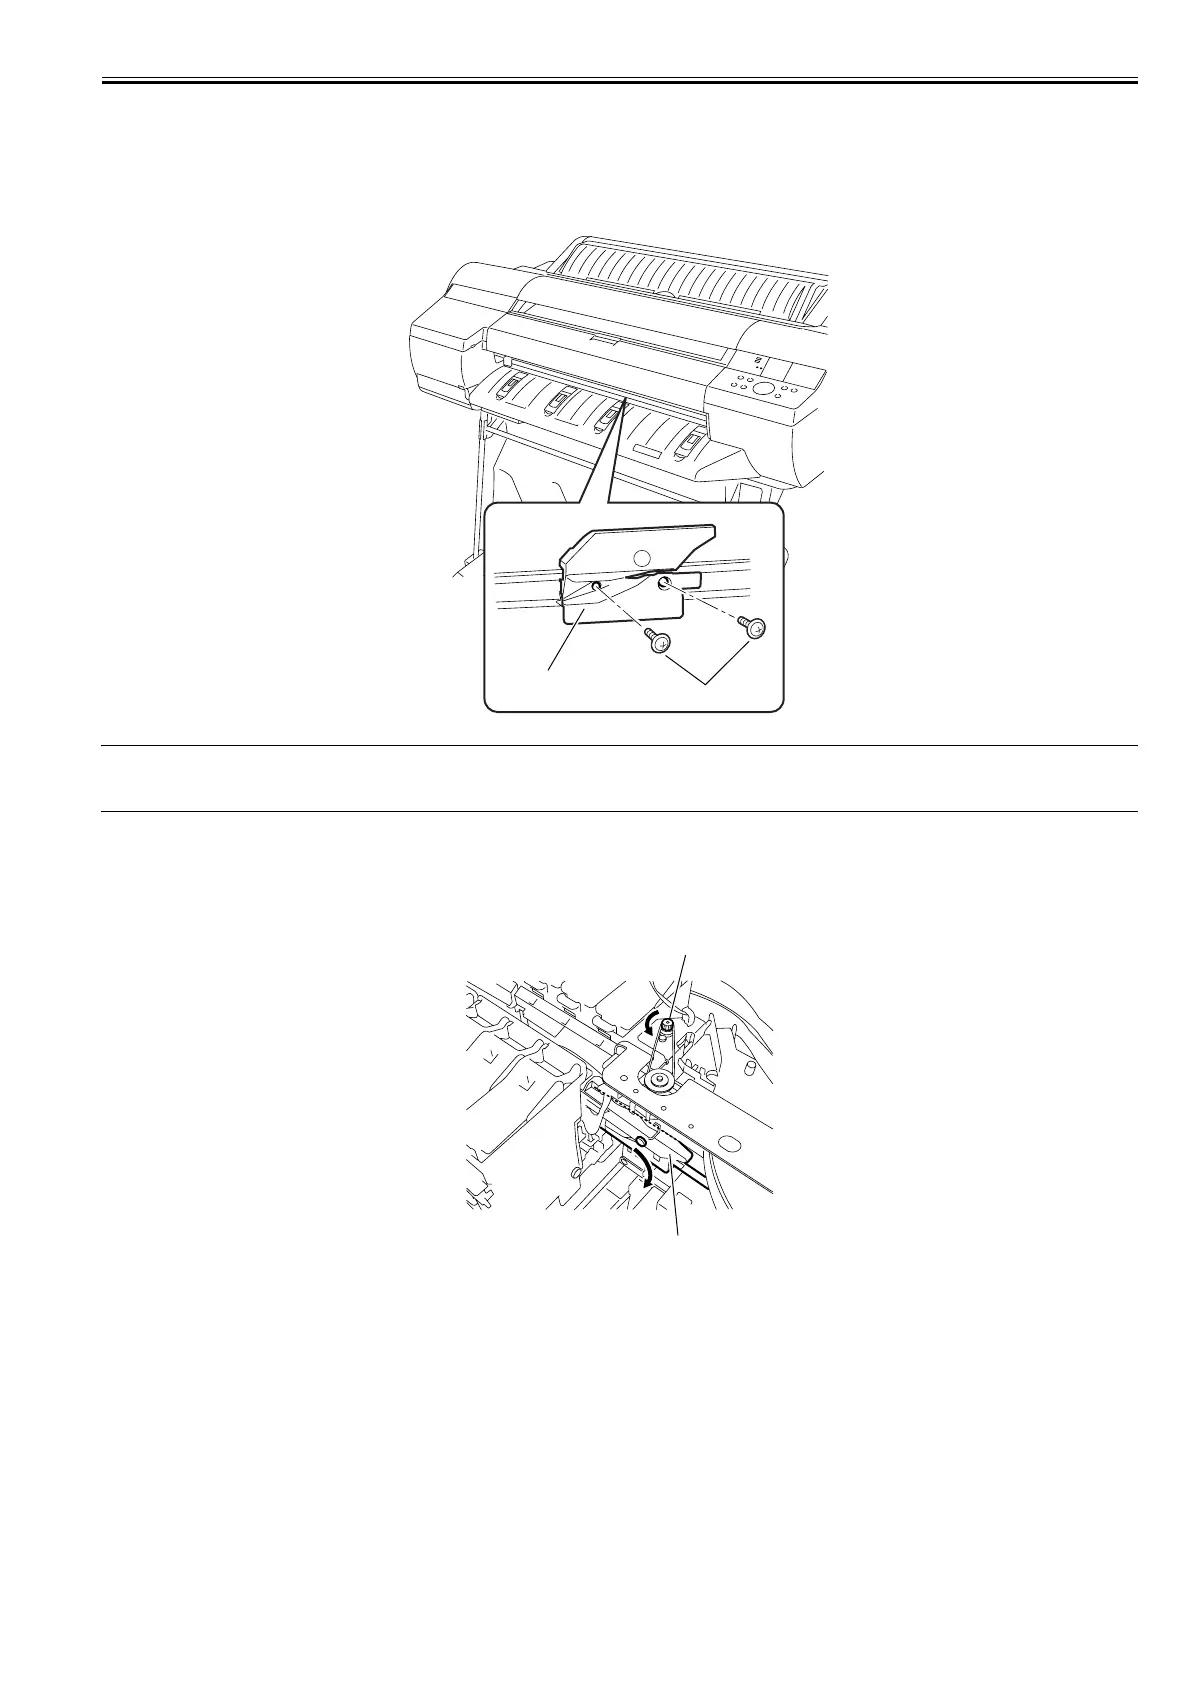
a) Removing the Cutter
1) Perform service mode: [SERVICE MODE] > [REPLACE] > [CUTTER] and then choose [YES] to move the cutter to the replacement place.
2) Remove two screws [1] to remove the cutter [2].
F-4-41
MEMO:
After replacing the cutter, choose [CLR COUNTER CT-1] > [YES] that displayed on the LCD to initialize the parts counter information. Then, the cutter moves
to home position automatically.
b) Removing the cutter unit
1) When removing the cutter unit, open the top cover, and then remove the roll feed unit, output guide, left and right circle covers, tank cover, left front cover, right
upper cover, operation panel, exhaust filter, lower rear cover, right cover, right front cover, upper front cover, lower front cover. Refer to DISASSEMBLY/REAS-
SEMBLY > Points to note on Disassembly and Reassembly > External Covers.
2) Turn the motor pulley[1] in the direction of the arrow to lower the cutter unit[2].
F-4-42
[2]
[1]
[1]
[2]