23
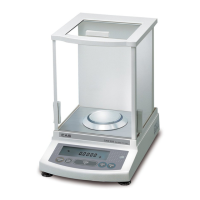
3. This balance has three level screws
(adjustable feet) at the right front, left
front and right rear corners.
Turning a level screw clock-wise
stretches the leg to raise the balance body
there.
Turning anticlockwise withdraws the leg
and lowers the balance body.
The level indicator locates at left rear.
The bubble of it is off center when the
balance is not placed level.
(1) Adjustment is made with the two front
level screws only. Accordingly, first turn
the right rear level screw anti① -
clockwise to withdraw its leg completely.
(2) While adjusting level screws and
observing the bubble, gently press the
left front corner of the balance ② so
that both front level screw feet ③ are
touching the table surface.
(3) Bubble moves to the highest position.
Therefore, adjust level screws ③ so that
the balance main body is lowered in the
direction of the bubble.
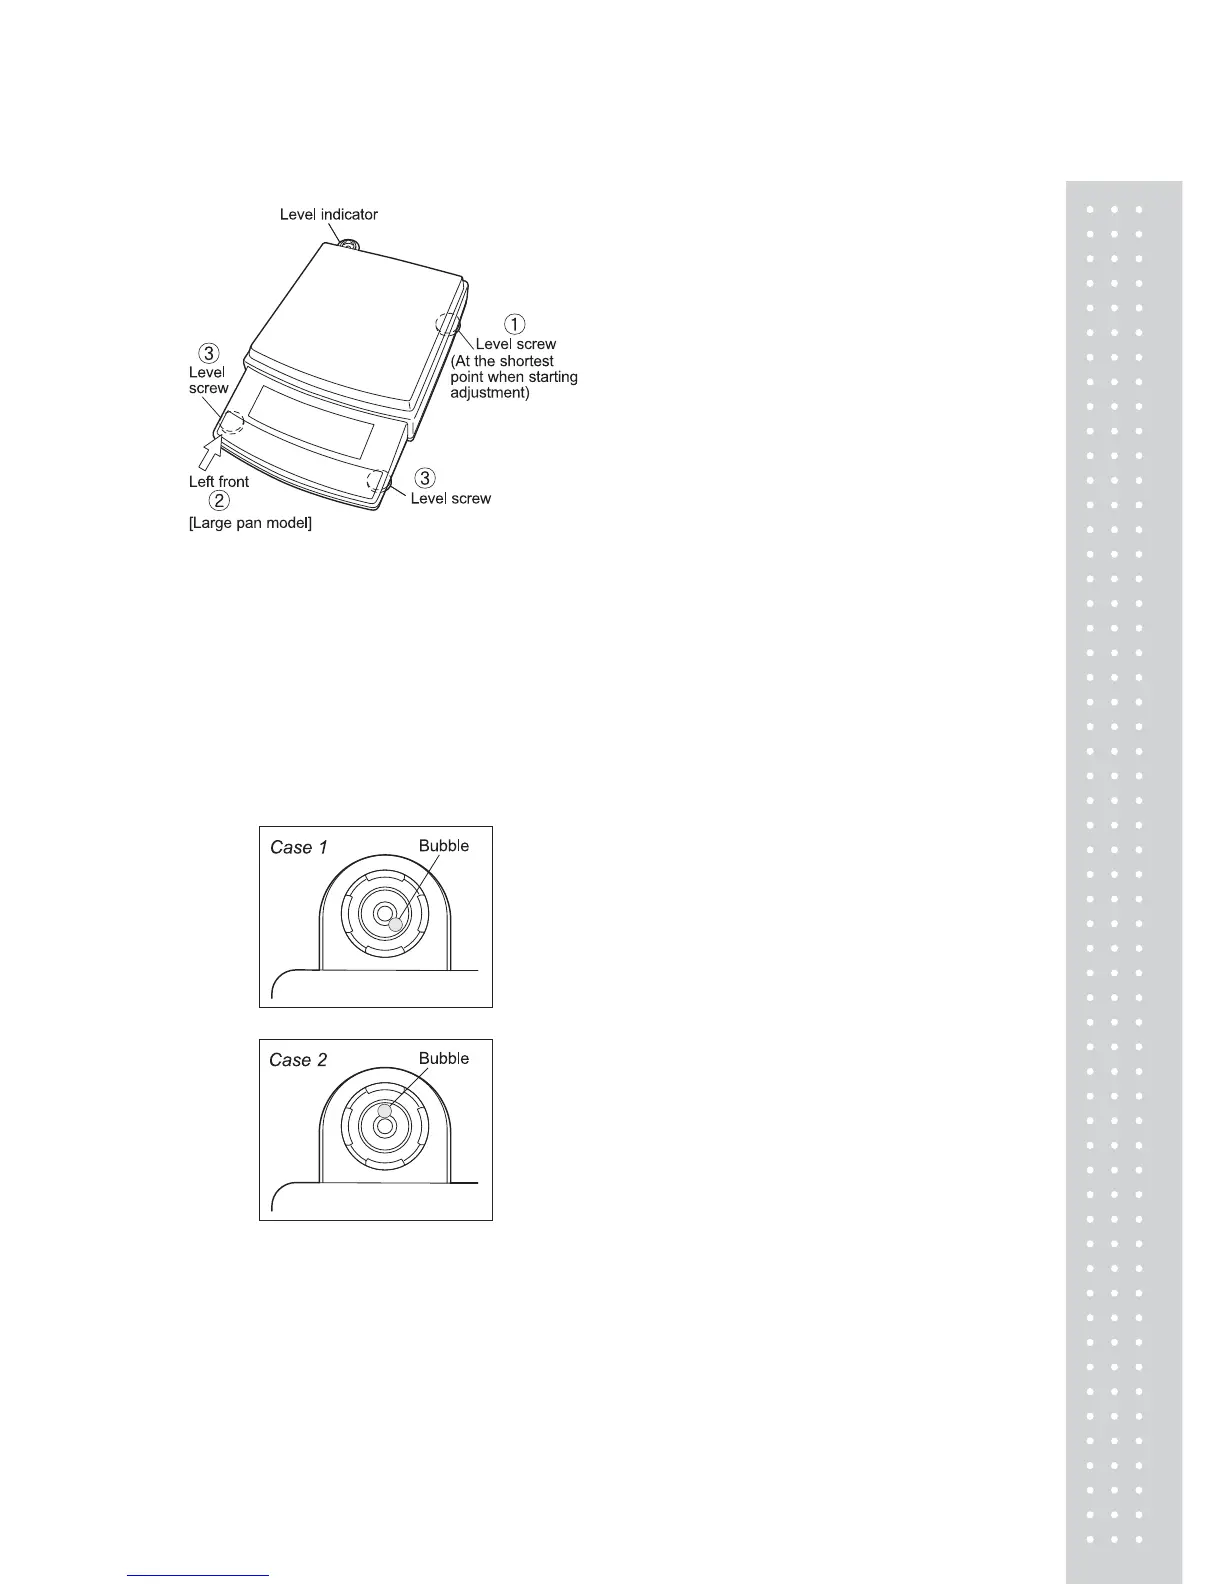
Case 1: Right front of the balance is too high.
Turn right front level screw anti-clockwise so
that the bubble moves towards center.
Case 2: Front of the balance is too low.
Turn both front level screws clockwise so
that the bubble moves towards center.
(4) When the bubble has come to the center
of the red circle, turn the right rear level
screw clockwise until its foot softly
touches the table surface. Verify the
balance sits stable with four feet.
 Loading...