41
7.4 Setting Numeric Values
Some of UW/UX series balance menu items require numeric value setting.
For example, external calibration weight input, thresholds for checkweighing, and reference
density in pecific gravity measurements (see 10.2, 10.3, 13.1, 13.5, 13.8, 14.1, 14.2, 14.4 for
detail of each item.)
The values can be set using the balance keys.
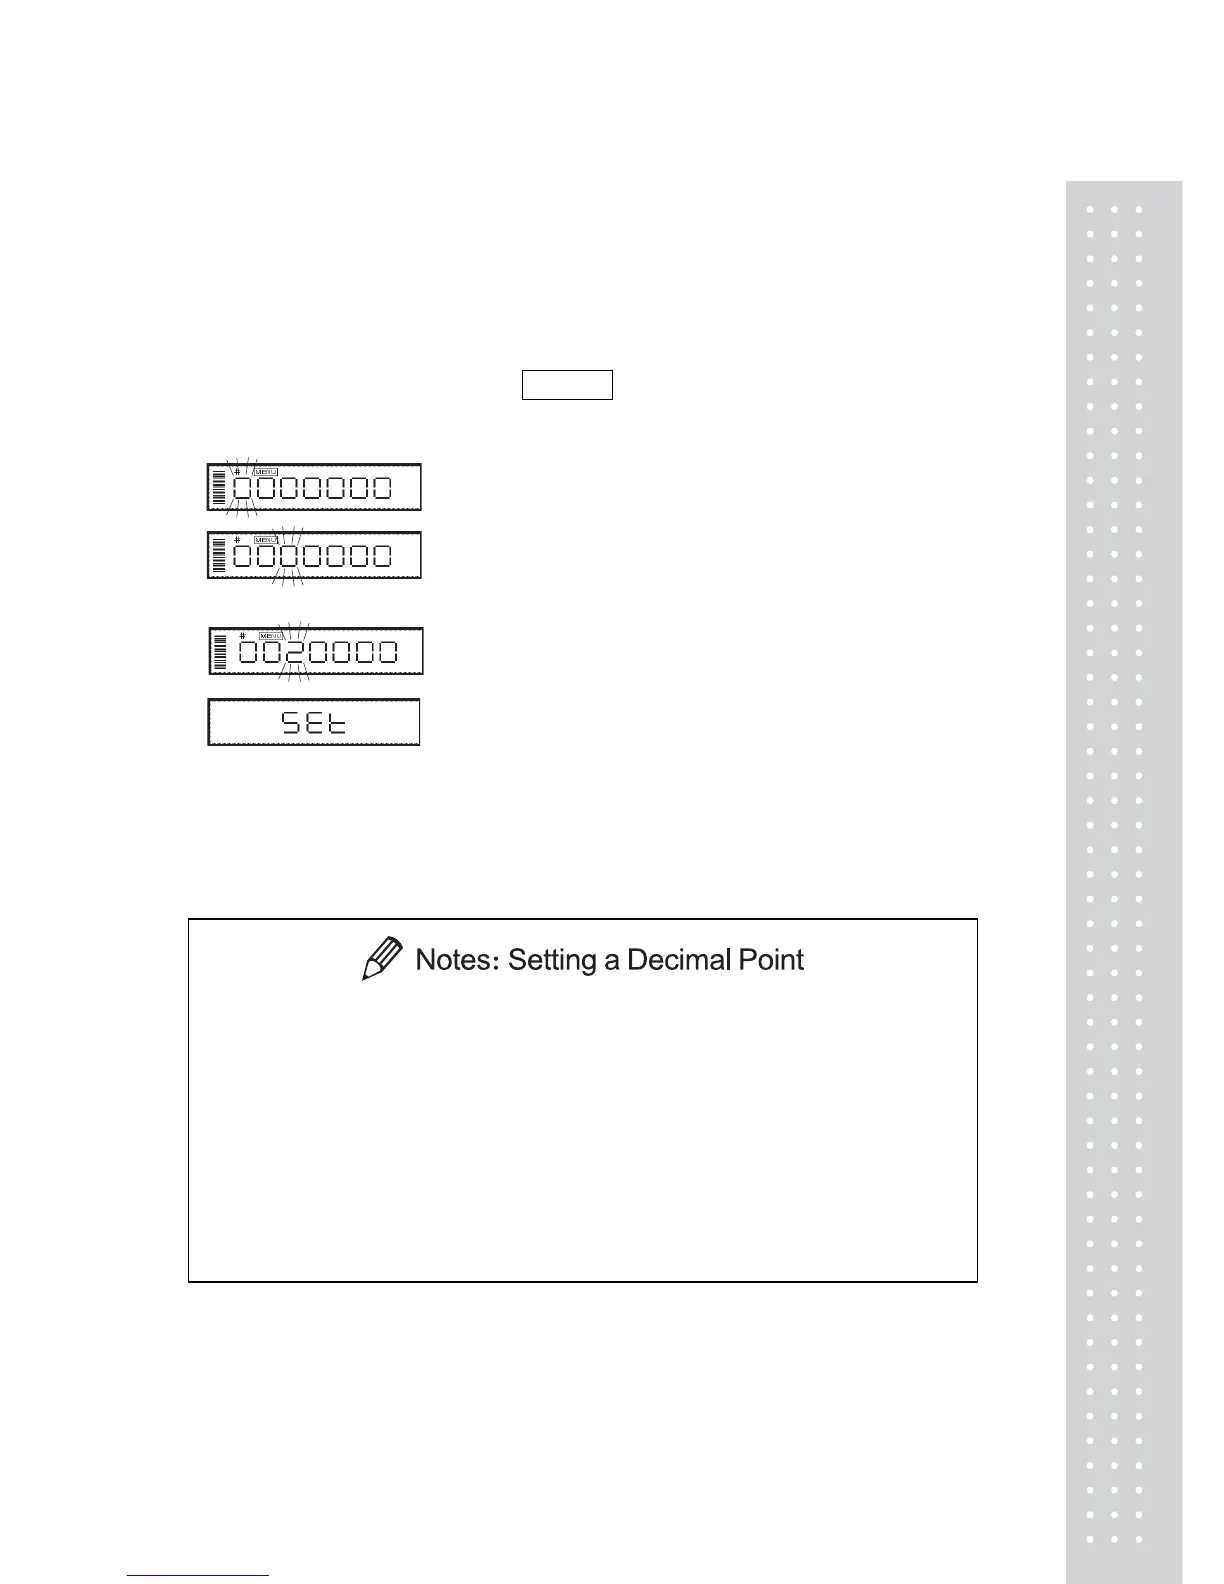
In a menu used to set numeric values, MENU and
# are both illuminated and the digit to
be input blinks.
1. Press the [UNIT] key to increase the value of the
blinking digit by one. (0.....9, 0)
2. Press the [PRINT] key to move the blinking digit
one place to the right.
3. Press the [O/T] key to store the displayed value in
the balance memory.
“SEt” is displayed when the value has been
successfully saved.
“Err” is displayed when the balance failed to save
the value.
4. Press the [POWER] key to stop numeric entry.
“Abort” is displayed briefly and the display returns
to the menu, one level up.
A decimal point is only used when setting units for solid density weighing, liquid
density weighing or when setting the multiplier for the user-defined unit. Set the
decimal point while setting numerical values as follows.
x Press the [PRINT] key repeatedly until the last digit is blinking. Press the
[PRINT] key once more to initiate decimal point setting mode. The ▼
symbol or current decimal point blinks.
x Press the [UNIT] key to move the blinking decimal point one digit at a
time to the desired position.
x Press the [O/T] key to set the decimal point position.
“SEt” is displayed briefly to indicate that the setting is completed.
Use the optional AKB-301 Application Keyboard to easily set numerical values and decimals.
 Loading...