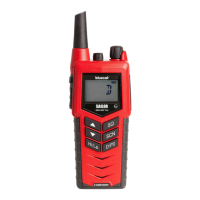
frequency, set Tx Power to Hi, the Bandwidth to "Std.", and no subaudible tone. Press
the "HOME" button multiple times to return to the "HOME" display page.
(b) Press the "Test" Button and verify the receive indicator (Green RX) lights up and
noise audio is heard in the headsets. Adjust RT #1 volume control (the small knob on
the left side) so that the noise can be heard.
8.3 TRANSMITTER TESTS
8.3.A General
During transmitter verification tests, monitor any other radios or sensors that are
present to determine if interference between them and RT-7000 PMR system exists.
(1) Input a 1 kHz sine wave tone into the primary microphone port and adjust input
level for .25 VRMS. DO NOT RELY ON THE TEST EQUIPMENT SETTING -
MEASURE USING AN AC VOLTMETER AT THE MICROPHONE JACK.
(2) Set the communication analyzer to FM mode. Tune the manual channel on the
RT-7000 PMR to the frequencies listed in Tables 7-1 through 7-6 (select
appropriate transceiver model) and record transmit power and modulation levels
at the output of the radio. This will verify the RT-7000 PMR is communicating
with the transceiver and that microphone audio is getting to the transceiver at
the proper level. Verify that the RT-7{AM indicates a transmit condition by
showing the transmit indicator when the PTT is initiated. If modulation is not
3000 Hz +/ 500 Hz, adjust audio panel for more/less output. Also verify transmit
frequency is correct.
(3) Remove the audio source and transmit on a selected frequency; verify that side
tone audio is heard in the headset.
(4) Connect the through line Watt meter between the radio and antenna and check
forward and reflected power at each of the frequencies listed in the tables below
that is appropriate for the type of transceiver being tested. The Reflected power
should be less than 30% of the forward power.
(5) Perform Tests 1-4 on transceivers #2 and #3 (if installed)
8.3.B Receiver Verification
(1) Use the communication analyzer to measure receiver sensitivity at the
frequencies listed in 8.4 Installation Checkout Data Tables and Checklist . Remember
that frequencies below 400 MHz use the Antenna Switching Unit NC" RF
connector and frequencies above 400 MHz use the NO RF connector. Use the
manual channel on the RT-7000 PMR to tune the transceiver. Verify transceiver 1
by varying the input signal until 12 dB sinad is measured. The signal level should
be < .6V for all FM Channels.
(2) Perform the same tests on transceiver #2 if available.
(3) Perform the same tests on transceiver #3 if available.
 Loading...