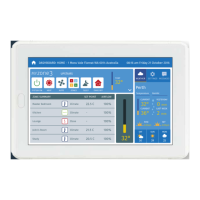
System is Off AC Unit
Zone Control
2
3 4
1
Sleep Timer
Zone Airflow Favourites
Screen Settings
Schedule Set Time
Pair
Beep System Config
77
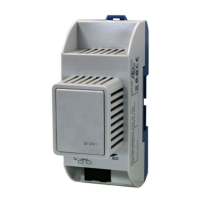
Wi-Fi Bridge Set Up
Equipment
• See installation manual for details of equipment required and wiring diagram.
Conguration and Set Up
• Connect the Wi-Fi Bridge to a 240V Power Supply.
• Connect the factory supplied RJ45 cable to the "Ethernet" port on the Wi-Fi
bridge and to a "LAN" port on the customers Modem/Router.
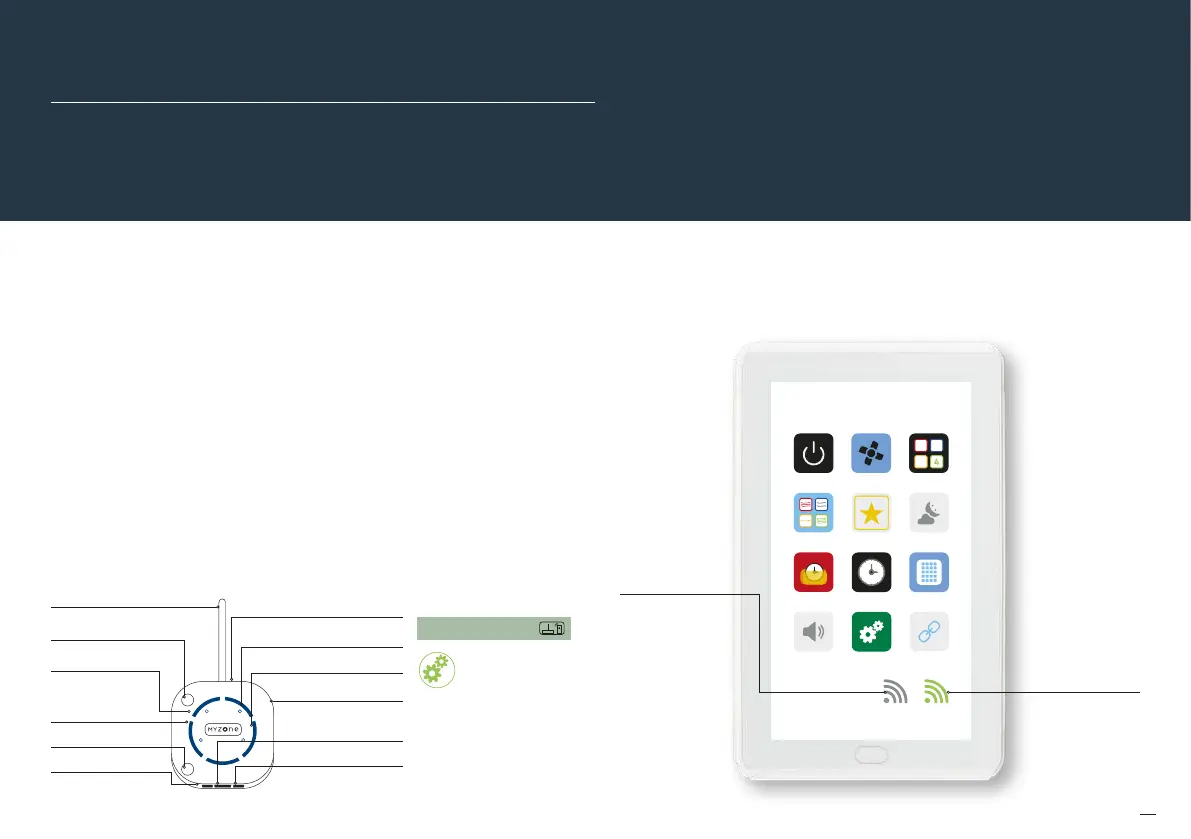
Pair the wireless bridge to the Myzone system
• Once plugged into power and connected to a compatible modem/router press
and hold the blue button on the side of the Wi-Fi Bridge.
• At the same time enter the system configuration menu on the tablet using the
“wamfud” password and press “Pair Wireless Device”. Once successfully paired
you may release the “Pair” button on the Wi-Fi Bridge.
Check the pairing was successful
• Wait a few seconds ater completing the pairing process. Press the home
button on the touch screen.
A grey symbol
indicates the
Wi-Fi bridge
is connected
to the Myzone
system but is
not connected
to the internet.
Customer will
need to rectify
any issue(s) with
their internet
service provider
A green symbol
indicates the Myzone
system is now
connected to WiFi
Back
Sensor Battery Status: Good
Signal Strength: 100%
Change RF Channel 1
Balance Air Max: 80%
Balance Air Min: 15%
Calibrate Sensor -0.2 C
Pair Wireless Device
6. Wall mounting point on back
1. Antenna
2. Reset button
4. Pairing LED
5. Pair button
10. Power jack port
7. Ethernet activity LED
8. Wireless LED
9. Rubber feet for
desktop mounting
11. Ethernet RJ45 port
12. iZone net port
A grey symbol
indicates the
Wi-Fi bridge
is connected
to the Myzone
system but is
not connected
to the internet.
Customer will
need to rectify
any issue(s) with
their internet
service provider
3. iZone
Worldwide LED