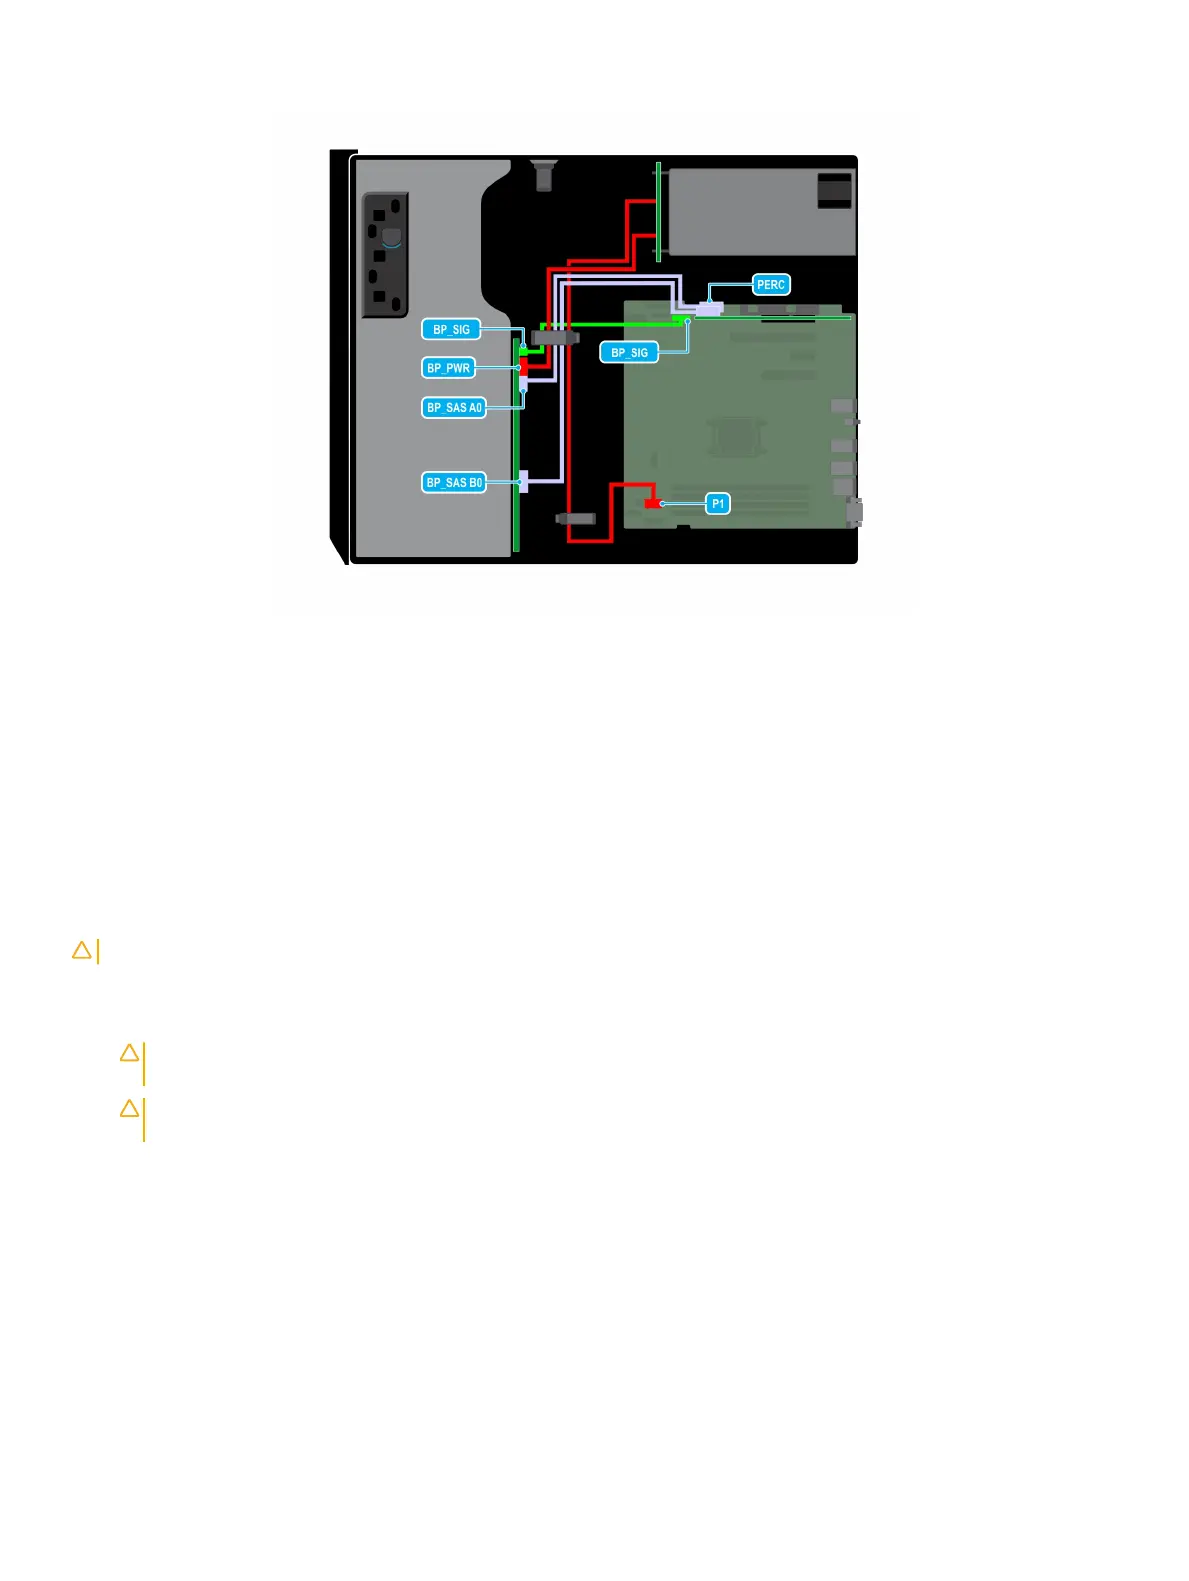
Figure 48. Cable routing - 8 x 3.5-inch SAS/SATA drive backplane with PERC card
Four-slot drive blank
Systems with x8 drive backplanes congured for software RAID support only four drives. The remaining drive slots are pre-installed with
the four-slot drive blank, and cannot be upgraded for additional storage.
Removing a four-slot drive blank
Prerequisites
CAUTION
: To maintain proper system cooling, all empty drive slots must have drive blanks installed.
1 Follow the safety guidelines listed in Safety instructions.
2 Follow the procedure listed in Before working inside your system.
CAUTION
: To prevent damage to the drives and backplane, you must remove the drives from the system before removing
the backplane.
CAUTION: Note the slot number of each drive and temporarily label the slots before removing the drives so that you can
replace them in the same locations.
3 Remove the air shroud.
4 Remove all the drives.
5 Remove the drive backplane.
Steps
1 Using a screwdriver, push the release tabs on the corners of the blank from inside the system, to unlock the four-slot hard drive blank
from the chassis.
2 From the front of the system, pull the four-slot hard drive blank at the corners until it is free of the hard drive slot.
74
Installing and removing system components

 Loading...


