4 Remove the BOSS card.
NOTE: The procedure to remove the BOSS card is similar to the removing an expansion card.
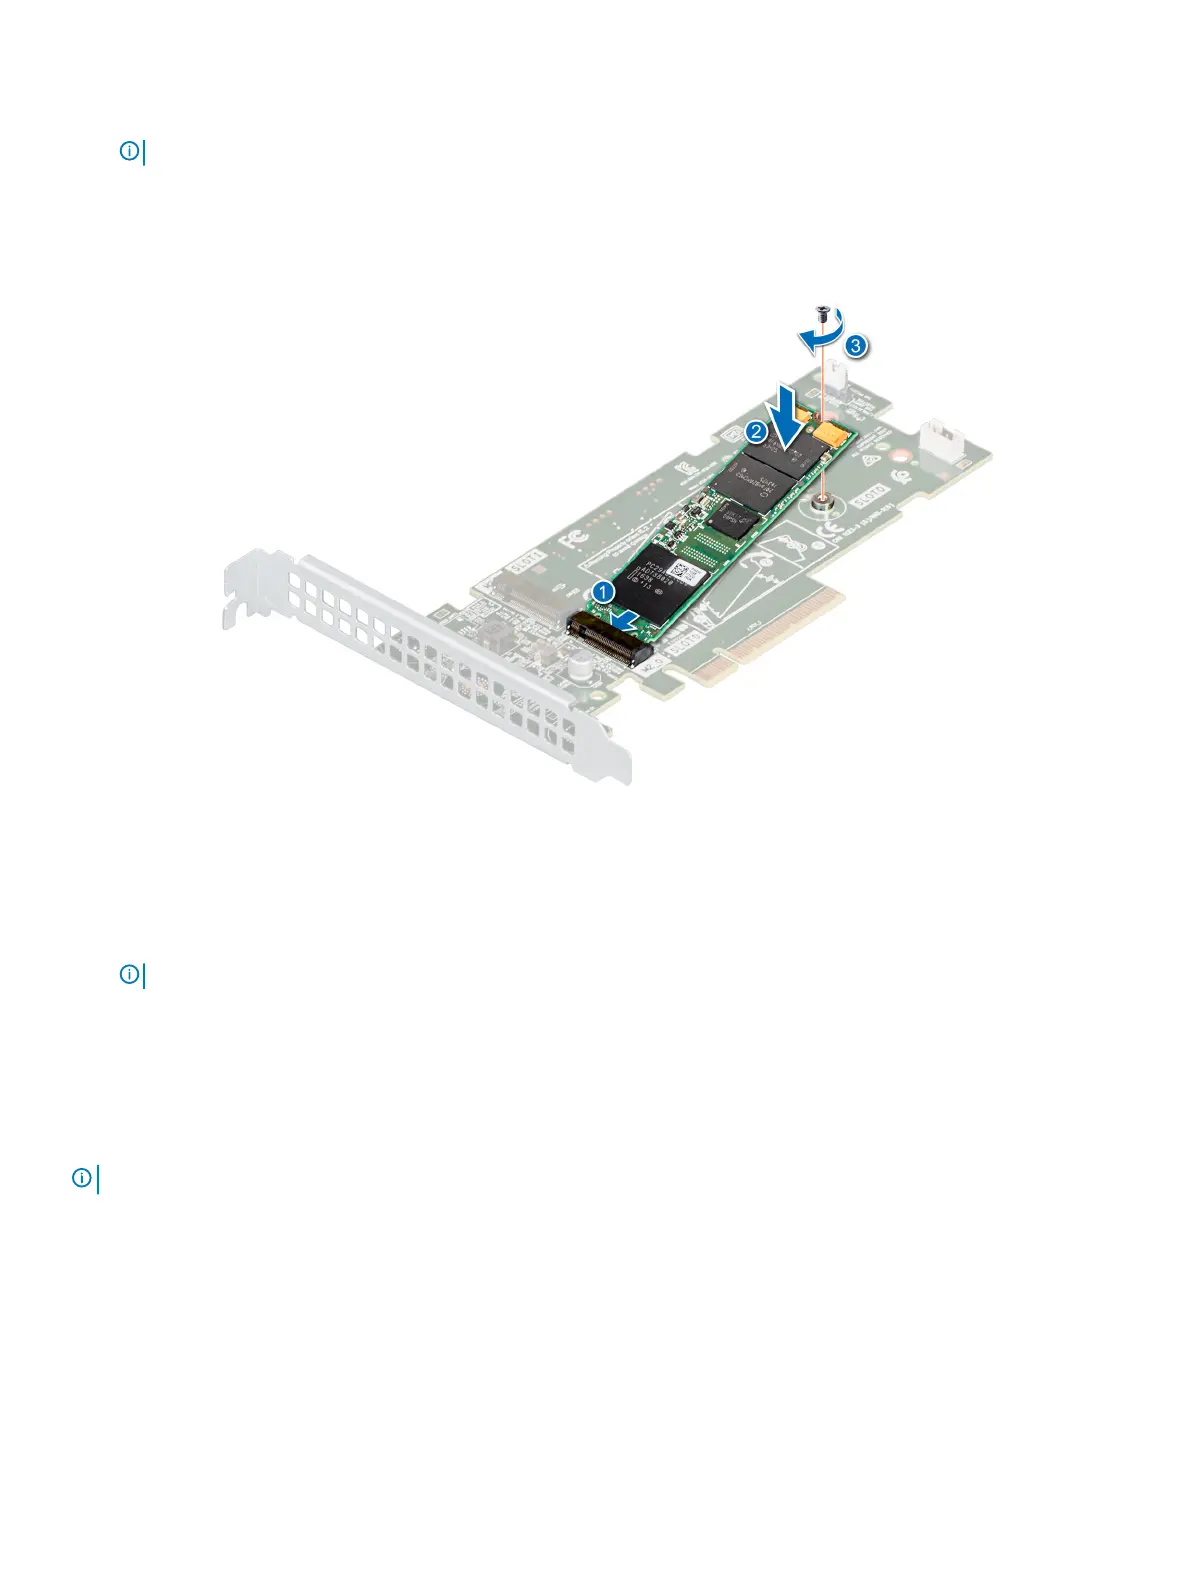
Steps
1 Align the M.2 SSD module at an angle with the BOSS card connector.
2 Insert the M.2 SSD module until it is rmly seated in the BOSS card connector.
3 Using the Phillips #1 screwdriver, secure the M.2 SSD module on the BOSS card with the screw.
Figure 61. Installing the M.2 SSD module
Next steps
1 Install the BOSS card.
NOTE
: The procedure to install the BOSS card is similar to removing an expansion card.
2 Install the air shroud.
3 Follow the procedure listed in the After working inside your system.
Optional IDSDM or vFlash module
The IDSDM or vFlash module combines the IDSDM and/or vFlash features into a single module.
NOTE
: The write-protect switch is on the IDSDM or vFlash module.
Removing the optional IDSDM or vFlash card
Prerequisites
1 Follow the safety guidelines listed in Safety instructions.
2 Follow the procedure listed in Before working inside your system.
3 Remove the air shroud.
88
Installing and removing system components

 Loading...


