248 Scanning
NOTE: Ensure that the printer is connected to the computer using the USB cable.
To scan an image from the PaperPort:
1
Load the document(s) face up with top edge in first into the ADF.
OR
Place a single document face down on the document glass.
For details about loading a document, see "Loading an Original Document on the ADF" on page 272.
2
On the Windows
Start
menu, click
Nuance PaperPort 14
from
All Programs
, and then click
PaperPort
(for
Windows 8, click the
PaperPort
icon on the
Start
screen).
3
In the
Desktop
tab, click
Scan Settings
in the
Function Pane
group.
4
Click
Select
in the
Scan or Get Photo
pane.
5
In the
Available Scanners
dialog box, select
TWAIN: Dell C1765 MFP Scanner
and then click
OK
.
6
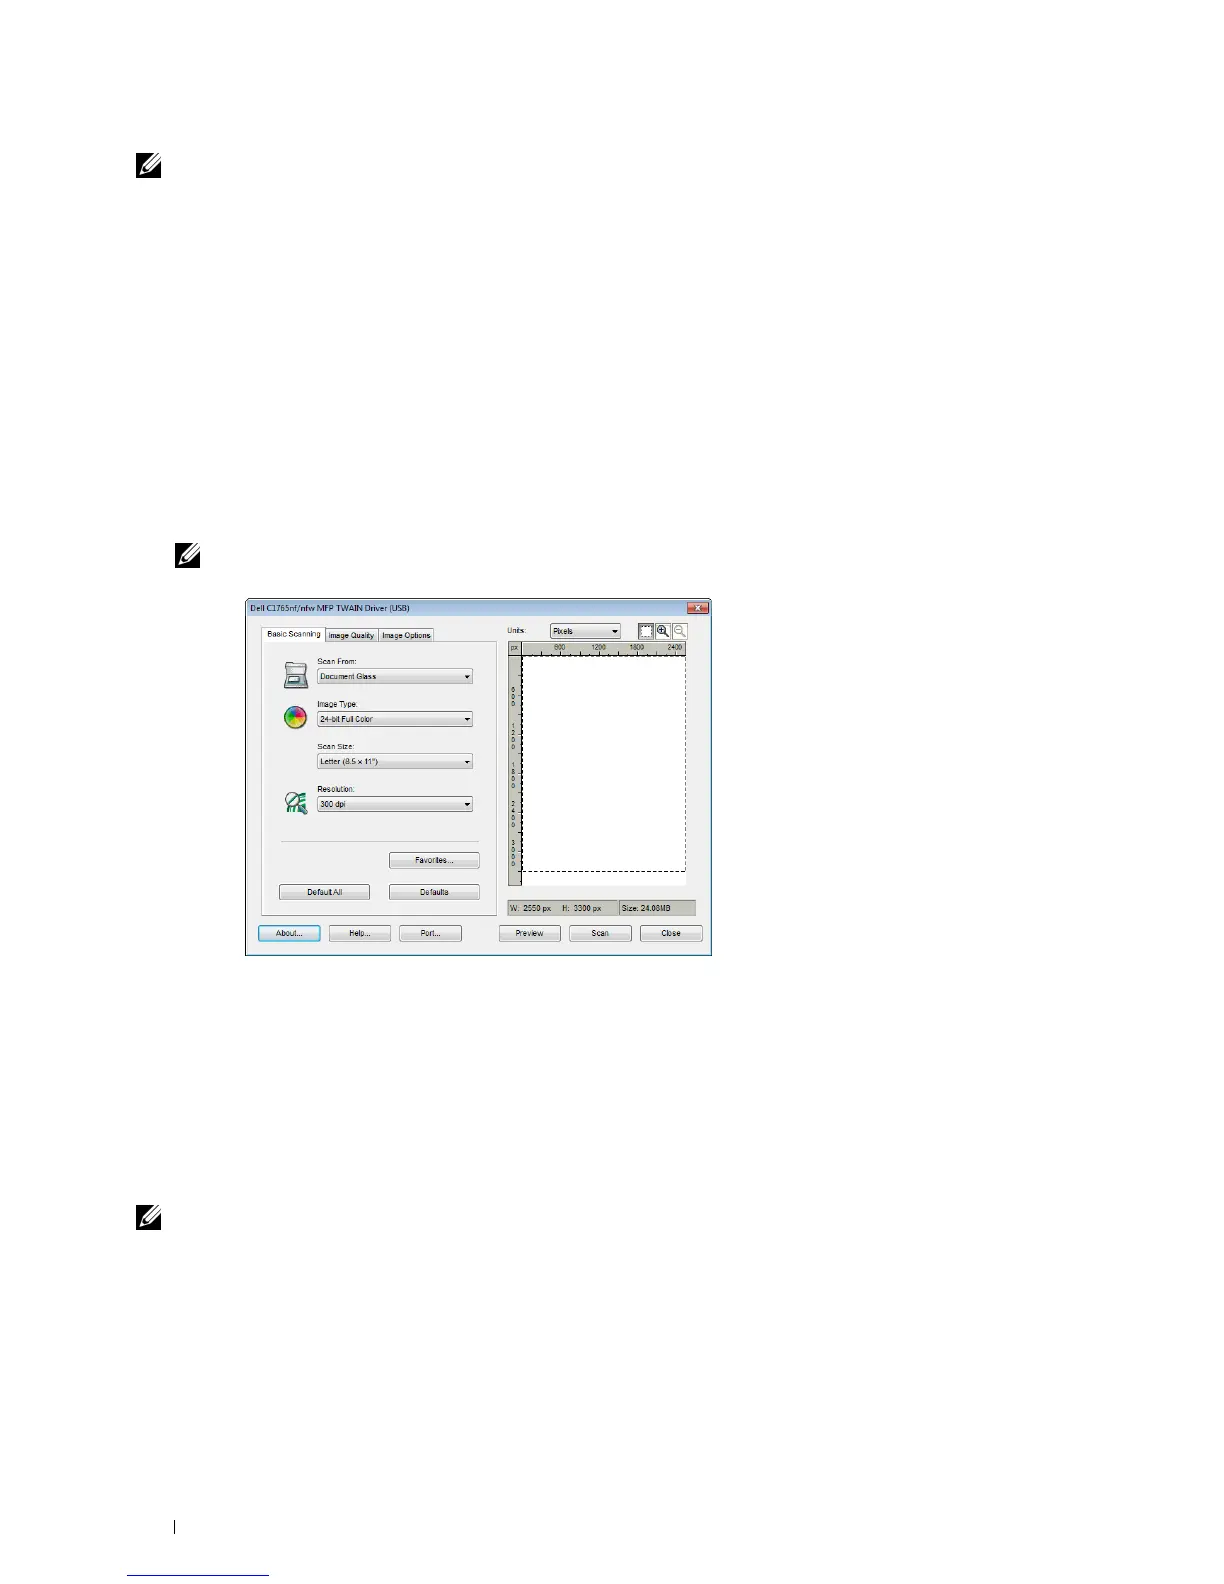
Select your scanning preferences and click
Preview
to display the preview image.
NOTE: The illustration may vary for different operating systems.
7
Select the desired properties from the
Image Quality
and
Image Options
tabs.
8
Click
Scan
to start scanning.
9
Follow the on-screen instructions to edit the picture after it is copied to your computer.
Scanning Using the Windows Image Acquisition (WIA) Driver
Your printer also supports the WIA driver for scanning images. WIA is one of the standard components provided by
Windows XP and later operating systems and works with digital cameras and scanners. Unlike the TWAIN driver, the
WIA driver allows you to scan an image and easily manipulate those images without using additional software.
NOTE: Ensure that the printer is connected to the computer using the USB cable.
1
Load the document(s) face up with top edge in first into the ADF.
OR
Place a single document face down on the document glass.
For details about loading a document, see "Loading an Original Document on the ADF" on page 272.
2
Start the drawing software, such as
Paint
for Windows.

 Loading...