158 | Installing System Components
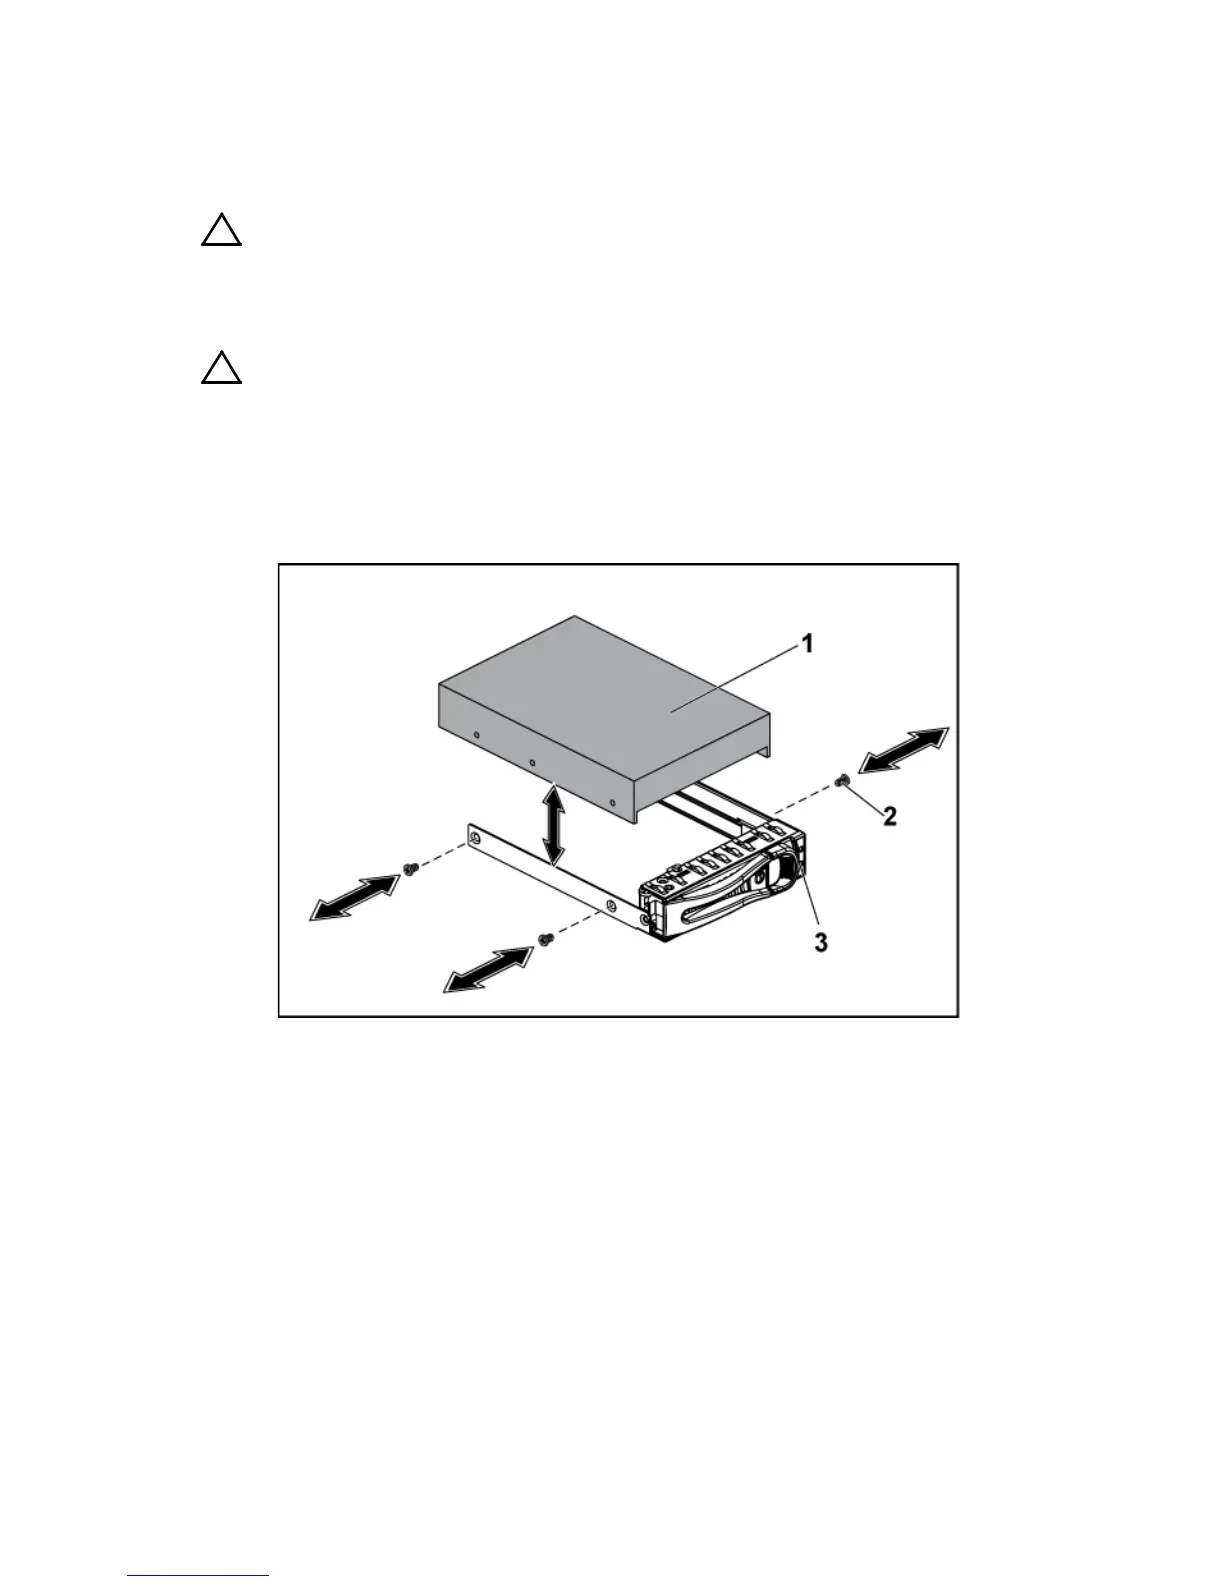
1 Remove the four screws. See Figure 3-6.
2 Lift the hard drive out of the hard-drive carrier.
Figure 3-6. Removing and Installing a Hard Drive from the Hard-Drive Carrier
CAUTION: When installing a hard-drive carrier, ensure that the adjacent drives
are fully installed. Inserting a hard-drive carrier and attempting to lock its handle
next to a partially installed carrier can damage the partially installed carrier's
shield spring and make it unusable.
CAUTION: To prevent data loss, ensure that your operating system
supports hot-swappable drive installation. See the documentation supplied with
the operating system.

 Loading...


