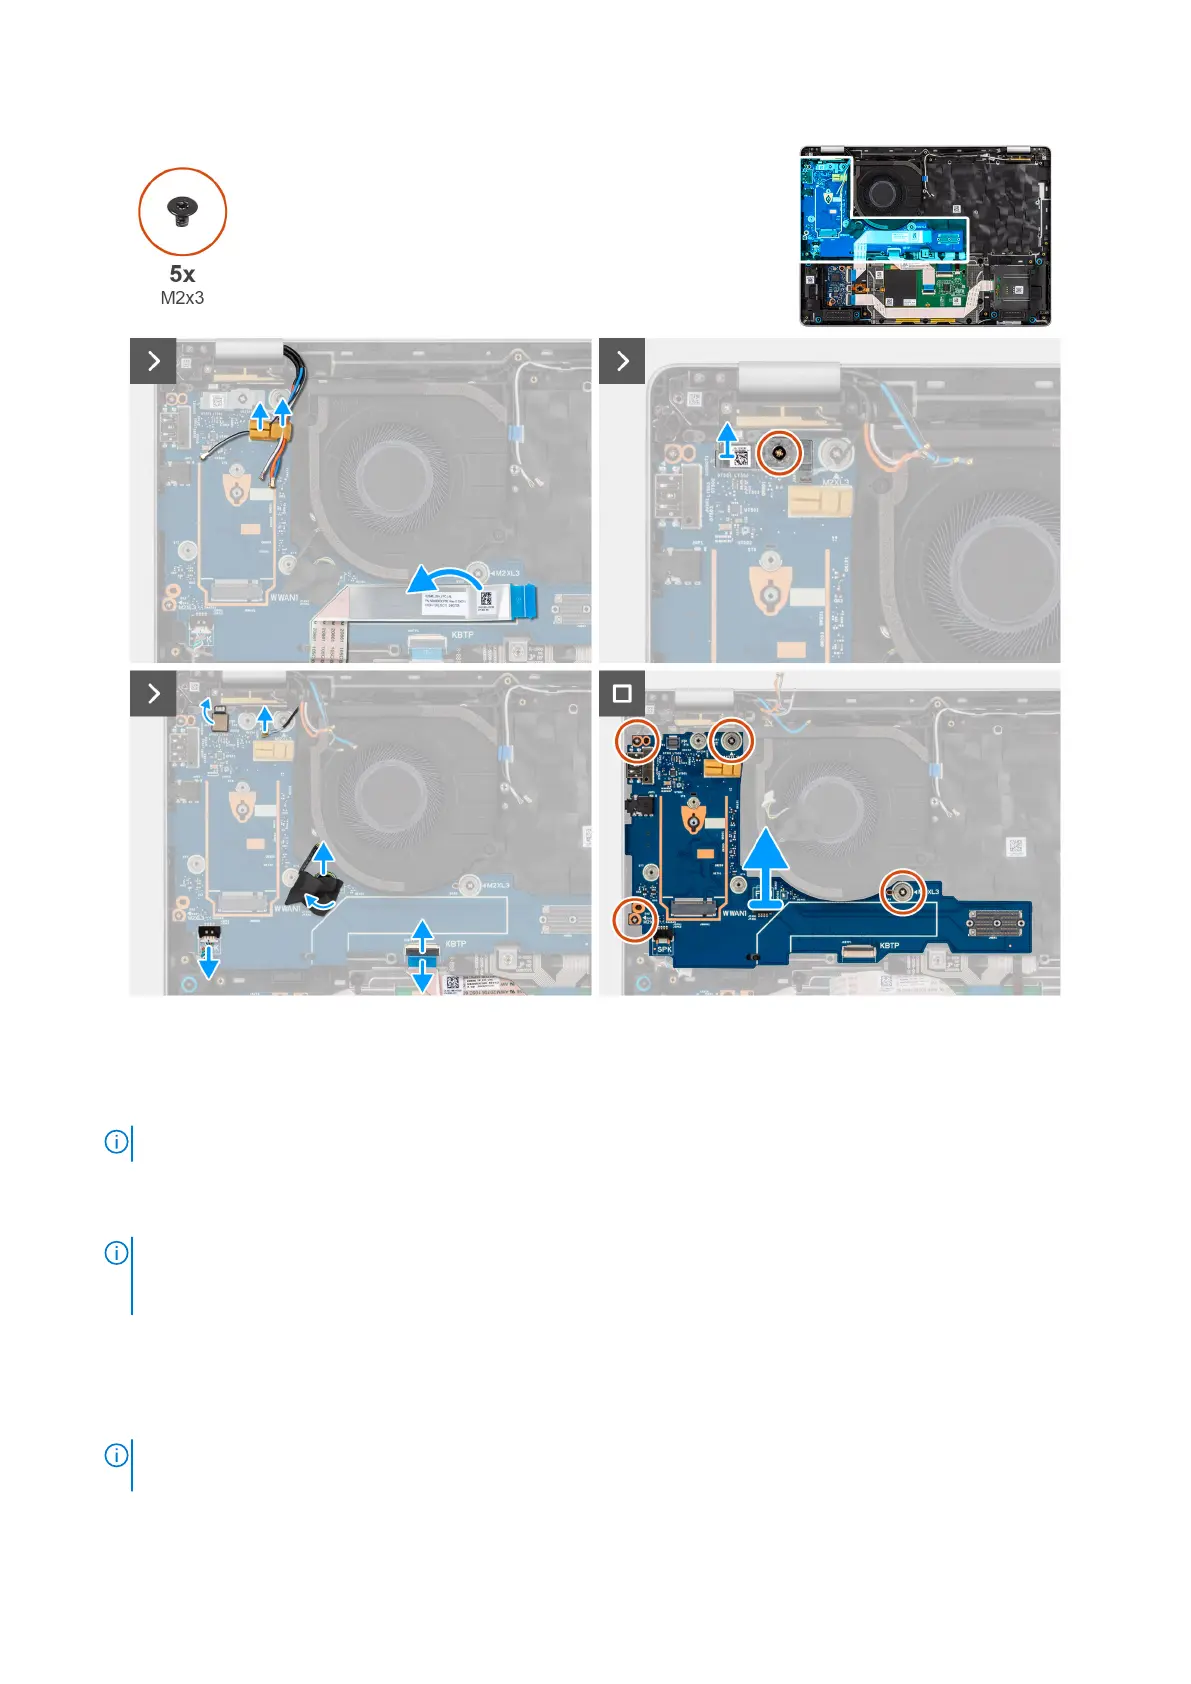
Figure 75. Removing the daughter board
Steps
1. Peel the USH daughter board flexible flat cable from the I/O board.
NOTE: This step applies to models shipped with a USH daughter board.
2. Release the WWAN antenna cables from the routing guides on the I/O board and move it away from the I/O board.
3. Remove the screw (M2x3) that secures the fingerprint-reader bracket in place and remove the fingerprint reader bracket.
NOTE:
The fingerprint reader bracket covers both the fingerprint reader connector and Darwin cable connector.
Models that are shipped without a fingerprint reader still have a fingerprint-reader bracket to cover the Darwin cable
connection.
4. Disconnect the fingerprint reader flexible flat cable (for models shipped with a fingerprint reader), Darwin cable, fan cable,
touchpad flexible flat cable, and speakers cable from the I/O board.
5. Remove the four screws (M2x3) that secure the I/O board in place.
6. Lift the left side of the I/O board by left hand and the lower right corner of the I/O board by right hand.
NOTE:
While replacing the I/O board, the WWAN card thermal pad mylar sticker at the top side of the I/O board must
be replaced to the replacement I/O board.
7. Slide the I/O board off the palm-rest assembly by both hands.
Removing and installing Field Replaceable Units (FRUs)
107