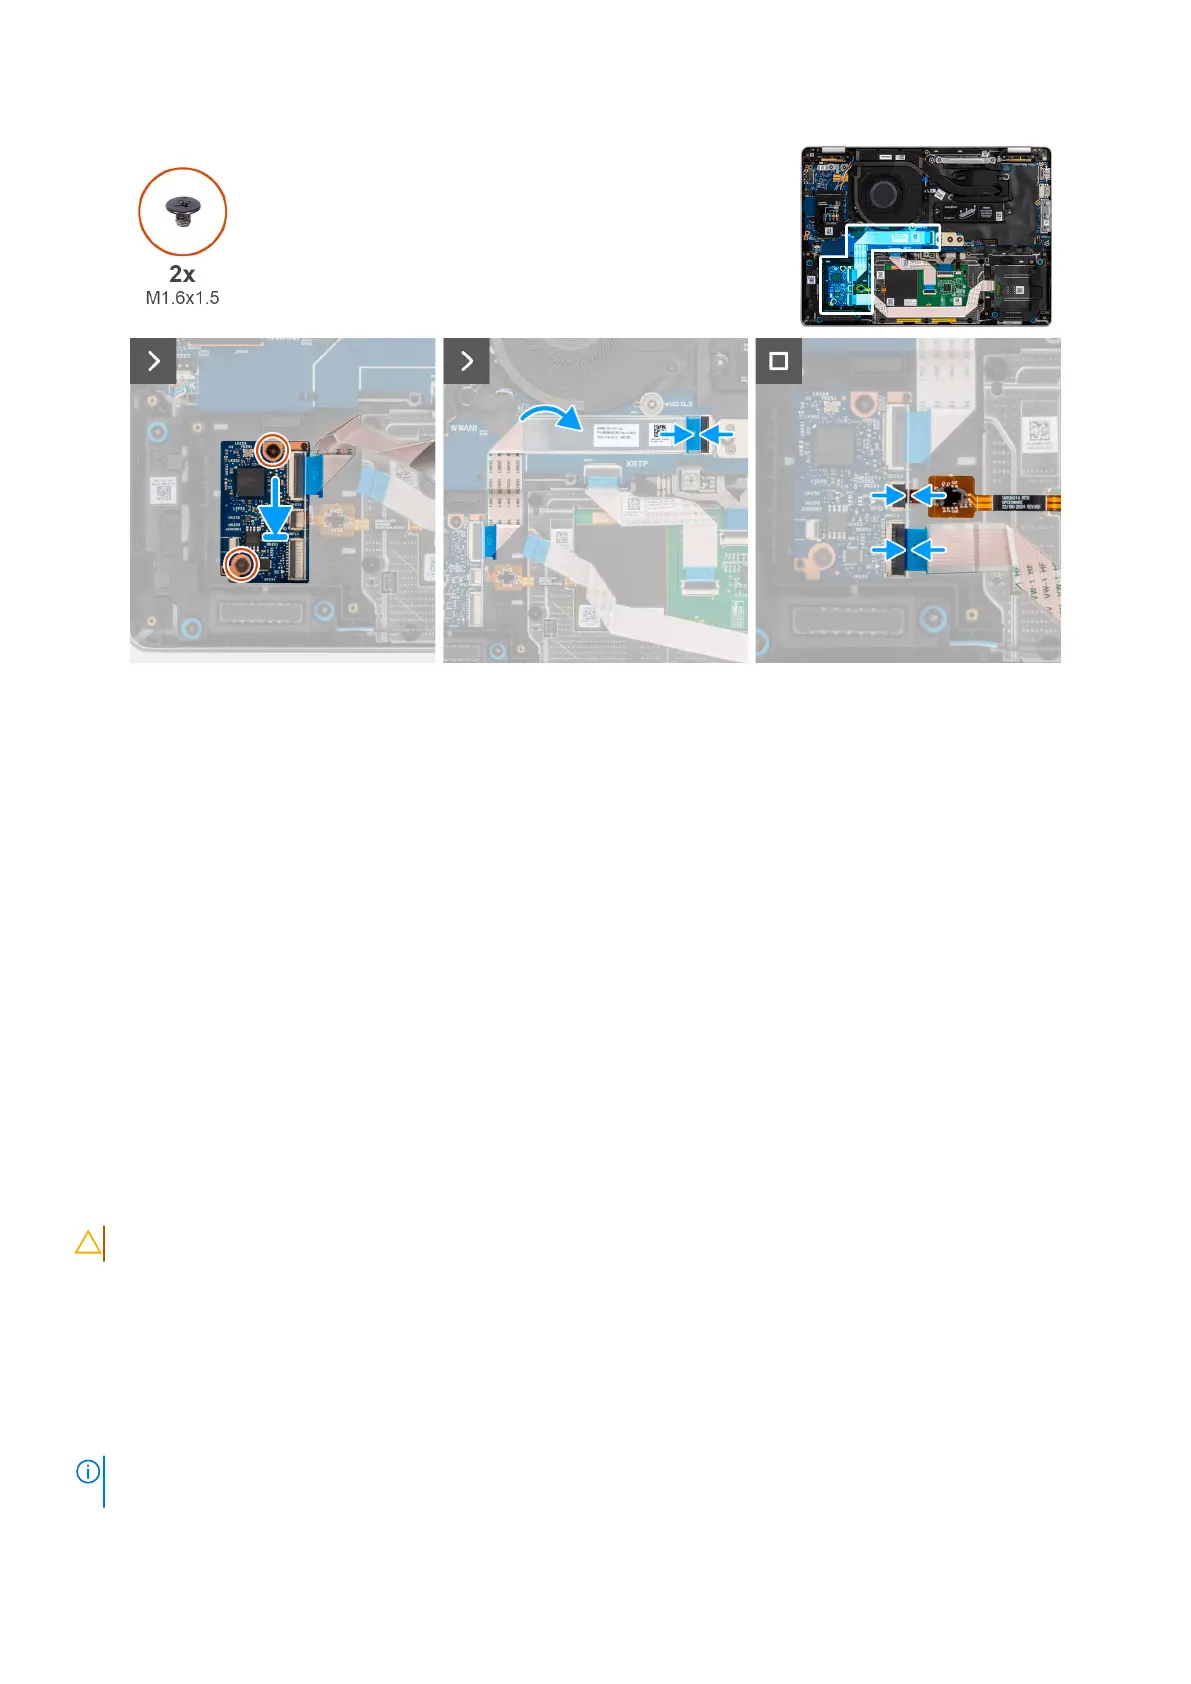
Figure 66. Installing the USH daughter board
Steps
1. Place the USH daughter board on the chassis.
2. Replace the two screws (M1.6x1.5) that secure the USH daughter board in place.
3. Connect the USH daughter board flexible flat cable to the connector on the USH daughter board. Adhere the USH daughter
board flexible flat cable to the I/O daughter board.
4. Connect the smart card reader flexible flat cable to the connector on the USH daughter board.
Next steps
1. Install the battery.
2. Install the base cover.
3. Install the SIM card tray, if applicable.
4. Follow the procedure in after working inside your computer.
Heatsink
Removing the heat-sink
CAUTION: The information in this removal section is intended for authorized service technicians only.
Prerequisites
1. Follow the procedure in before working inside your computer.
2. Remove the sim-card tray, if applicable.
3. Remove the base cover.
About this task
NOTE:
The heat-sink may become hot during normal operation. Allow sufficient time for the heat-sink to cool before you
touch it.
Removing and installing Field Replaceable Units (FRUs) 97