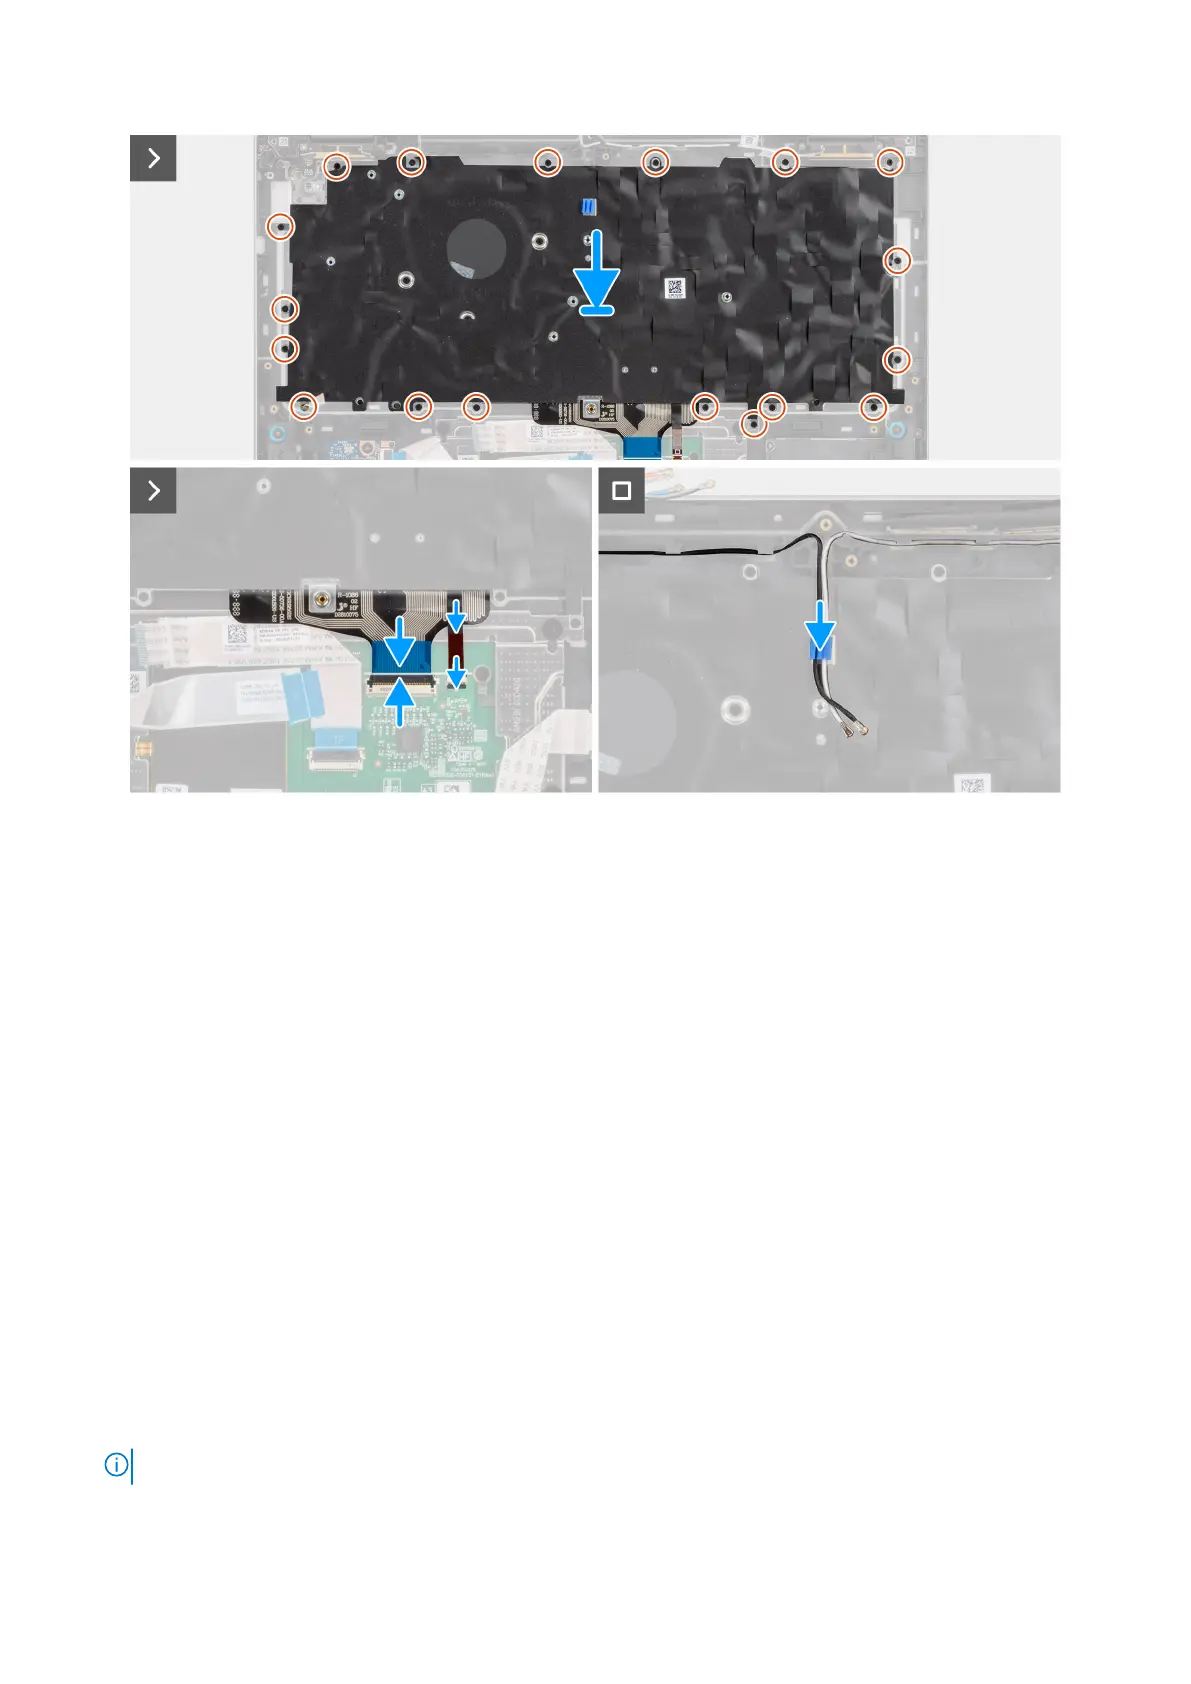
Figure 82. Installing the keyboard
Steps
1. Replace the keyboard on the keyboard bracket.
2. Replace the two screws (M2x2) that secure the keyboard to the keyboard bracket from the top side.
3. Replace the keyboard assembly on the palm rest.
4. Replace the eighteen screws (M1.6x1.7) that secure the keyboard assembly in place.
5. Connect the keyboard FPC and keyboard backlight FPC (for models that are shipped with the keyboard backlight) to the
touchpad.
6. Route the WLAN antenna cables along the routing guides on the keyboard bracket.
Next steps
1. Install the power button with fingerprint reader.
2. Install the I/O board.
3. Install the USB-C connector module.
4. Install the system board.
5. Install the heat sink.
6. Install the USH daughter board.
7. Install the smart card reader
8. Install the display assembly
9. Install the fan.
10. Install the speakers
11. Install the M.2 2230 solid state drive or M.2 2280 solid state drive, as applicable.
12. Install the WWAN.
NOTE: This procedure applies only to computers shipped with a WWAN card installed.
13. Install the battery.
Removing and installing Field Replaceable Units (FRUs)
115