101
“2: M1 KEY” to “6: M5 KEY”: Defining the Mx key functions
1. Select “2: M1 KEY” to “6: M5 KEY” at the SET KEY menu and then
press the ENT key.
The SET M1 KEY menu screen on the right is displayed.
(In the example on the right, “2: M1 KEY” has been selected.)
The highlighted setting is the current setting.
“1: None”:
Ignores the key entry.
“2: Trigger Switch”:
Sets the magic key as the trigger switch.
“3: Shift Key”:
Sets the magic key as the SF key.
“4: Enter Key”:
Sets the magic key as the ENT key.
“5: Backlight Key”:
Sets the magic key as the backlight function ON/OFF key.
“6: MENU”:
Sets the magic key as a key used to start up the “Buzzer/Vibrator/Backlight Adjustment Screen”.
“7: Clear Key”:
Sets the magic key as the C key.
2. Use the cursor keys ([▲] [▼]) or numerical keys ([1] [2] [3] [4] [5] [6]
[7] [8]) to highlight the item to be set, and then press the ENT key.
The selected item is set and the screen returns to the SET KEY menu.
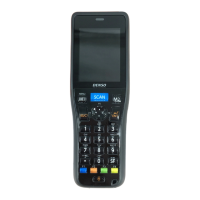
Magic keys (M1 to M5)
Magic keys (M1 to M5) can be set to function as the trigger switch, SF key,
ENT key, backlight function ON/OFF key, MENU key or BS/C key.
If the M1 key is defined as the backlight function ON/OFF key, pressing the
M1 key enables or disables the backlight function.
In user programs, data strings can be also assigned to these magic keys.
Magic key M5 is set as the trigger switch by default.
- Point -
The backlight function ON/OFF key can be assigned only to one of the magic keys from M1
to
M5
. The key defined more recently will act as the backlight function ON/OFF key and the
previously defi
ned key will be ignored.
M1 and M2
keys are defined as the backlight function ON/OFF key in this
order, the
M2 key functions as the backlight function ON/OFF key and the M1 key entry
On the other hand, if the
M2 and M1 keys
are defined as the backlight function ON/OFF key
in this order, the
M1 key functions as the backlight function ON/OFF key and the M2
is ignored.
SET M1 KEY
1:None
2:Trigger Switch
3:Shift Key
4:Enter Key
5:Backlight Key
6:MENU Key
7:Clear Key
SET M1 KEY
1:None
2:Trigger Switch
3:Shift Key
4:Enter Key
5:Backlight Key
6:MENU Key
7:Clear Key