Chapter 9 HYBRID Coater Service Manual ver1.1
74
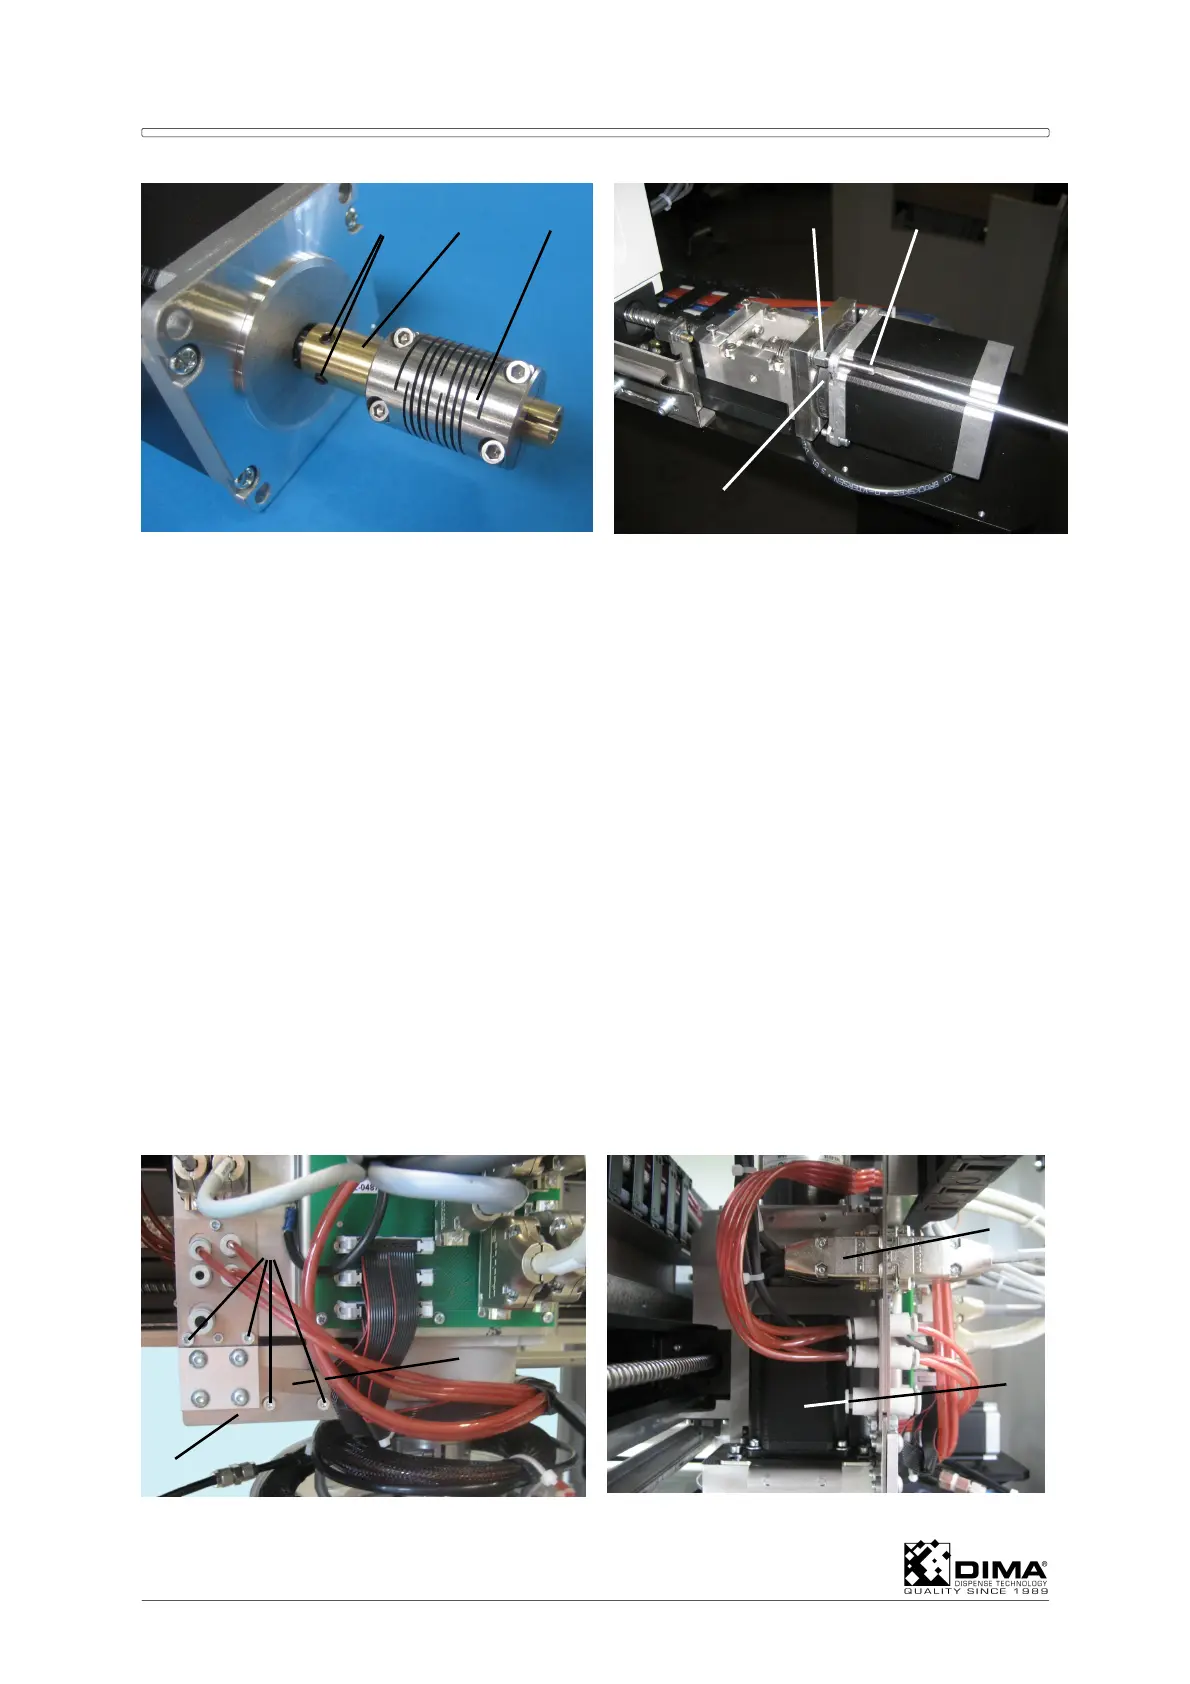
C Mount the coupling (#4) together with the bushing (#10) to the new stepper motor.
Tighten both set screws (#12) Mount the two guide pins (#10 = special tool) into the two
bolts (#11) with thread that keep the rubber middle piece (#7) in place. Now you can
guide the new motor over the guide pins (#10) and mount and tighten the other screws
(#8) back. Now tighten the bolts (#5) of the coupling (#4) and refit the cover. Then couple
the connector of the motor again and put on new tie wraps.
NOTE: the set screws (#12) have to be secured with Loctite 243.
ATTENTION: The same procedure applies to the stepper motor of the Z axis of the HC-
100. Here the Coating Head has to be supported and secured in the highest
position. This way the cover (#2) is readily accessible.
9.5.2 Replacing the Stepper Motor of the Z axis on the HC-200
The stepper motor for the Z axis is the lower motor on the Coating Head of the HC-200. In
order to be able to get near this stepper motor, the Coating Head has to be moved all the
way to the left hand side of the working area (seen from the front). Also push the Coating
head all the way to the rear of the working area. Now you can take on this stepper motor
from the rear of the HYBRID.
A Undo the four bolts (#1) which hold the back plate (#2) of the grounding strip (#3) to the
Coating Head and remove the back plate.
B Cut the tie wraps that hold the cable of the motor (#5) and then undo its connector (#4).
1
2
3
4
5