Chapter 4 HYBRID Coater Service Manual ver1.1
28
4.5 Completion of the Installation
NOTE: for HC-100/200: when a conveyor is present:
Configuration, Settings: the loading and unloading direction must be selected.
For all machine types:
Calibrate the machine (refer to User Manual).
Run a small production batch to check if the machine performs well.
4.6 Installing Special Options
4.6.1 Installing Options DD-52XX
This means installing the option DD-52XX to the HYBRID. This means that the option HC-
1980 is installed to the HC-100 or that the option HC-1390 is installed to the HC-200, see
also Section 4.7.
In order to install option DD-52XX to a HC-200, it is sufficient to connect the wires according
to Module drawing DD-52XX (Additional Valve Heating), see Appendix C.
In order to install option DD-52XX to a HC-100, the wires have to be soldered onto the
connector according to Module drawing DD-52XX (Additional Valve Heating), see Appendix C.
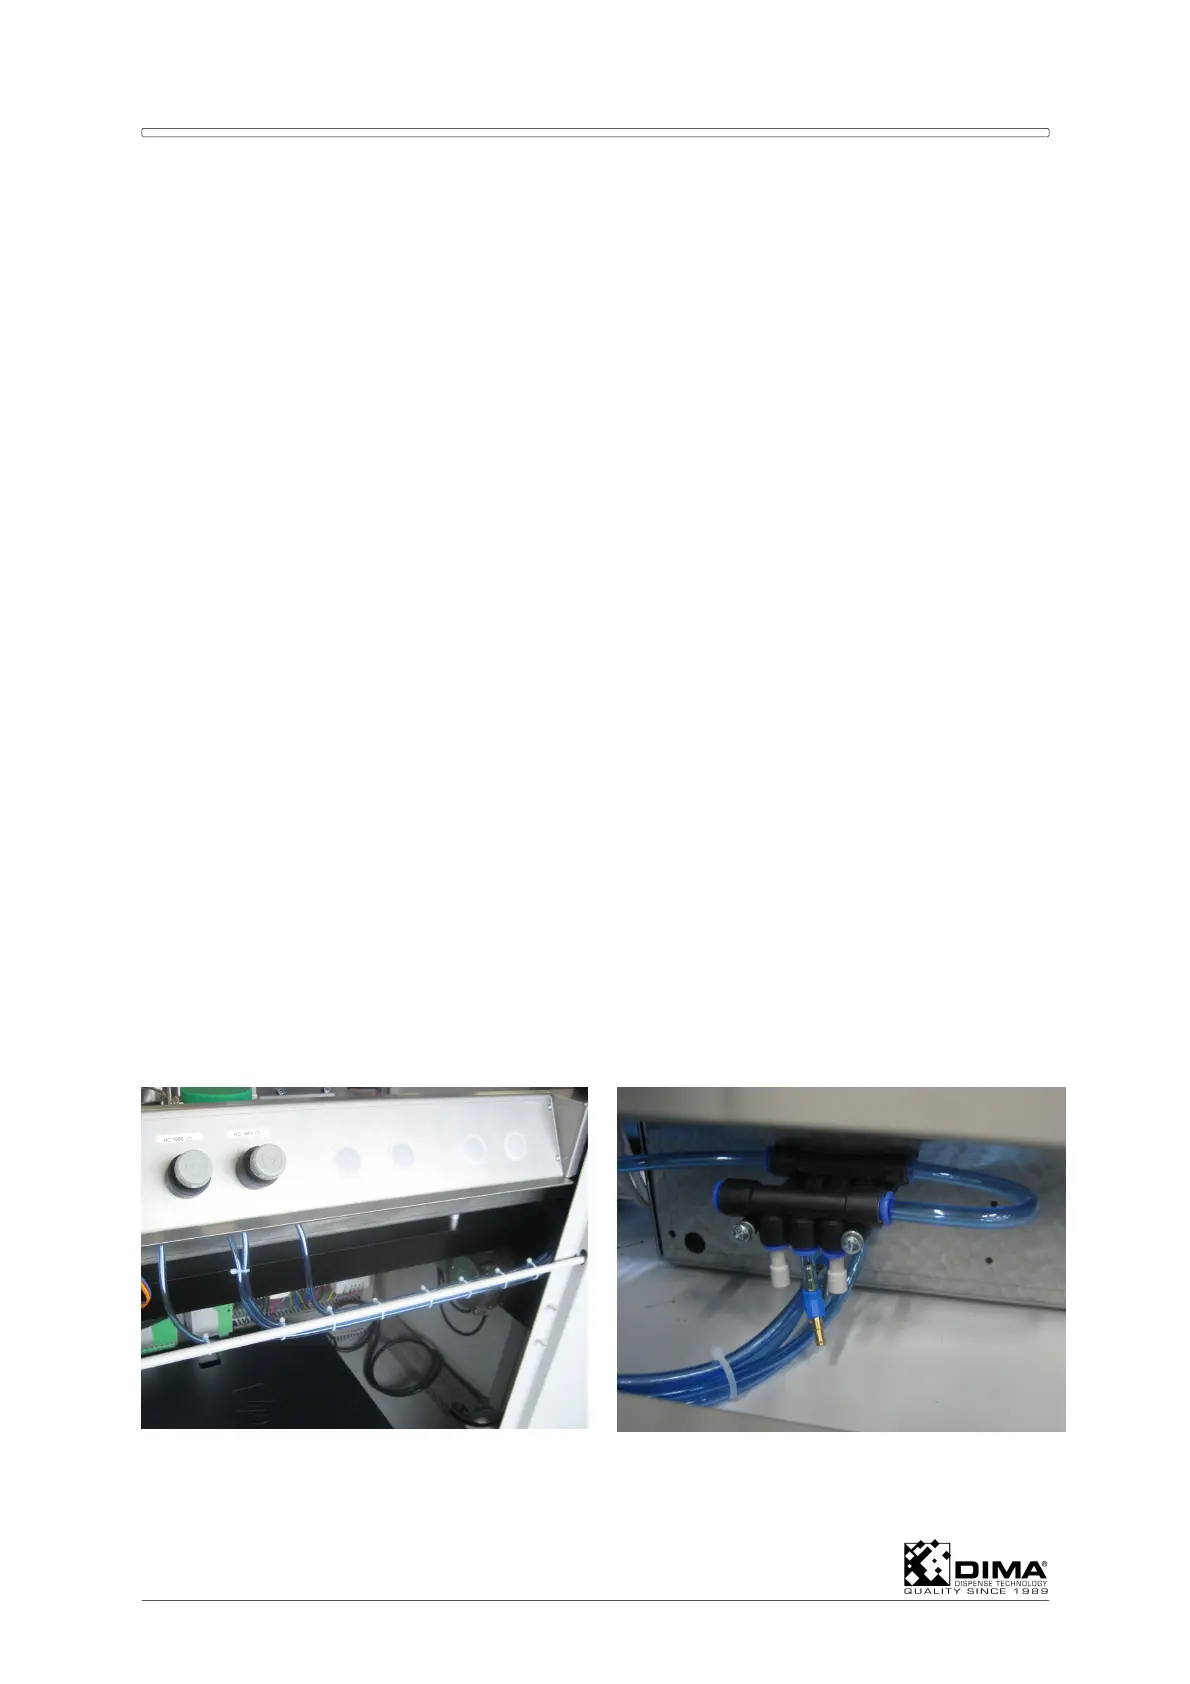
4.6.2 Installing Option HC-1050/ HC-1051
This means installing the HC-1050 and/or HC-1051 Pressure Reducing Valves in the front
panel and Sensors in the rear bottom compartment of the machine. First install all 1050
Pressure Reducing Valves you need from the left to the right on the front panel and then all
the 1051’s you need. The parts needed to install this option all are delivered as one kit.
1. Remove the upper front cover of the HYBRID. Remove the plastic closure from the
opening in the front panel in which you want to install the Pressure Reducing Valve and
mount the Pressure Reducing Valve. Guide the air lines on the right horizontally to the
rear compartment and fasten them onto the horizontal bar with some tie wraps.
2. Connect the input air line of the Pressure Reducing Valve to a free position of the
distributor in the left rear in the bottom of the machine.