HYBRID Coater Service Manual ver1.1 Chapter 4
37
4.8.2 Adjusting the Conveyor Level and Height
When present on a HC-100 or HC-200 the conveyor of either type HC-1160 or HC-1170 are
already adjusted to the correct height and level at the DIMA factory.
Later on when adjusting the height and level of the conveyor is necessary, the procedure for
both the HC-1160 and the HC-1170 is done in the same way. Set the same height in the X
axis as well as in the Y-axis, how much depends on the accuracy you want over the total
width and length of the working area you need. Measure at the surface of the belt or at the
upper side of the conveyor pins at the locations A till F.
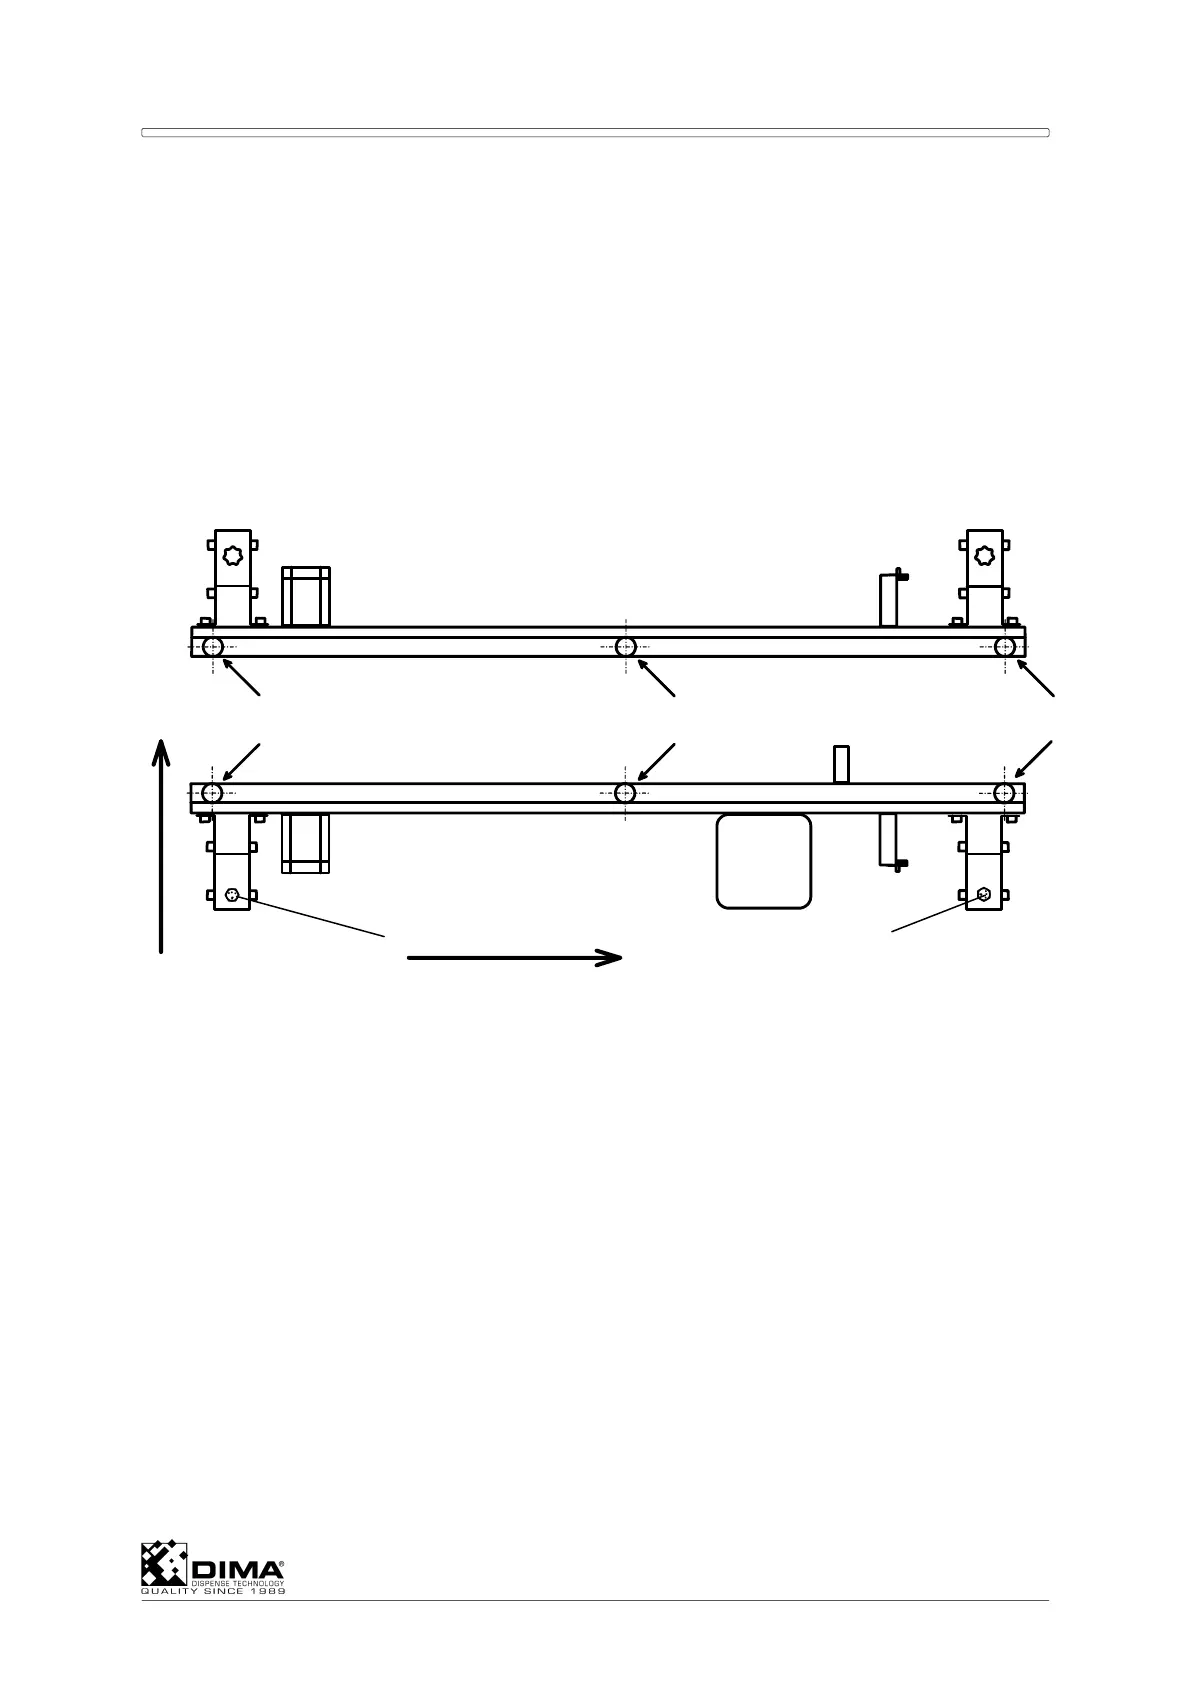
A Set the front rail accurate in the X axis with the camera and tighten both bolts (#1) on
both ends.
Front Conveyor Rail
Rear Conveyor Rail
A
B
C
D
EF
X axis
Y-axis
B Use the Coating Head to measure the height difference as follows. Go down with the Z
axis and touch point C of the front rail. Set this point fixed by Product level then
Calibrate then OK. Select Move height and set this on 0.5mm and press Apply. Use a
feeler gauge to check this gap. Move in this same height to the other measuring points
first B and C. Be cautious not to touch the rails. With the feeler gauge you can check the
gap at these points and adjust the height within the limits. Then proceed to the rear rail
and measure the same on points D, E, and F.
NOTE: For moving the Z axis over large distances use the track-ball mode, but when
getting close to the rails use the arrow buttons on the keyboard.
C There are two possible places to adjust the rail in height. First the nuts (#2) which are
placed vertically and then the bolts (#3) which are placed horizontally. To adjust the
height first loosen these nuts, adjust the height and tighten them. When insufficient, do
the same with the bolts (#3). Perform this first on the fixed front rail so you know this is
accurate and then the movable rear rail.
1
1