Removing and Replacing the Front Panel Assembly
4-58 72A-1230 Rev. F
July 22, 2005
Removing and Replacing the Front Panel Assembly
The Front Panel Assembly is located on the front of the instrument.
The Front Panel Assembly must be removed in order to replace it and to gain
access to the Main Reference Assembly, the Guard Front Panel Board, and the
I/O Protection Board. Keep screws that are removed together in a safe location
for re-assembly.
Take the following steps to remove and replace the Front Panel Assembly:
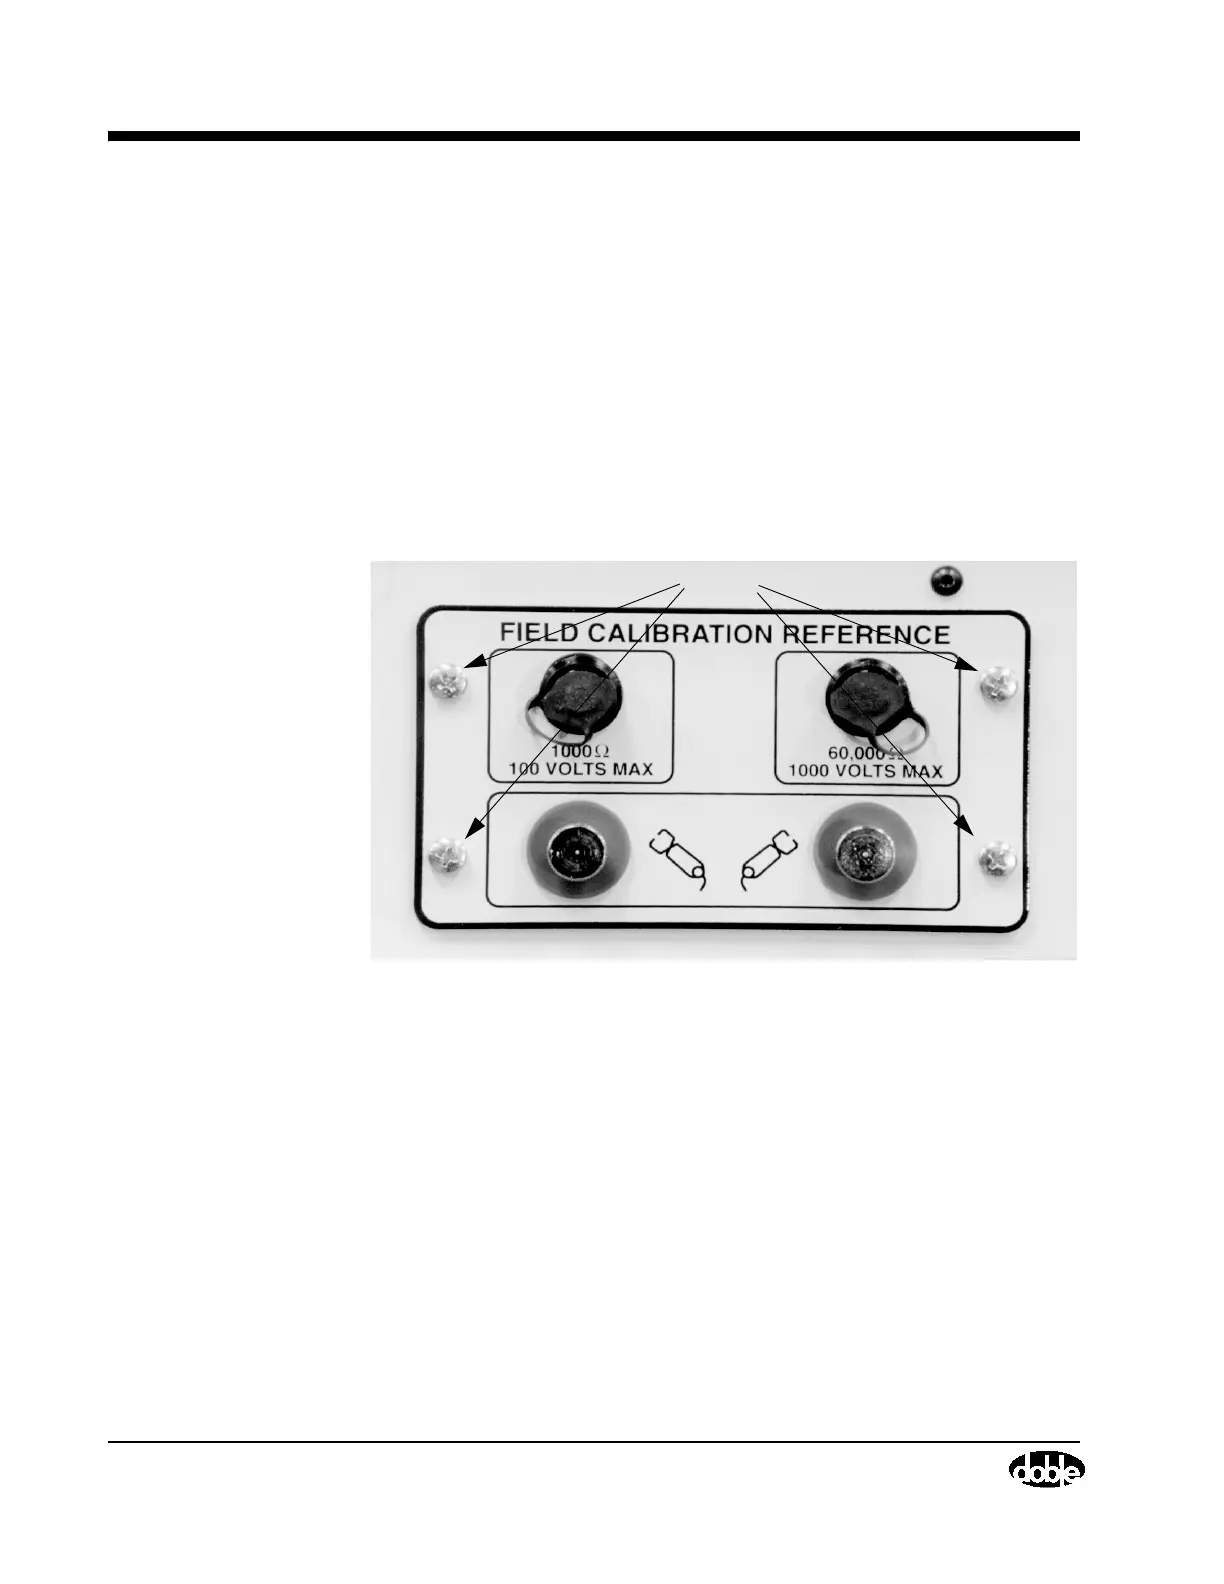
1. Unscrew four captive screws (Figure 4.28) that secure the optional Field
Calibration Reference, if present, to the Front Panel Assembly using a
Phillips-head screwdriver.
Figure 4.28 Field Calibration Reference, Screw Locations
2. Pull out the Field Calibration Reference.
3. Remove the screws (Figure 4.29) on the cover of the Main Reference
Assembly using a Phillips-head screwdriver. Then, lift off the cover.
4. Remove two screws inside the box (see Figure 4.29).
Screws