Replacing the Fan
4-94 72A-1230 Rev. F
July 22, 2005
Replacing the Fan
The fan is part of the Amplifier Assembly, which is shown in Figure 4.23
on page 4-47. Take the following steps to replace it:
1. Remove the Amplifier Assembly from the instrument by following Steps
1-8 in ”Replacing the Amplifier Assembly” on page 4-63.
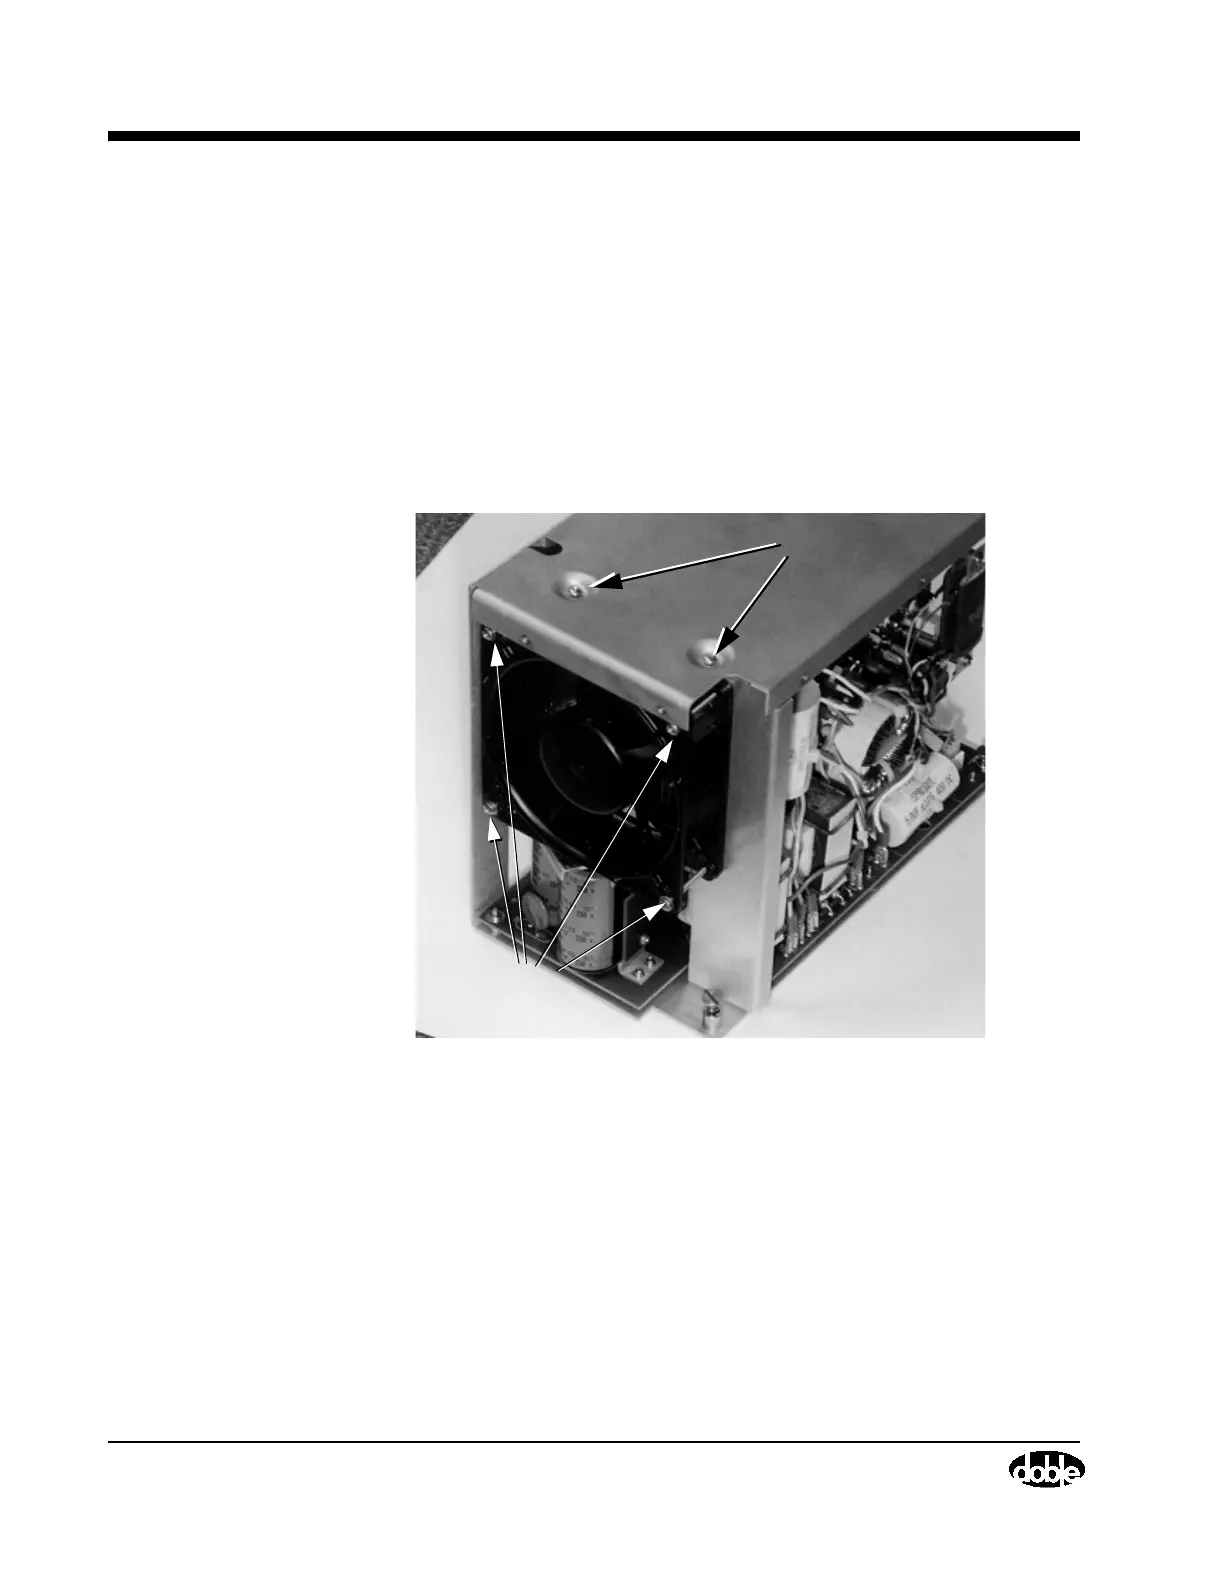
2. Remove the Amplifier Assembly cover by removing the two screws that
hold it in place (Figure 4.54) using a Phillips-head screwdriver. Then, lift
the cover off.
Figure 4.54 Amplifier Assembly Cover, Fan Screw Locations
3. Remove four screws, with washers, at the corners of the fan (Figure 4.54).
4. Release two connectors at the top of the fan.
5. Cut the tie wrap holding the connectors in place using a pair of wire
cutters.
6. Unpack the replacement fan and insert it into the Amplifier Assembly.
7. Connect the two connectors.
8. Replace the four screws and washers at the corners of the fan.
Screws
Fan Screws