Removing and Replacing the Front Panel Assembly
4-60 72A-1230 Rev. F
July 22, 2005
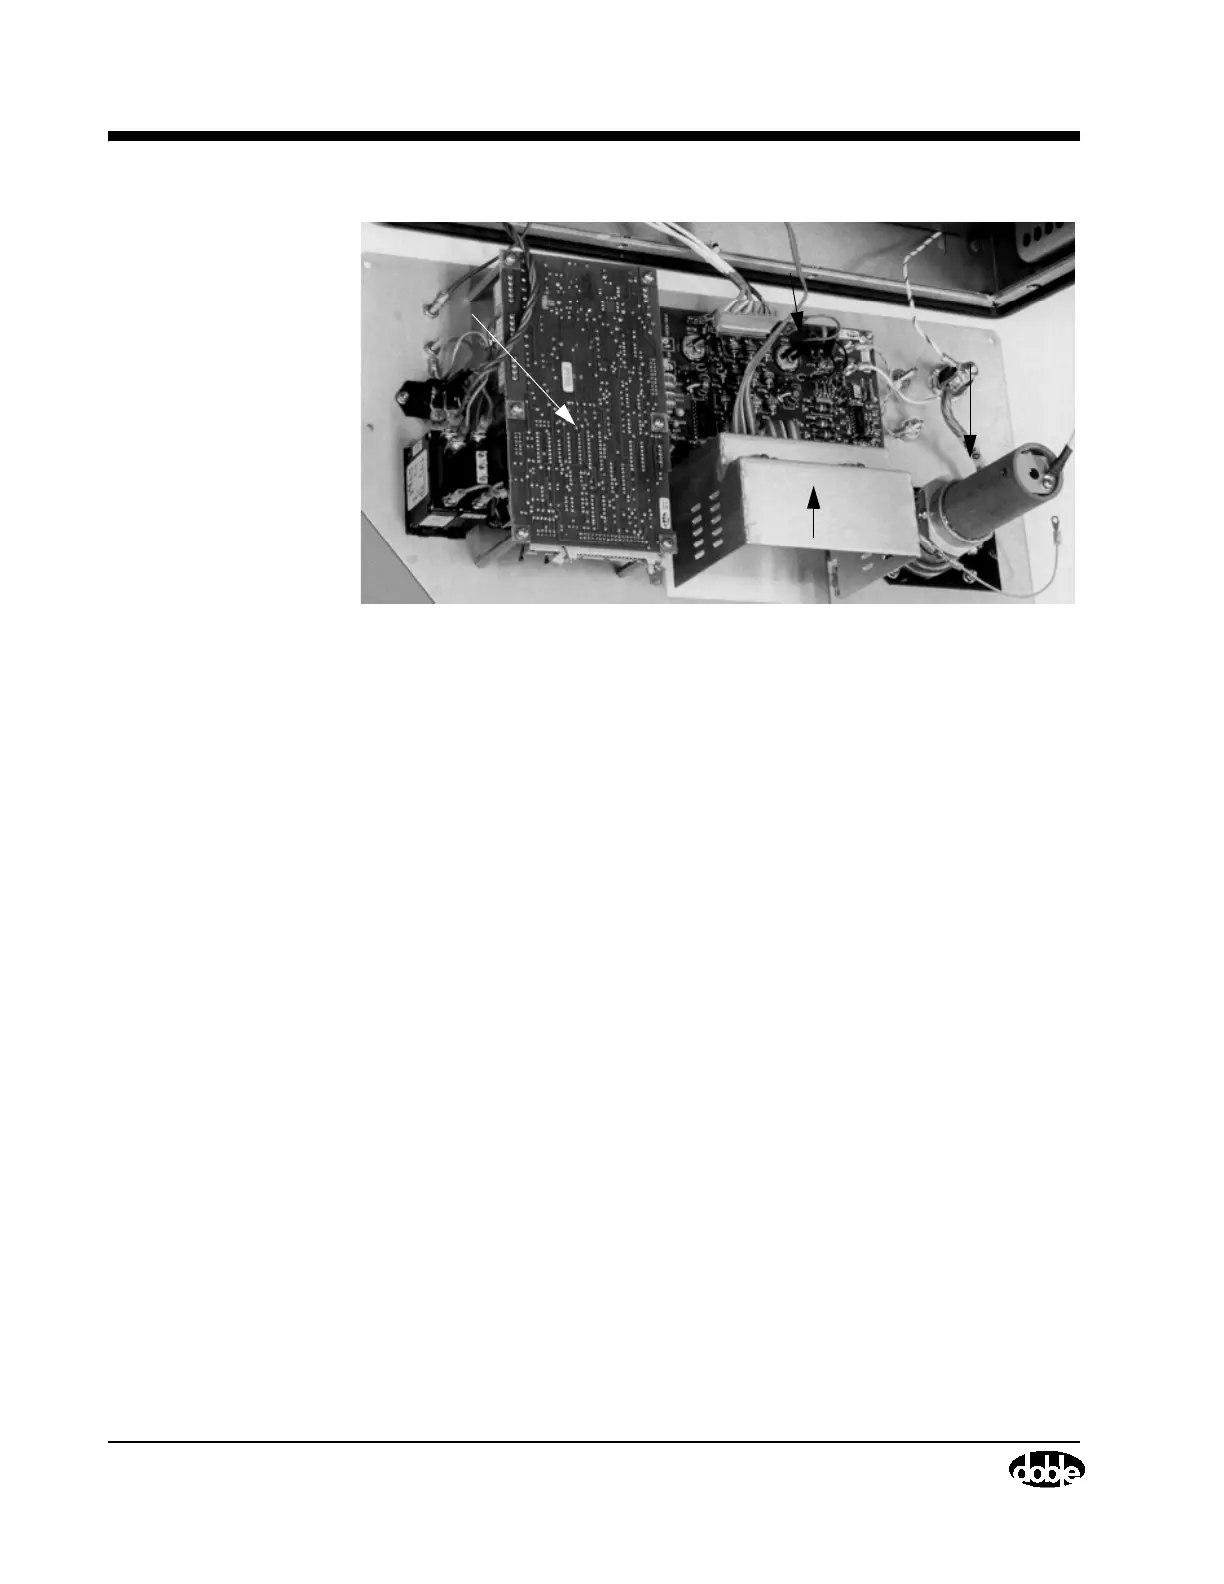
Figure 4.30 M4100 Interior View, Front Panel Removed
10. To reinstall the Front Panel Assembly, first unpack the replacement unit
(or locate the existing one). Position it on the front of the instrument.
Reconnect the two ribbon cables coming from the I/O Protection Board.
11. Replace the ten self-locking screws that hold the front panel in place using
a #8 Torx screwdriver.
12. Replace one nut (Figure 4.29 on page 4-59) located behind the HV
Pothead using a nut driver.
13. Replace the Main Reference Assembly cover and secure it by replacing
four screws using a Phillips-head screwdriver.
14. Replace the Field Calibration Reference and secure it by tightening four
captive screws (Figure 4.28 on page 4-58) using a Phillips-head
screwdriver.
HV Pothead
Field Calibration
I/O Protection Board
Guard Front Panel Board
Box Chassis