Installation Control Unit IV Reference Manual
2-6 529-0004 Ver.3
2.4.2 Using the Workabout to set up the Control Unit
Electroline’s tool for programming addressable devices is a software that runs on a hand-
held computer called the Workabout. Normally, the Workabout is used only to run the
Electroline software, but it also includes a terminal emulation mode that can be used to
access the Control Unit’s setup menu. Follow the instructions in this section to use the
Workabout as a setup terminal.
To set up the Workabout’s communication parameters:
1. If the Electroline EAS-PMW software is running on the Workabout, exit the program by
pressing <∪+X>. The main screen with the icons should appear.
2. Select the Comms icon (scroll through the icons with the <→> key) and press <Enter>.
3. Press <Menu> and use the <→> key to go to the Scrn menu.
4. From the Scrn menu, choose Options to open the emulation options window. Select On
in the Local echo field by pressing the <→> key, and then press <Enter>.
5. Press <Menu> again, and use the <→> key to go to the Spec menu.
6. From the Spec menu, choose Port to open the port settings window. Set the port’s baud
rate to 9600, and choose port A by pressing the <→> key.
7. Press <Enter> to return to the terminal emulation window.
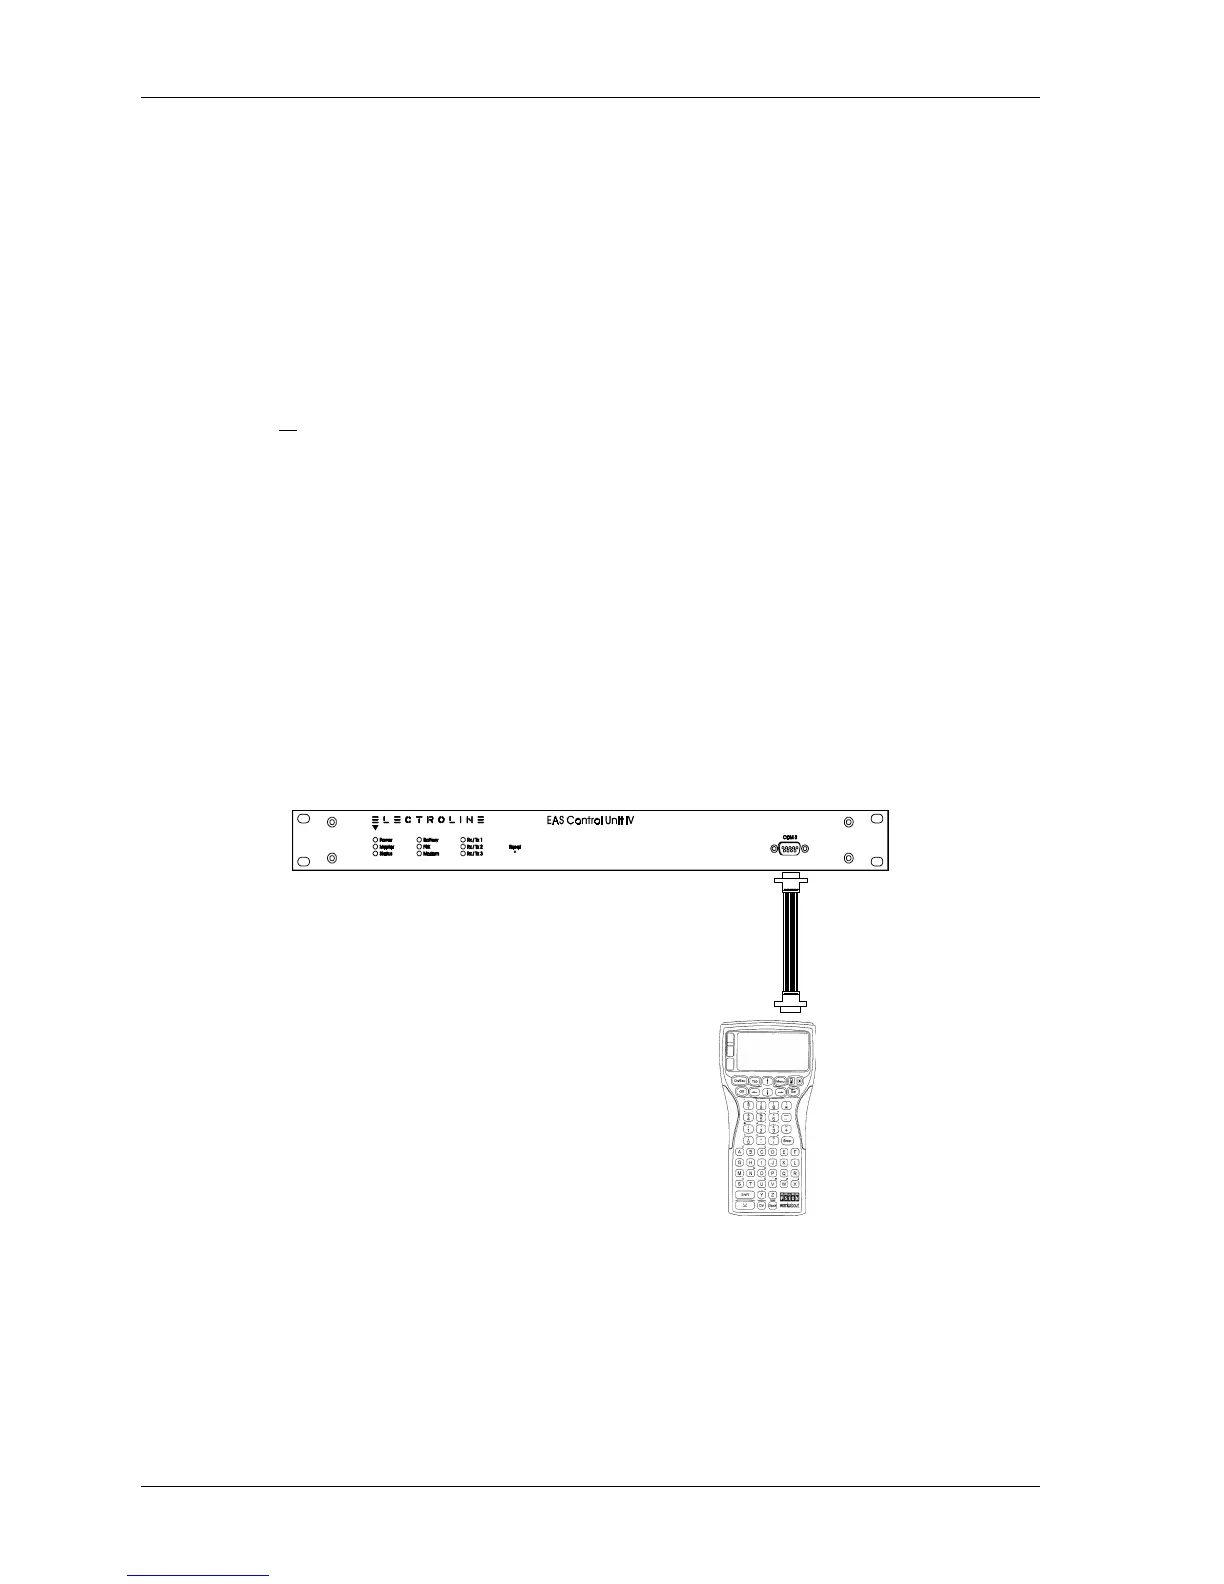
8. Using a standard RS-232 cable, or the 24” DB-9 to DB-9 cable (#WKB-PAC2) that
comes with the Workabout, connect the RS-232 port on the Workabout to the COM 3
port on the Control Unit.
DB-9 flat cable
(or standard RS-232 cable)
Connect to RS-232 port on
Workabout
Figure 2-2: Connecting the Workabout to the Control Unit’s COM 3 port for setup
You are now ready to log on to the Control Unit’s COM 3 port. See Chapter 3 for detailed
setup instructions.