Connecting add-on devices multi N/C 2100S
44
3. Connect the analyzer to the power supply in accordance with the user manual.
4.
Connect the serial data cable supplied to the "sampler" interface at the equipment
backplate of the analyzer. (12 in
Fig. 17 p. 29).
Connect the other end of the data cable to the RS 232 interface of the sampler (see
sampler user manual).
Connect the waste hose supplied to the wash cup of the sampler and to the waste
canister of the analyzer.
Place the sample tray and the wash cup onto the space provided.
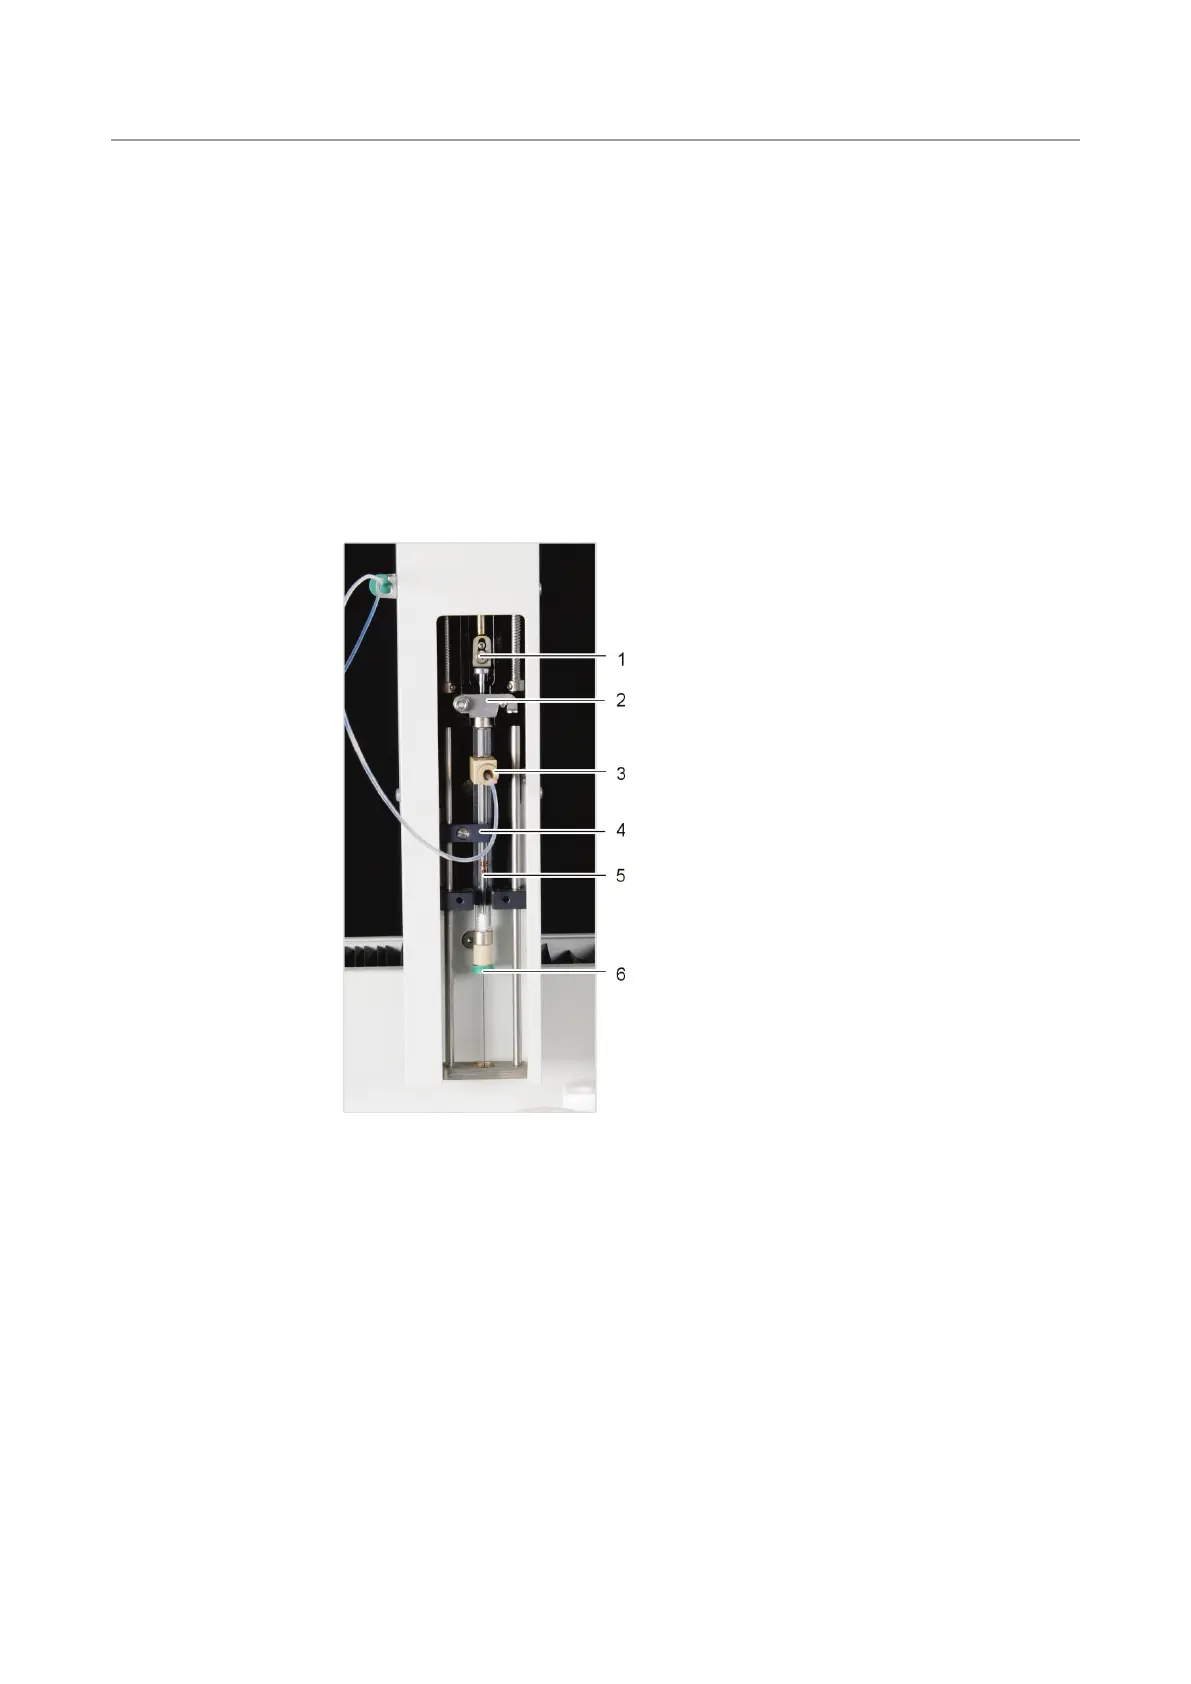
Install the syringe as follows:
1. Remove the appropriate syringe (without
scaling, with NPOC gas connection) from its
packaging.
Connect the syringe to the NPOC hose (3
for multi N/C 2100S pharma).
Slide the septum supplied (6) onto the
syringe cannula up to the union nut.
: The septum guarantees the system
tum-free lock during
Insert the syringe into the syringe adapter
and close the bracket (2).
Secure the syringe piston with the lock screw
(1).
Close the locking lever (4) above the syringe
cylinder (5) and press it slightly from below
against the syringe adapter.
7. The syringe volume is specified on the syringe and you must later select it in
multiWin using the menu command CONFIGURATION EDIT OPTIONS in the window
O
PTIONS TAB ANALYZER COMPONENTS in the group SYRINGE in the list field SIZE.
Check the configuration via the menu command I
NSTRUMENT SYSTEM INFORMATION in the
window
SET-UP INFO. If necessary, modify the configuration:
1. Exit the program multiWin.
2. On the windows user interface start under S
TART PROGRAM FILES MULTIWIN
MULTI
WIN SET-UP TOOL the SET-UP TOOL.
3. In the list S
AMPLER select the sampler type
4. Exit the
SET-UP TOOL with [CREATE].
5. Check the configuration in the window
MULTIWIN SET-UP TOOL.
Installing the syringe
configuration
 Loading...