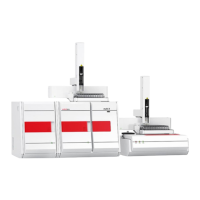
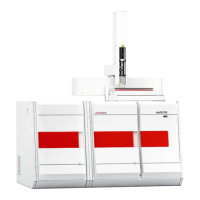
multi N/C 2100S Operation
61
• Start the measurement by clicking the button [S
TART F2] and follow the
instructions of the control and analysis software.
6. Flush the syringe several times with measuring liquid.
7. Draw in the sample free from bubbles.
8. Inject the sample once prompted by the control and analysis software.
For septum lock (TIC lock):
• Insert the syringe cannula fully into the corresponding septum lock and inject the
sample.
• After the injection you can remove the syringe immediately.
For septum-free lock (lock for TC/TN determination):
• Move the lock switch to the back.
• Insert the syringe and septum into the lock until it is tight.
• Inject the sample.
• Hold the syringe for at least another 10 sec on the lock to prevent a loss of
measuring gas.
• During each injection hold the syringe in the lock for the same period of time to
achieve reproducible results.
• Close the lock immediately after removing the syringe by moving the switch
forward.
At the end of the measurement the results appear in the analysis report or in
the selected analysis table.
6.4.2 Measurement with sampler
NOTICE
After transport or prolonged storage of the analyzer the sampler must be readjus
ted
1. Using the menu command METHOD NEW create a new method or load an existing
method.
To do so open via the menu command M
ETHOD LOAD the database window METHOD
SELECTION
,
highlight the desired method and confirm the selection by clicking the
button [OK].
2. In the window SYSTEM STATE check the following entries:
• Visual bank – OK (not for multi N/C 2100S pharma)
• if applicable CLD or, if applicable, ChD - OK
• Gas flow - OK
• Temperature - OK
Note:
If one of the entries is incorrect (shown in red), carry out a fault finding exercise in
accordance with the notes in section "Fault removal" p. 91.
 Loading...