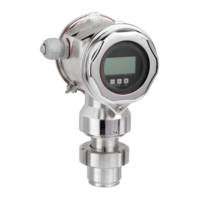
OXY5500 Optical Oxygen Analyzer BA02195C
B
–10 Endress+Hauser
Removing and Replacing the Oxygen Probe
Use the following instructions to remove and replace an oxygen probe on the
OXY5500.
Tools/parts
• OXY5500 replacement oxygen probe
• Adjustable Crescent wrench
• Philips screwdriver
• 5/32 in. Hex driver
• 7/16 in. Open-end wrench
• 1/2 in. Open-end wrench
Removing the oxygen probe
1. Purge the analyzer by allowing 99.9999% pure nitrogen flow
through the system for 30 minutes.
2. Shut off gas flow to the analyzer.
3. Turn off power to the analyzer.
4. Loosen the enclosure screws and remove the clamps to open the
enclosure door.
5. Using an adjustable wrench, loosen the cable gland cap on the panel
by turning “up” toward the analyzer. Do not remove cable gland cap.
Refer to Figure B–10.
Refer to “Spare Parts” on page A-6 for a complete list of
replaceable probe parts and part numbers.
 Loading...

