Adjustment
4.1 Over View
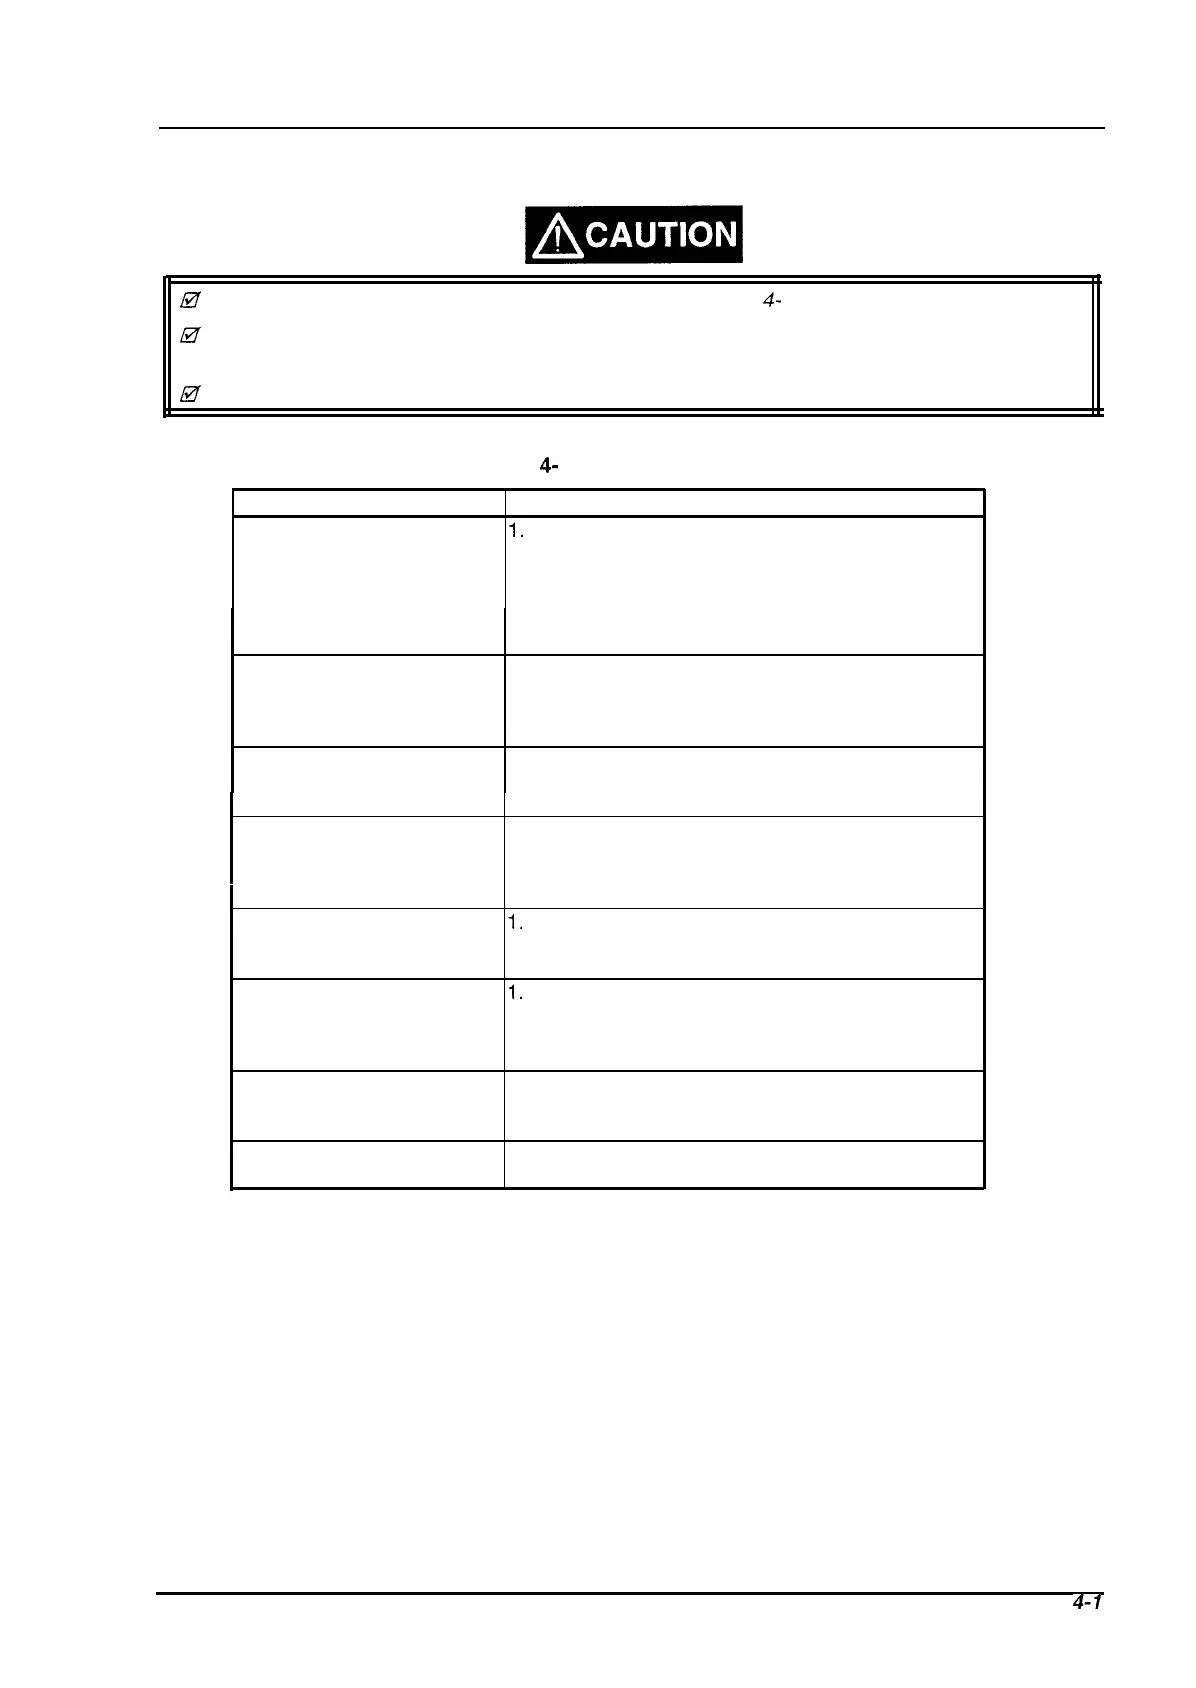
This section describes adjustmenta required after disassembling and assembling the printer.
a
Adjustment must be performed in the order numbered in Table
4-
1.
U
Be sure to leave the ink cartridges installed in the CR unit when returning the printer to the
customer.
U
Use 720 dpi exclusive paper when printing the adjustment pattern.
Table
4-
1 Required Adjustment
Replaced Unit/Part
Adjustment Menu
Replacement of the printer
1.
EEPROM Clear (Refer to Section 1.4.3.)
mechanism or
2. Head Voltage Write
MAIN board
3. BK-M Hight Adjustment
4. Head Gap Adjustment
5. Uni-D Adjustment
6. Bi-d Adjustment
Black head replacement
1. Head VH voltage input
2. Black Head Angular Adjustment
3. BK-M Hight Adjustment
4. Head Gap Adjustment
Black head removal
1. Black Head Angular Adjustment
2. BK-M Hight Adjustment
3. Head Gap Adjustment
Color head replacement
1. Head VH voltage input
2. Color Head Angular Adjustment
3. BK-M Hight Adjustment
4. Head Gap Adjustment
Color head removal
1.
Color Head Angular Adjustment
2. BK-M Hight Adjustment
3. Head Gap Adjustment
CR unit Replacement
1.
Platen Gap adjustment
2. Head Voltage Write
3. Uni-D Adjustment
4. Bi-d Adjustment
CR unit removal or CR unit 1. Platen Gap adjustment
disassemblina
2. Uni-D Adiustment
3. Bi-d Adjustment
CR motor removal or CR 1. Uni-D Adjustment
motor disassembling
2. Bi-d Adjustment
Note)
The adjusting program doesn’t run without inputting the customer data first.
Rev. C
4-l

 Loading...


