EPSON Stylus COLOR 440, 640, and 740 Chapter 5 Adjustments
119
12.
If the
ap is ad
usted correctl
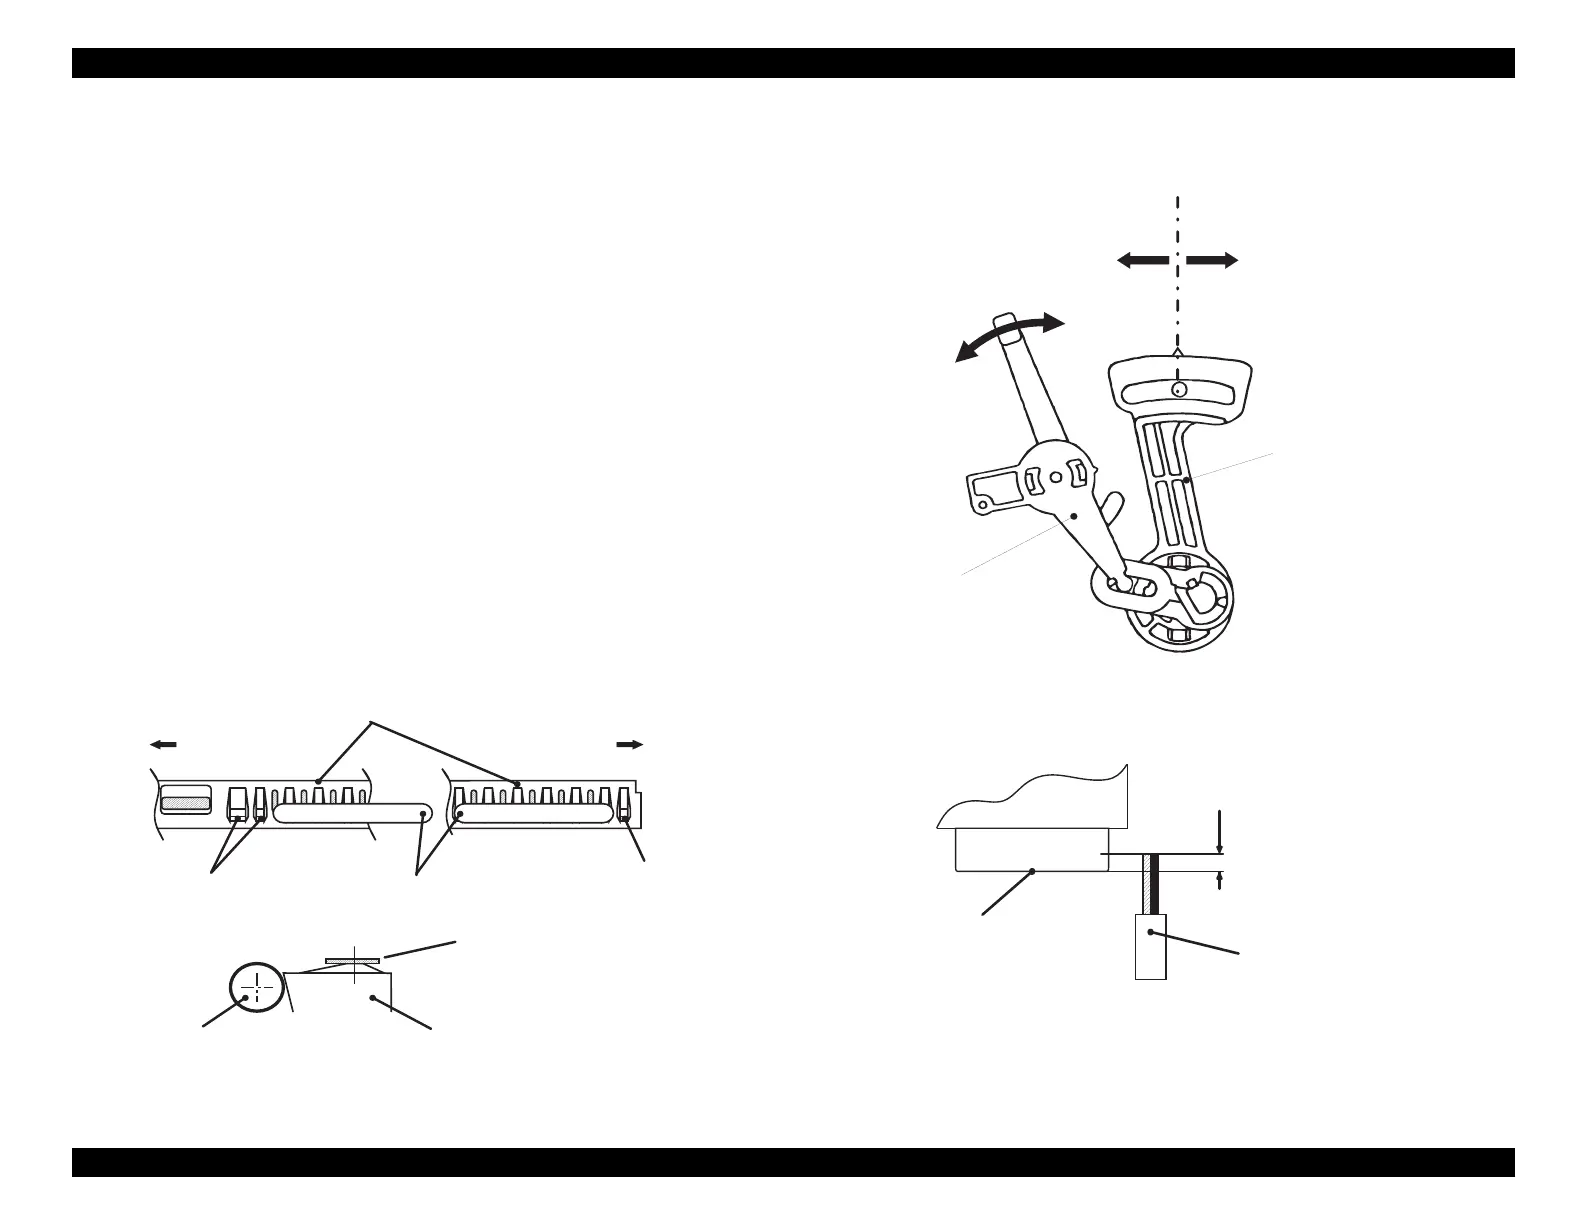
, move the ri
ht parallelism
ad
ustment bushin
one notch toward
ou
the
ap will be wider
.
Fixing the Parallelism Adjustment Bushing
13.
Fix the ri
ht and left parallelism ad
ustment bushin
s with No.1
screws.
After completin
this ad
ustment, check to make sure the printhead
makes proper contact with the head cleaner blade, as described below.
1.
Extend the cleaner blade b
rotatin
ear 67.2.
This is the lar
e
ear on the left side of the printer. See Fi
ure 4-6.
2.
Move the carria
e so it’s next to the cleaner blade, and make sure
the overlap between the printhead and the cleaner blade is at least
1/16 inch
0.5 mm
. If not, ad
ust or replace the blade. See Fi
ure
5-3.
3.
Retract the cleaner blade b
rotatin
ear 67.2, and return the
carria
e to its home position.
Figure 5-1. Gauge Placement
Figure 5-2. Parallelism Adjustment Bushing
Figure 5-3. Contact Between Printhead and Cleaner Blade
Left
Platen
R ight
(H P side)
D o not place gauge
on the left 2 ribs
Thickness G auge
D o not place gauge
on the rib farthest to
the right
Paper Feed R oller
Platen
Place the gauge on the flat part
of the ribs, and align the center of
the gauge lengthw ise w ith the center
of the ribs.
C enter
Position M ark
Forw ard
(w ider gap)
Backward
(narrow er gap)
R ig h t P a r a lle lis m
Adjustm ent Bushing
Platen G ap
Lever
(0 )
(+ )
Printhead
Nose
H ead C leaner B lade
O verlap = 1/32 inch (0.5 m m ) or m ore
CR
 Loading...


