EPSON Stylus COLOR 440, 640, and 740 Chapter 4 Disassembly and Assembly
103
4.2.4.5 Removing the PF Motor
4.2.4.5.1 Stylus COLOR 740
NOTE: These instructions apply to the Stylus COLOR 740.
See the next page for the 440 and 640.
1. Remove the housin
.
Refer to Section 4.2.1.
2. Remove the left front panel.
Refer to Section 4.2.3.
3. Remove the waste ink pad assembl
.
Refer to Section 4.2.4.2.
4. Remove the board assembl
see Section 4.2.2
. Then disconnect
the PF motor connector
CN8
from the main board.
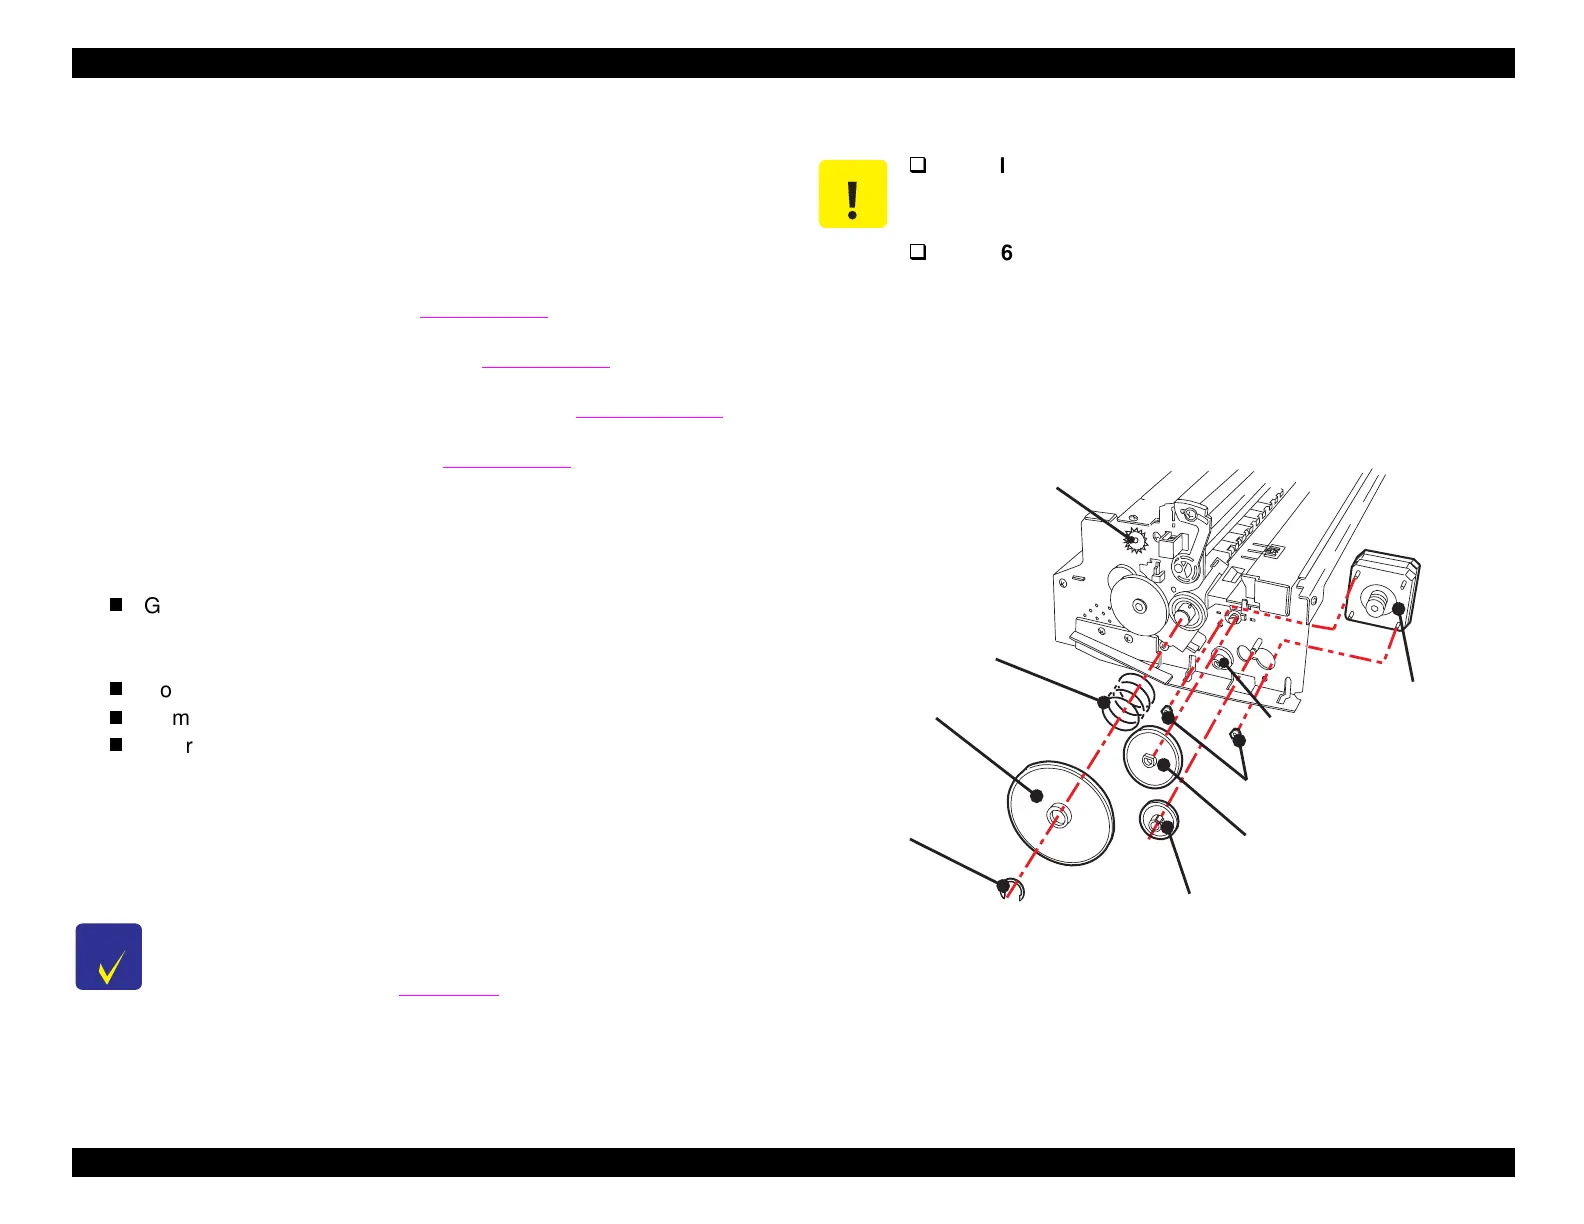
5. Remove the followin
ears located on the left side of the printer
mechanism:
Gear 67.2
Remove the rin
with tweezers or a flathead
screwdriver. Do not reuse this
ear; see the caution note
below.
Combination
ear 8.8,21.6
Combination
ear 8,14.4
Gear 36
6. Remove the 2 hexa
on nuts that secure the PF motor to the frame.
Slide the PF motor toward the front of the printer so that the motor’s
pinion
ear ali
ns with the lar
er hole in the frame, and remove the
PF motor.
See Fi
ure 4-13.
Figure 4-13.
Removing the PF Motor Assembly (Stylus Color 740)
CHECK
POINT
During reassembly, be sure to route the PF motor cable
through the right cable hook and the right cable holder, as
seen from the rear (see
Fi
ure 4-3
).
CAUTION
Handle all the gears carefully, as you would a bearing
surface; do not damage or mar the teeth and grooves
of the gears.
Gear 67.2 cannot be pulled off its shaft without
deforming it very slightly. If you reinstall the same
gear, its deformation will cause poor print quality in
Microweave mode. Therefore, always replace gear
67.2, even if it has no obvious or visible signs of
damage.
C-Ring
PR M otor Assem bly
H exagon N ut
C om pression S pring 0.9
G ear 67.2
C om bination G ear 8.8,21.6
G ear 36
C om bination G ear8,14.4
G ear 34
 Loading...


