EPSON Stylus COLOR 440, 640, and 740 Chapter 4 Disassembly and Assembly
109
4.2.4.7 Removing the Carriage Assembly
1. Remove the housin
.
Refer to Section 4.2.1.
2. Remove the ink cartrid
es and the printhead.
See Section 4.2.4.1.
3. Loosen the timin
belt b
pushin
the timin
belt tensionin
mechanism inward.
See Fi
ure 4-11.
Then remove the timin
belt
from the CR motor.
4. Remove the timin
belt tensionin
mechanism b
pushin
it in far
enou
h to enable
ou to slide it out throu
h the notches in the
frame.
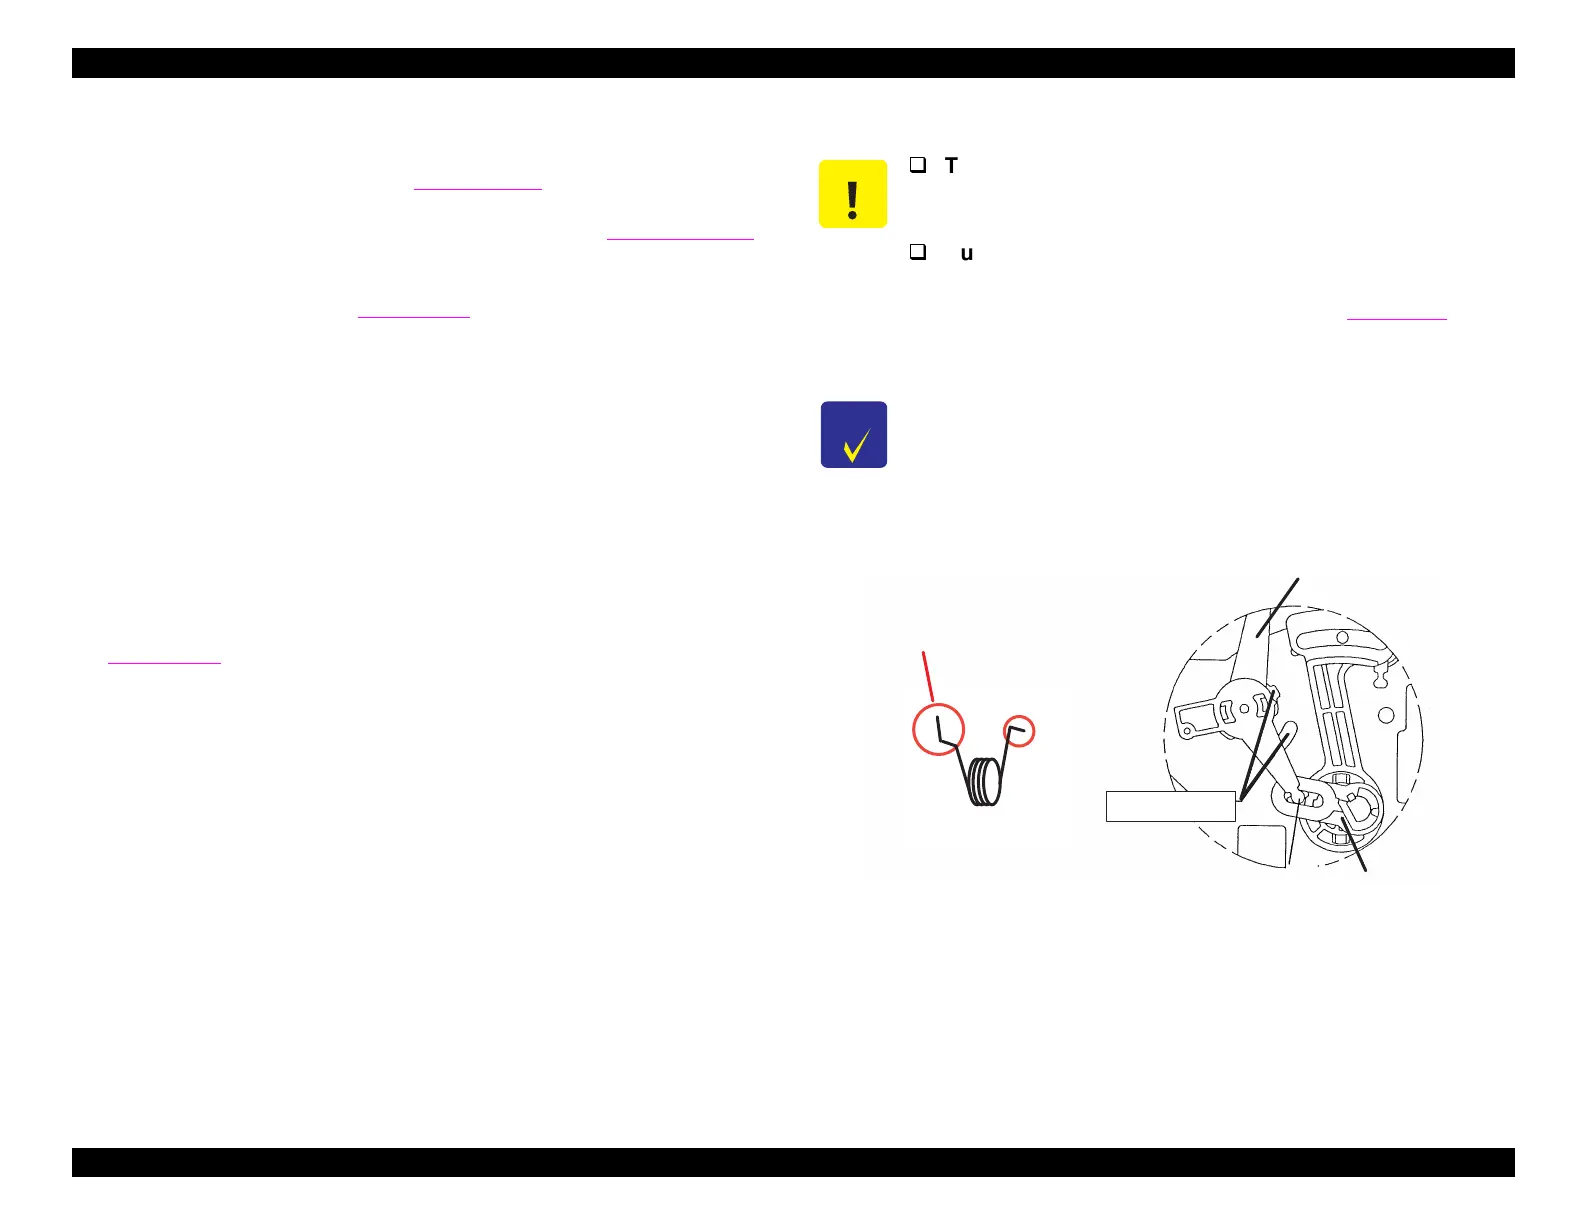
5. Remove the torsion sprin
inserted between the frame and the PG
lever. See Fi
ure 4-18. Release the hooks holdin
the PG lever in
place and remove the lever.
6. Gentl
pr
up the hook built into the PG lever support, and remove
the PG lever support and washer from the CR
uide shaft. See
Fi
ure 4-19.
7. Remove the screw
No.7
fixin
the ri
ht parallelism ad
ustment
bushin
. Rotate the bushin
so that its tabs fit into the notches in
the frame, and remove the bushin
.
8. Remove the carria
e with the CR
uide shaft.
Figure 4-18. Installing the PG Lever
CAUTION
The washer should be installed with its convex side
facing inward against the right parallelism adjustment
bushing.
During disassembly, the oil pad that lubricates the CR
guide shaft may fall out of the carriage unit. Be sure
to put it back during reassembly. See
Fi
ure 6-1
.
CHECK
POINT
When disassembling the right parallelism adjustment
bushing, mark its present position on the frame so that
you can omit gap adjustment after assembly.
PG Lever
PG Support Lever
E llip tic H o le s
In to th e P G
Lever
Insert this end through the
hole in the m etal fram e.
Torsion Spring
 Loading...


