EPSON Stylus CX4900/CX4905/CX5000/DX5000/DX5050/CX5900/CX6000/DX6000/DX6050 Revision A
DISASSEMBLY/ASSEMBLY Printer Section 132
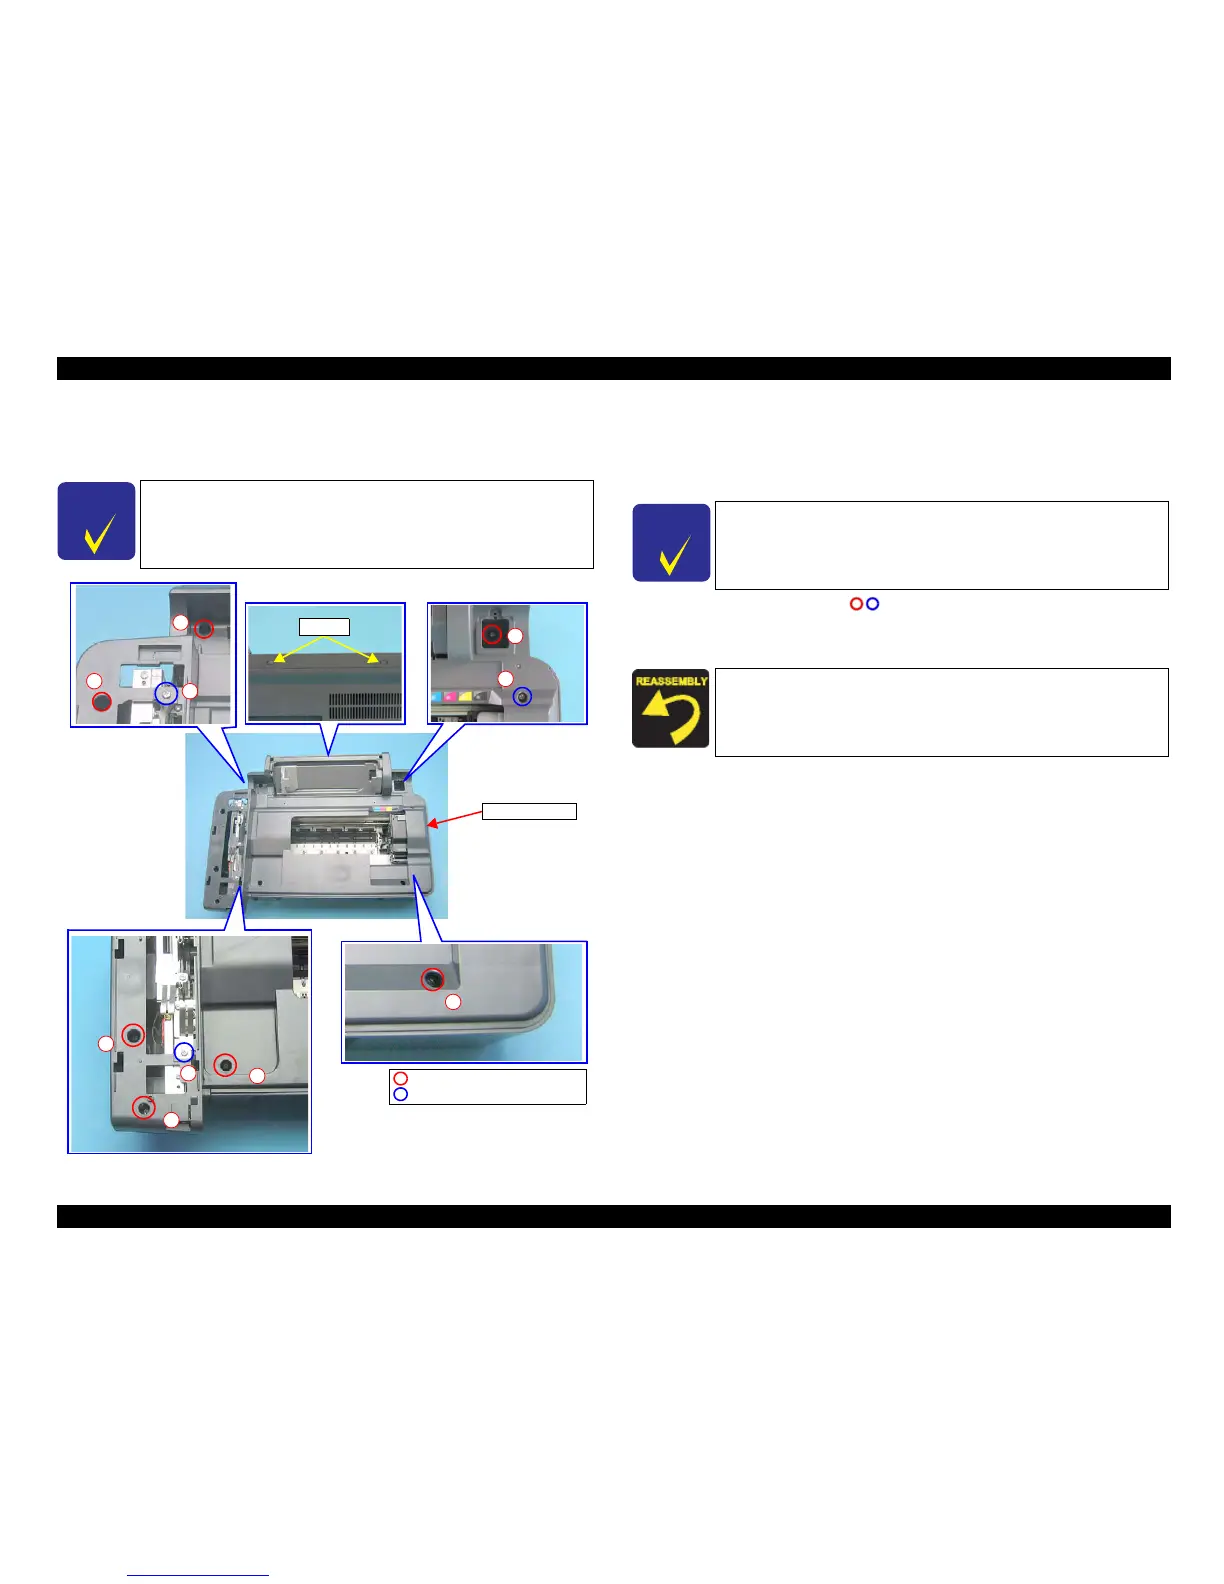
4.4.6 Housing, Upper
External view
Figure 4-9. Removing Housing, Upper
Part/Unit
that should be removed before removing Housing, Upper
Document Cover / Panel Unit / Scanner Unit
Removal procedure
1. Remove the screws (x10, ) that secure the Housing, Upper.
2. Release the tabs (x2) that secure the Housing, Upper with a flathead
screwdriver or a similar tool, and lift up to remove the Housing, Upper.
C H E C K
P O I N T
The removal procedures differ depending on the model.
For Stylus CX4900/CX4905/CX5000/DX5000/DX5050, see "4.6.2
Housing, Upper (p170)".
1
8
2
3
4
5
9
6
7
10
Tabs
C.B.P. 3x10 F/Zn (4±1kgfcm)
C.B.S. 3x6 F/Zn (7±1kgfcm)
Housing, Upper
C H E C K
P O I N T
Screw number 9 secure the Housing, Upper as well as a grounding
plate.
Tighten the screws in the order as shown in the figure. (T.B.D.)

 Loading...


