EPSON Stylus CX4900/CX4905/CX5000/DX5000/DX5050/CX5900/CX6000/DX6000/DX6050 Revision A
DISASSEMBLY/ASSEMBLY Printer Section 133
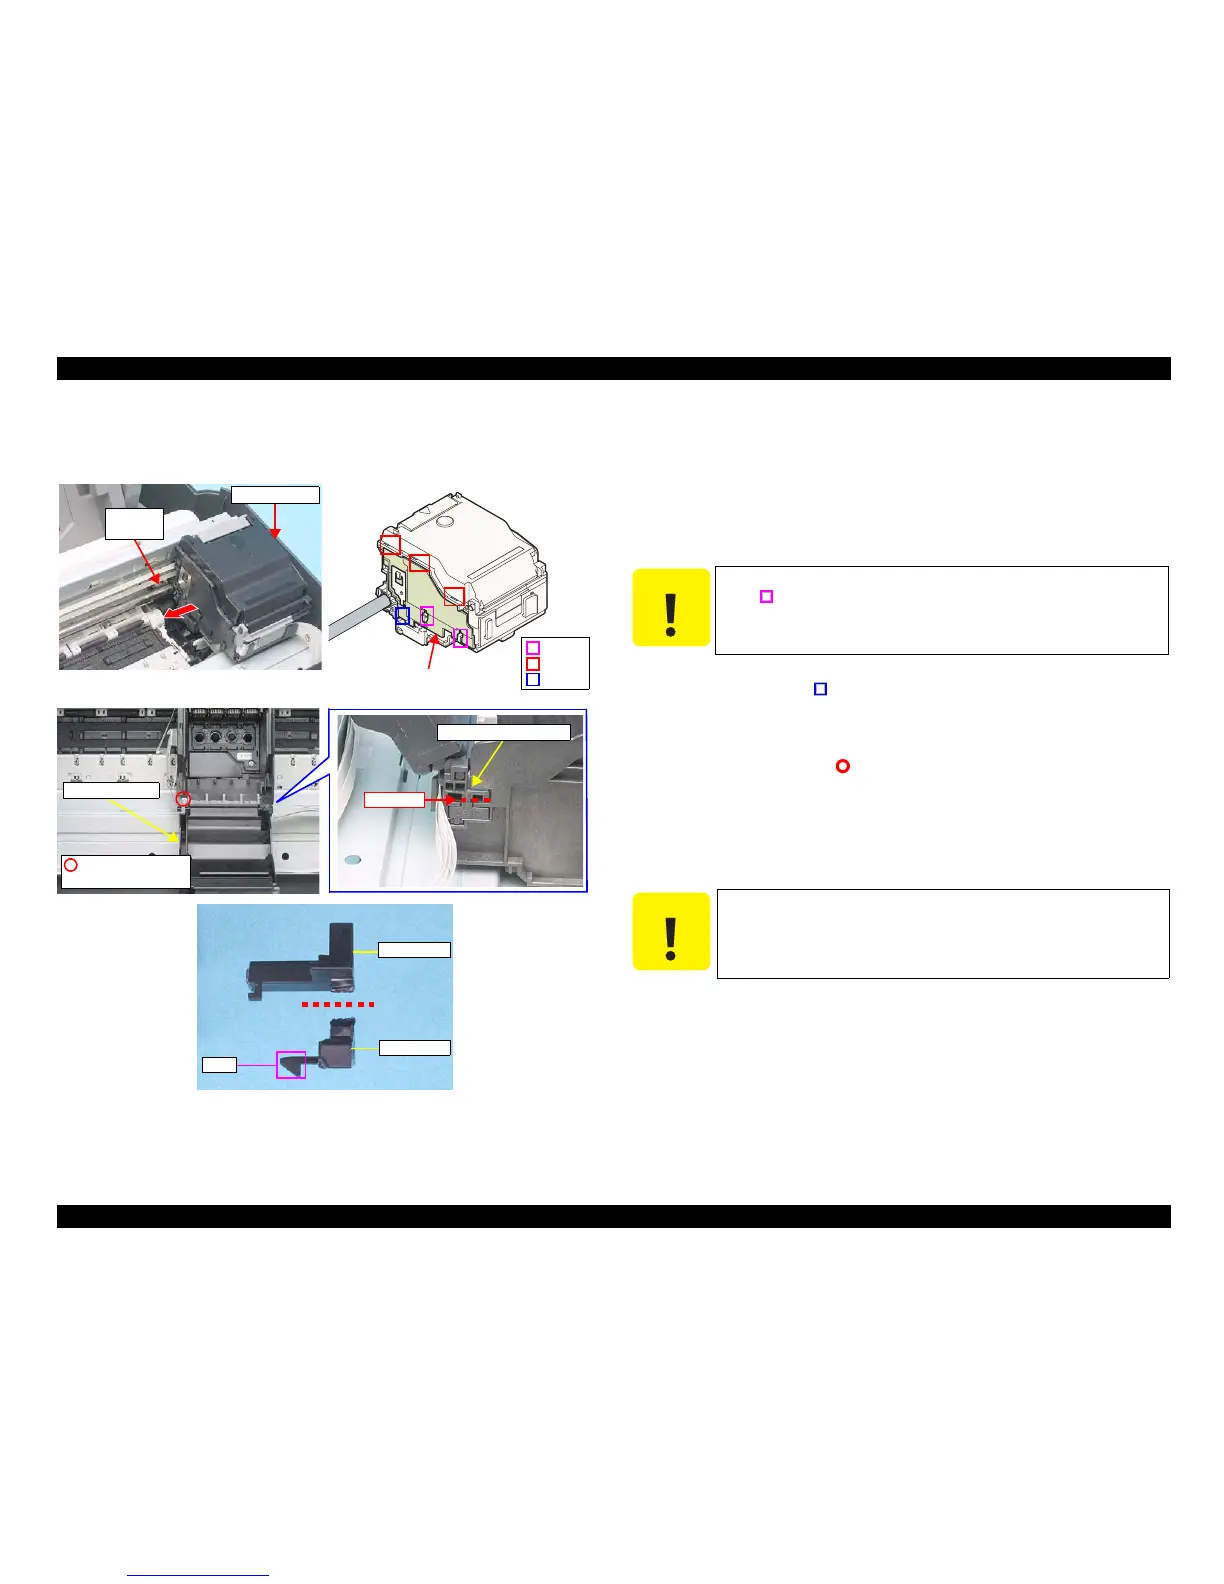
4.4.7 Printhead
External view
Figure 4-10. Removing Printhead
Part/Unit
that should be removed before removing Print Head
Document Cover / Panel Unit / Scanner Unit / Housing, Upper
Removal procedure
1. Release the Carriage Lock with a flathead screwdriver or a similar tool, and
move the Carriage Unit to the center of the printer.
2. Remove all the Ink Cartridges from the Carriage Unit.
3. Release the tab
(x1, ) on the downside of the Head Cable Cover with a
precision screwdriver (-), slide the Cover downward, and remove the Head
Cable Cover.
4. Open the cartridge cover.
5. Remove the screw (x1, ) that secures the cartridge cover.
6. Follow the steps below to remove the Cartridge Cover
Hinge.
6-1. Cut off the part of the Cartridge Cover Hinge with a nipper as indicated in
the figure.
6-2. Remove the upper part of the Cartridge Cover Hinge.
6-3. Release the tab and remove the lower part of the Cartridge Cover
Hinge.
7. Rem
ove the cartridge cover.
C.B.P. 2.5x8 F/Zn
(3±1kgfcm)
Cartridge Cover
Carriage Unit
Carriage
Lock
Tabs
Rib
Tab
Head Cable Cover
Cut here
Cartridge Cover Hinge
Upper part
Tab
Lower part
C A U T I O N
When performing the following work, be careful not to bend the
tabs (
) of the Carriage Unit.
C A U T I O N
The cut Cartridge Cover Hinge cannot be reused.

 Loading...


