EPSON Stylus CX4900/CX4905/CX5000/DX5000/DX5050/CX5900/CX6000/DX6000/DX6050 Revision A
PRODUCT DESCRIPTION Setting Modes 43
1.7 Setting Modes
1.7.1 Ink Level Check
1.7.2 Head Cleaning
Head Cleaning can be done from the operation panel to clear away head clogging.
St
ylus CX4900/CX4905/CX5000/DX5000/DX5050:
By pressing the [Ink] button for over 3 seconds.
St
ylus CX5900/CX6000/DX6000/DX6050:
By pressing the [Start] button.
1.7.3 Ink Cartridge Replacement
Stylus CX4900/CX4905/CX5000/DX5000/DX5050:
By pressing the [Ink] button.
St
ylus CX5900/CX6000/DX6000/DX6050:
Ink cartridge exchanging procedure starts by pressing the [Start] button.
Once the Scanner unit is opened and the [Start] button is pressed, the LCD shows
the following displays repeatedly.
1. Current remaining ink level
2. Promote replace Ink cartridges
3. Close the scanner unit and press Start button
When the Scanner Unit is closed and the [Start] button is pressed, the Carriage moves
to the standby position and the ink cartridge exchanging sequence is executed.
Automatically returns to the TOP screen after execution.
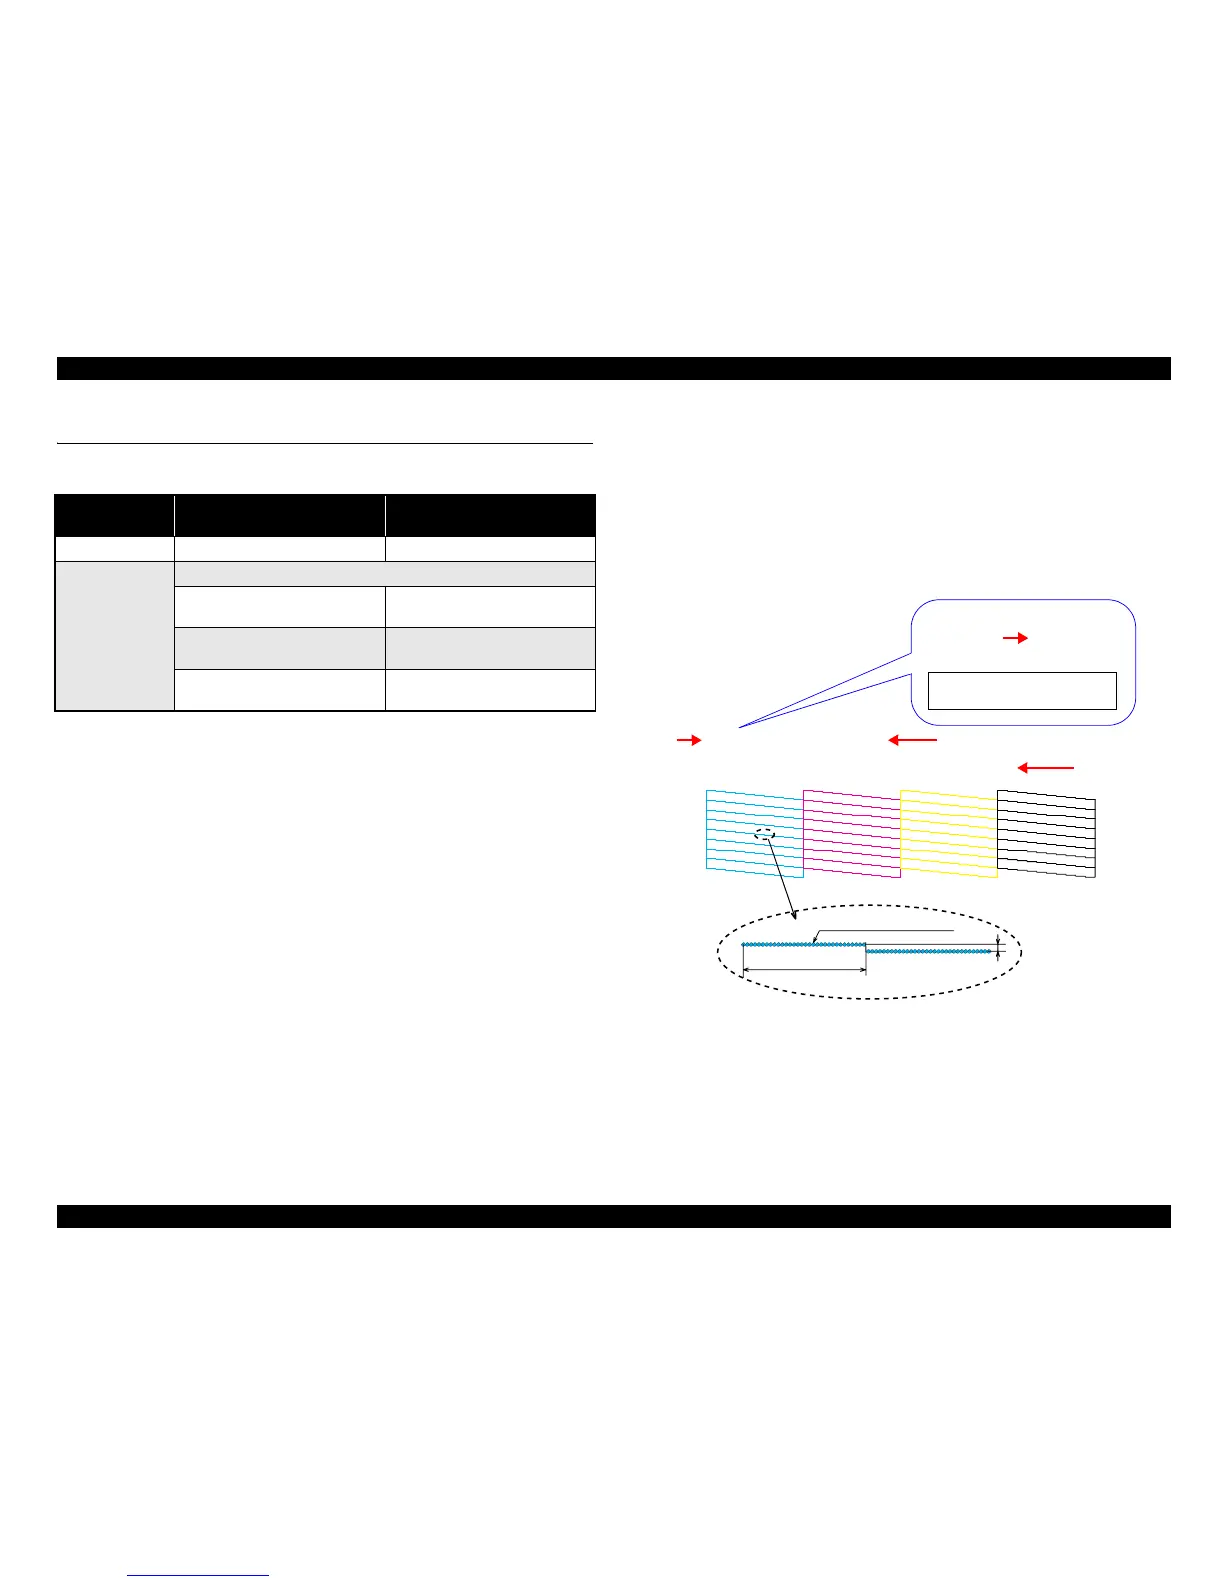
1.7.4 Nozzle Check Pattern Print
A nozzle check pattern can be printed to check for any ink clogging. Left ink quantity
of each color is also printed by the unit of 10%.
To activate this function, turn on this unit while depressing [Ink] button (Stylus
CX4900/CX4905/CX5000/DX5000/DX5050)/[Start] button (Stylus CX5900/CX6000/
DX6000/DX6050). After printing the pattern, this unit moves to ordinary standby
status.
The example of nozzle check pattern is explained below.
Figure 1-21. Nozzle Check Pattern (Stylus CX5900/CX6000/DX6000/DX6050)
Stylus CX4900/CX4905/CX5000/
DX5000/DX5050
Stylus CX5900/CX6000/DX6000/
DX6050
Ink level indicator LED LCD
Management and
viewing of ink
levels
Ink levels are 100% after initial charge
The Indicator shows Ink re
maining
by 4 steps, from 100% to Ink out
---
When any of ink is low, Ink LED
blinks
When any of ink is low, ink icon is
displayed at the upper left of LCD
When any of ink is out, Ink LED is
turned on
When any of ink is out, replace Ink
error is displayed

 Loading...


