EPSON Stylus CX4900/CX4905/CX5000/DX5000/DX5050/CX5900/CX6000/DX6000/DX6050 Revision A
DISASSEMBLY/ASSEMBLY Printer Section 140
4.4.11 Waste Ink Pads/Stacker Lock/PG Lever/Rubber Feet
External view (1)
Figure 4-20. Removing Waste Ink Pads
Part/Unit
that should be removed before removing Waste Ink Pads/
Stacker Lock/PG Lever/Rubber Feet
Document Cover / Panel Unit / Scanner Unit / Housing, Upper / Stacker Assy. /
Printer Mechanism
Removal procedure
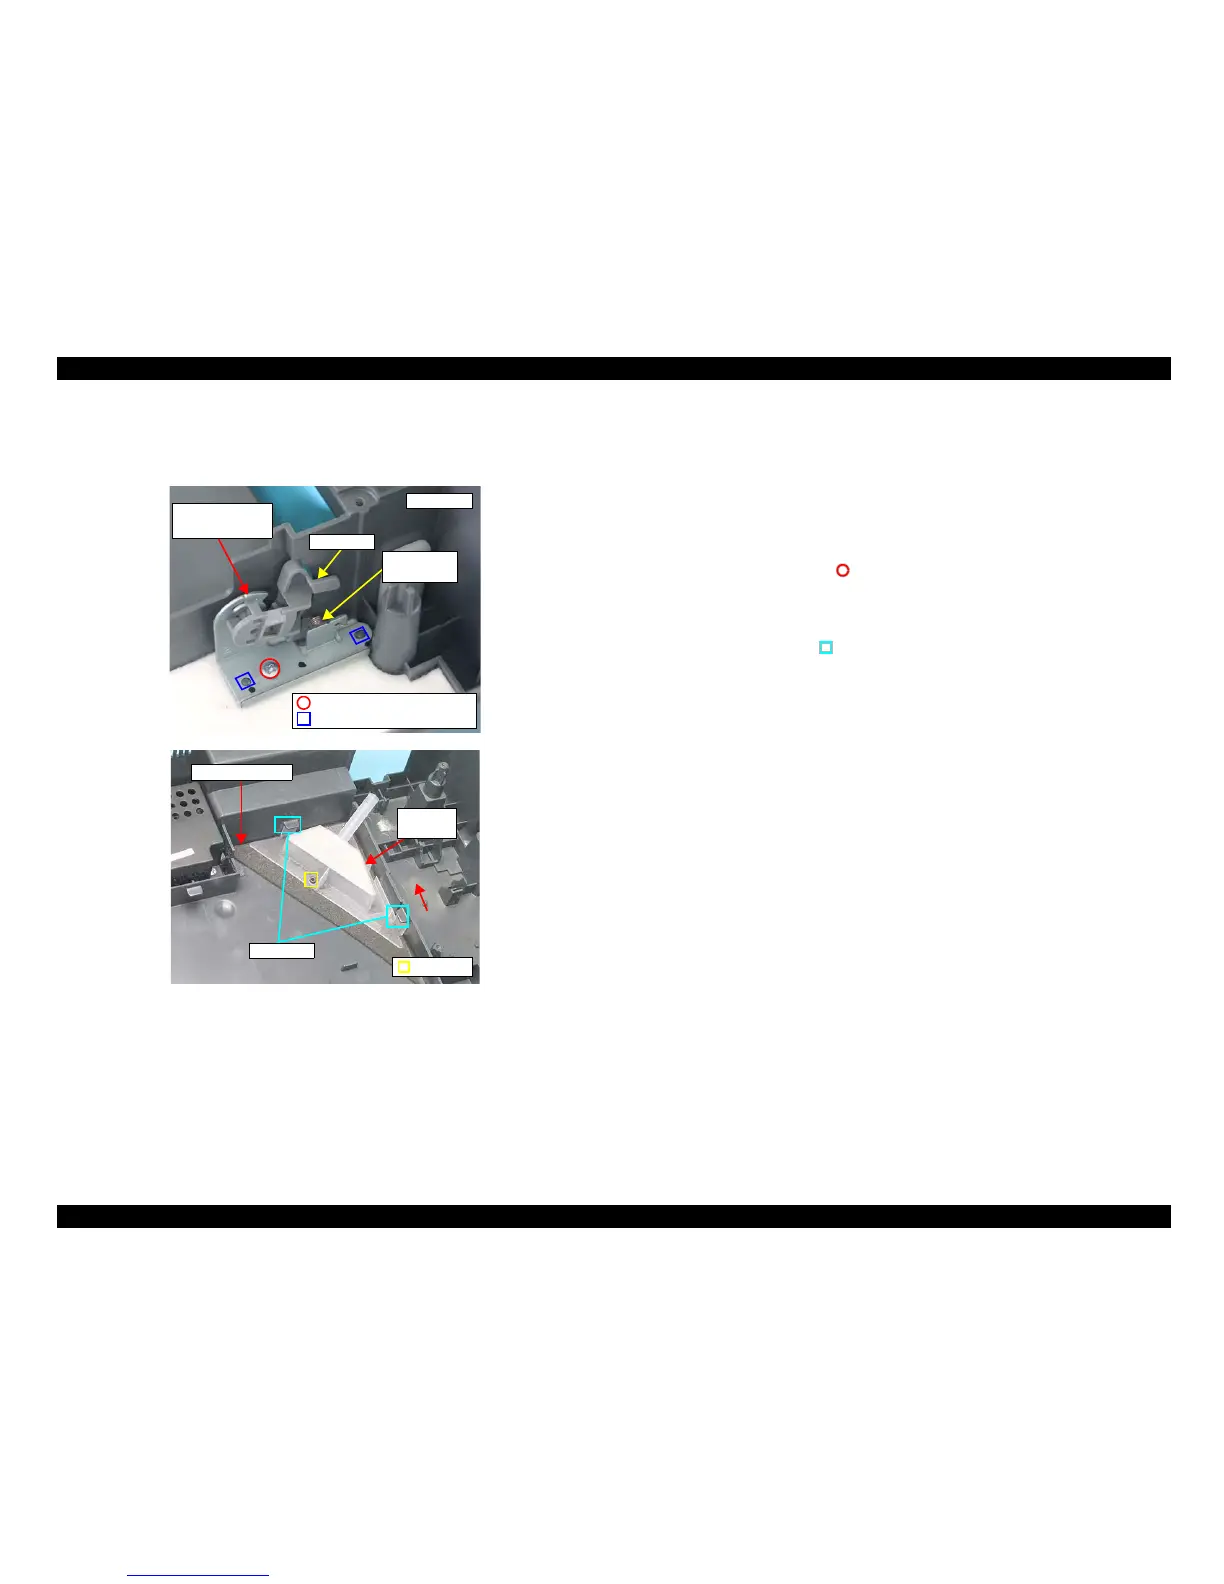
Waste Ink Pads Removal
1. Remove the screw (x1, ) that secures the PG Lever Mounting Plate, and
remove the PG Lever, PG Lever Mounting Plate and Torsion Spring 26.1 all
together from the Housing, Lower.
2. Remove 6 pieces of the Waste Ink Pads from the Housing, Lower.
3. Release the tabs (x2, ) that secure the Waste Ink Cover, and remove it from
the Housing, Lower.
4. Remove the Diffusion Sheet.
PG Lever
Mounting Plate
Torsion
Spring 26.1
Left Side
C.B.P 3x8 F/Zn (4±1kgfcm)
Guide Pin
PG Lever
Diffusion Sheet
Waste Ink
Cover
Tab
Guide Pin

 Loading...


