EPSON Stylus CX4900/CX4905/CX5000/DX5000/DX5050/CX5900/CX6000/DX6000/DX6050 Revision A
DISASSEMBLY/ASSEMBLY Printer Section 135
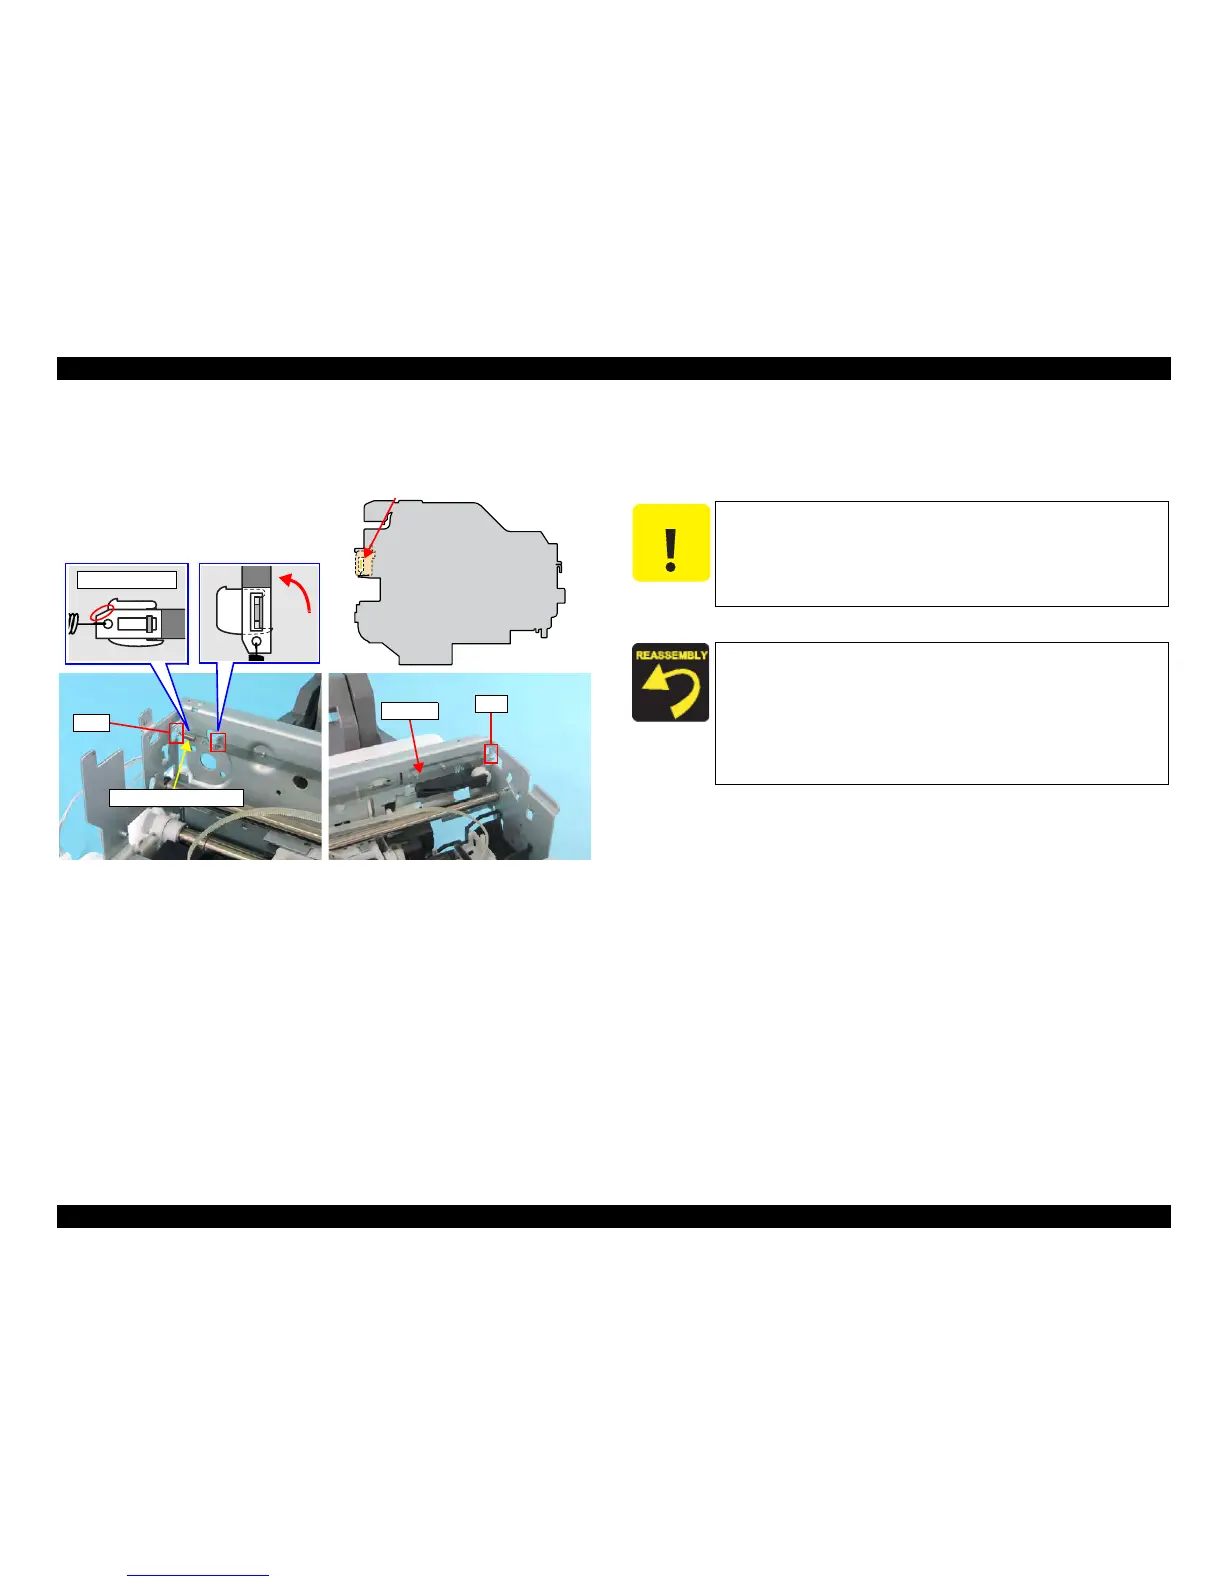
4.4.8 CR Scale
External view
Figure 4-13. Removing Carriage Unit (1)
Part/Unit
that should be removed before removing CR Scale
Document Cover / Panel Unit / Scanner Unit / Housing, Upper
Removal procedure
1. Remove the CR Scale from the Main Frame.
CR Scale
Tab
Extension Spring 3.289
Tabs
Chipped Part
Slit of CR Encoder Sensor
C A U T I O N
Pay attention to the following instructions:
Do
not touch the CR Scale with bare hands.
Do not damage th
e CR Scale.
Handle the Extension Spring 3.289 in a way that does not
extend it.
When installing the CR Scale, pay attention to the following
instructions.
• Pass the CR Scale into the slit of the CR Encoder Sensor.
• Chipped portion of the CR Scale should be facing upward.
• Make sure that Extension Spring 3.289 is not twisted, and
hitch one side of Extension Spring 3.289 to the hook of the
Main Frame.

 Loading...


