EPSON Stylus CX4900/CX4905/CX5000/DX5000/DX5050/CX5900/CX6000/DX6000/DX6050 Revision A
PRODUCT DESCRIPTION Control Panel 51
1.9.2 Control Panel of Stylus CX5900/CX6000/DX6000/
DX6050
Buttons
The control panel contains the following buttons, which are used to set and execute
vari
ous operations.
All of them are non-lock type buttons.
Note "*": Numbers in the table correspond to the numbers shown in Figure 1-23 (p52) and
Figure 1-24 (p53)
Refer to “1.9.4.2 Stand-alone Copy / Memory Card Print / Photo / Setup/Utilities
(Stylus CX5900/CX6000/DX6000/DX6050)” (p.57) for details about each button.
Indicat
ors
The control panel contains 2.0 inch LCD and 15 LEDs, which are used to indicate
variou
s status.
Note "*": Numbers in the table correspond to the numbers shown in Figure 1-23 (p52) and
Figure 1-24 (p53)
Note *1: All LEDs except for Power LED will be turned off while printing or scanning by PC.
*2: This LED is located near the card slot, not on the control panel.
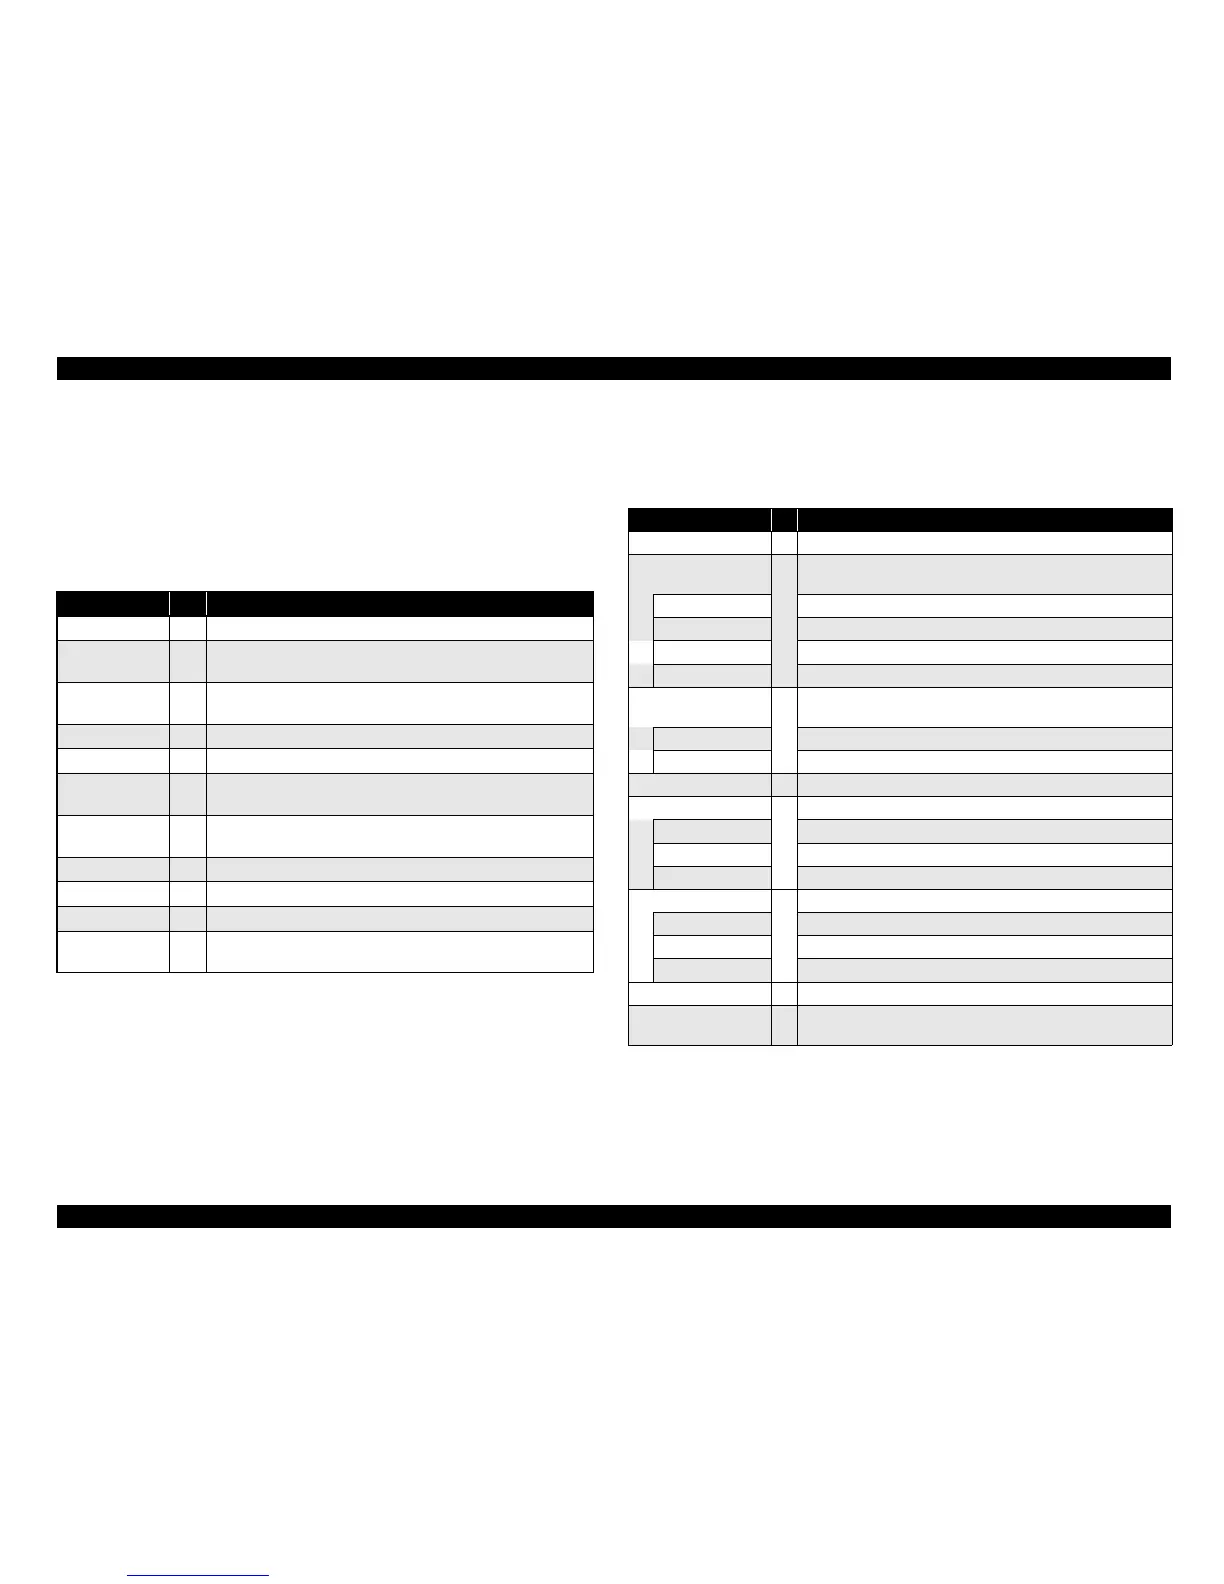
Table 1-50. Buttons
Button * Function
Power 1 Execute turning on/off this unit.
Memory Card 2
Make transition from “Copy mode” or “Photo mode” or “Setup
mode to “Memory Card mode” and selects one of card print mode.
Copy 3
Make transition from “Memory Card mode” or “Photo mode” or
“Setup mode” to “Copy mode” and selects zoom function.
Paper Type 4 Select paper type.
Paper Size 5
Select paper size.
Photo 11
Make transition from “Copy mode” or “Memory Card mode” or
“Setup mode” to “Photo mode”.
Setup/Utilities 12
Make transition from “Copy mode” or “Memory Card mode” or
“Photo mode” to “Setup mode”.
Up/Down 13 Sets number of copies
Left/Right 14 Select print image
Start 15 Start card print or color copy or scan.
Stop/Clear 16
Stop job of copying or printing or sometimes work at the printing.
Clear the setting value at the non-printing.
Table 1-51. Indicators (Stylus CX5900/CX6000/DX6000/DX6050)
LED * Function
Power LED [Green] *
1
A Light at stand-by. Blink while some operation is proceeding.
Memory Card LED 1-4
J
Light one of them while some memory card print function
showing below is ready or proceeding.
1
st
[Green] Print Select
2
nd
[Green] Print All/PictBridge
3
rd
[Green] Print Index Sheet
4
th
[Green] Print From Index Sheet
Copy LED 1-2
K
Light one of them while copy print function shown below is ready
or proceeding.
1
st
[Green] Fit to Page
2
nd
[Green] 100%
Photo [Green] L Light while Photo function showing below is ready or proceeding.
Paper Type LED 1-3
M
Light one of them showing which paper type below is selected.
1
st
[Green] Plain Paper
2
nd
[Green] Photo Paper
3
rd
[Green] Matte Paper
Paper Size LED 1,2
N
Light one of them showing which paper size
below is selected.
1
st
[Green] A4 (Euro/Asia), Letter (EAI), Letter/A4 (Latin)
2
nd
[Green] 10x15/ 4”x6”
(Euro/Asia), 4”x6” (EAI/Latin)
3
rd
[Green] 13x18/5”x7” (Euro/Asia), 5”x7” (EAI/Latin)
2 inch LCD O
Display photo, print number, error, settings, etc.
Card Access LED
[Green] *
2
--
Light when available memory card is in a slot. Blink when
accessing to the card.

 Loading...


