EPSON Stylus CX4900/CX4905/CX5000/DX5000/DX5050/CX5900/CX6000/DX6000/DX6050 Revision A
ADJUSTMENT Adjustment by Using Adjustment Program 179
5.2.15 PF Adjustment
Adjustment procedure
1. Examine the printed pattern and select a value for each of the top and bottom.
2. Input the value selected in Step 1 and print the PF adjustment check pattern.
3. Check the pattern printed in Step 2 if the correction has been properly
reflected.
4. If the result in Step 3 is NG, return to Step 1 and repeat the adjustment
procedure.
SELECTING THE VALUE FOR THE BEST PATCH and CHECKING THE PF
ADJUSTMENT CHECK PATTERN can be found on the following pages.
Figure 5-6. PF Adjustment Pattern
SELECTING THE VALUE FOR THE BEST PATCH
Procedure
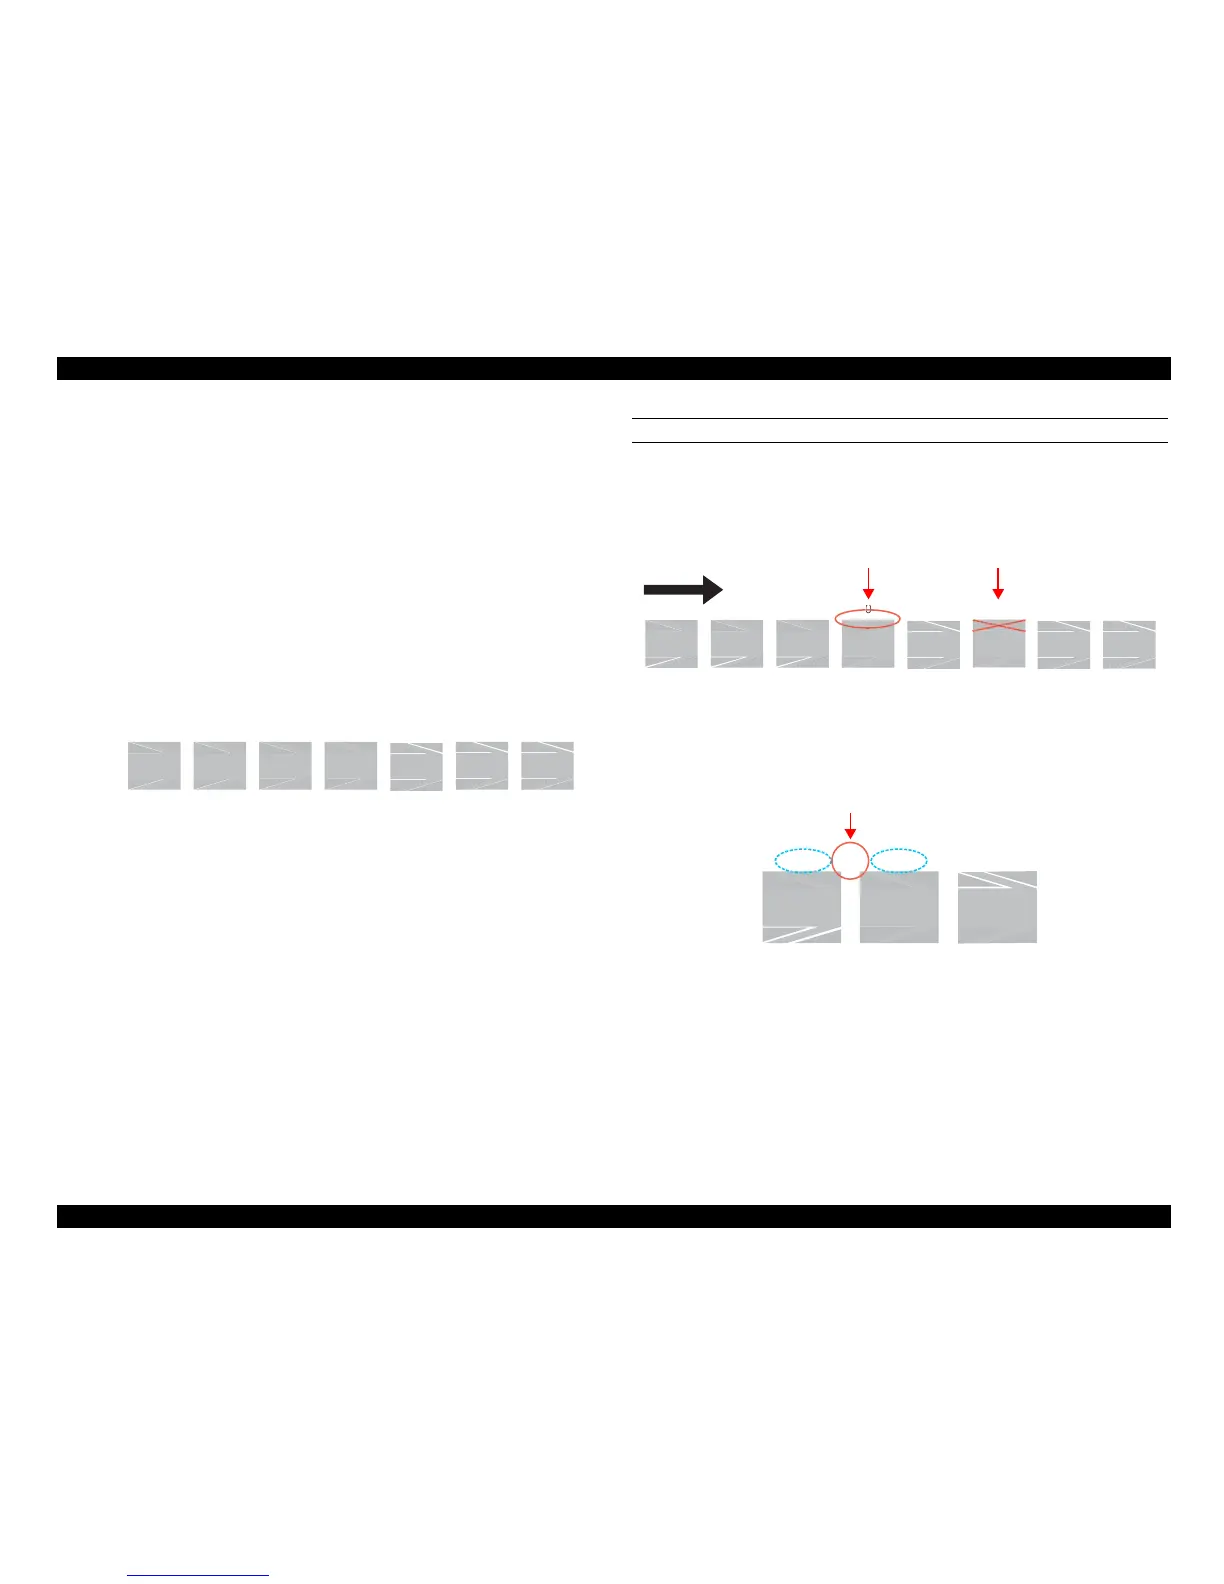
1. Examine the printed patches from the left and select a value for the patch with
least white oblique lines on its upper (top) area. If two or more patches are
found as the best patch, be sure to select a value for the left most one.
Figure 5-7. PF Adjustment (1)
• If it is difficult to judge, compare the most likely patch with the one on the right.
If you still cannot find any differences in the upper area between the two
patches, input the mean value of the two.
Figure 5-8. PF Adjustment (2)
-4 -2 0 2 4 6-6
-4 -2 0 2 4 6-6
PF adjustment
Top
Bottom
4
-4 -2 0 2 6 8-6
4
-4 -2

 Loading...


