EPSON Stylus CX4900/CX4905/CX5000/DX5000/DX5050/CX5900/CX6000/DX6000/DX6050 Revision A
DISASSEMBLY/ASSEMBLY Printer Section 141
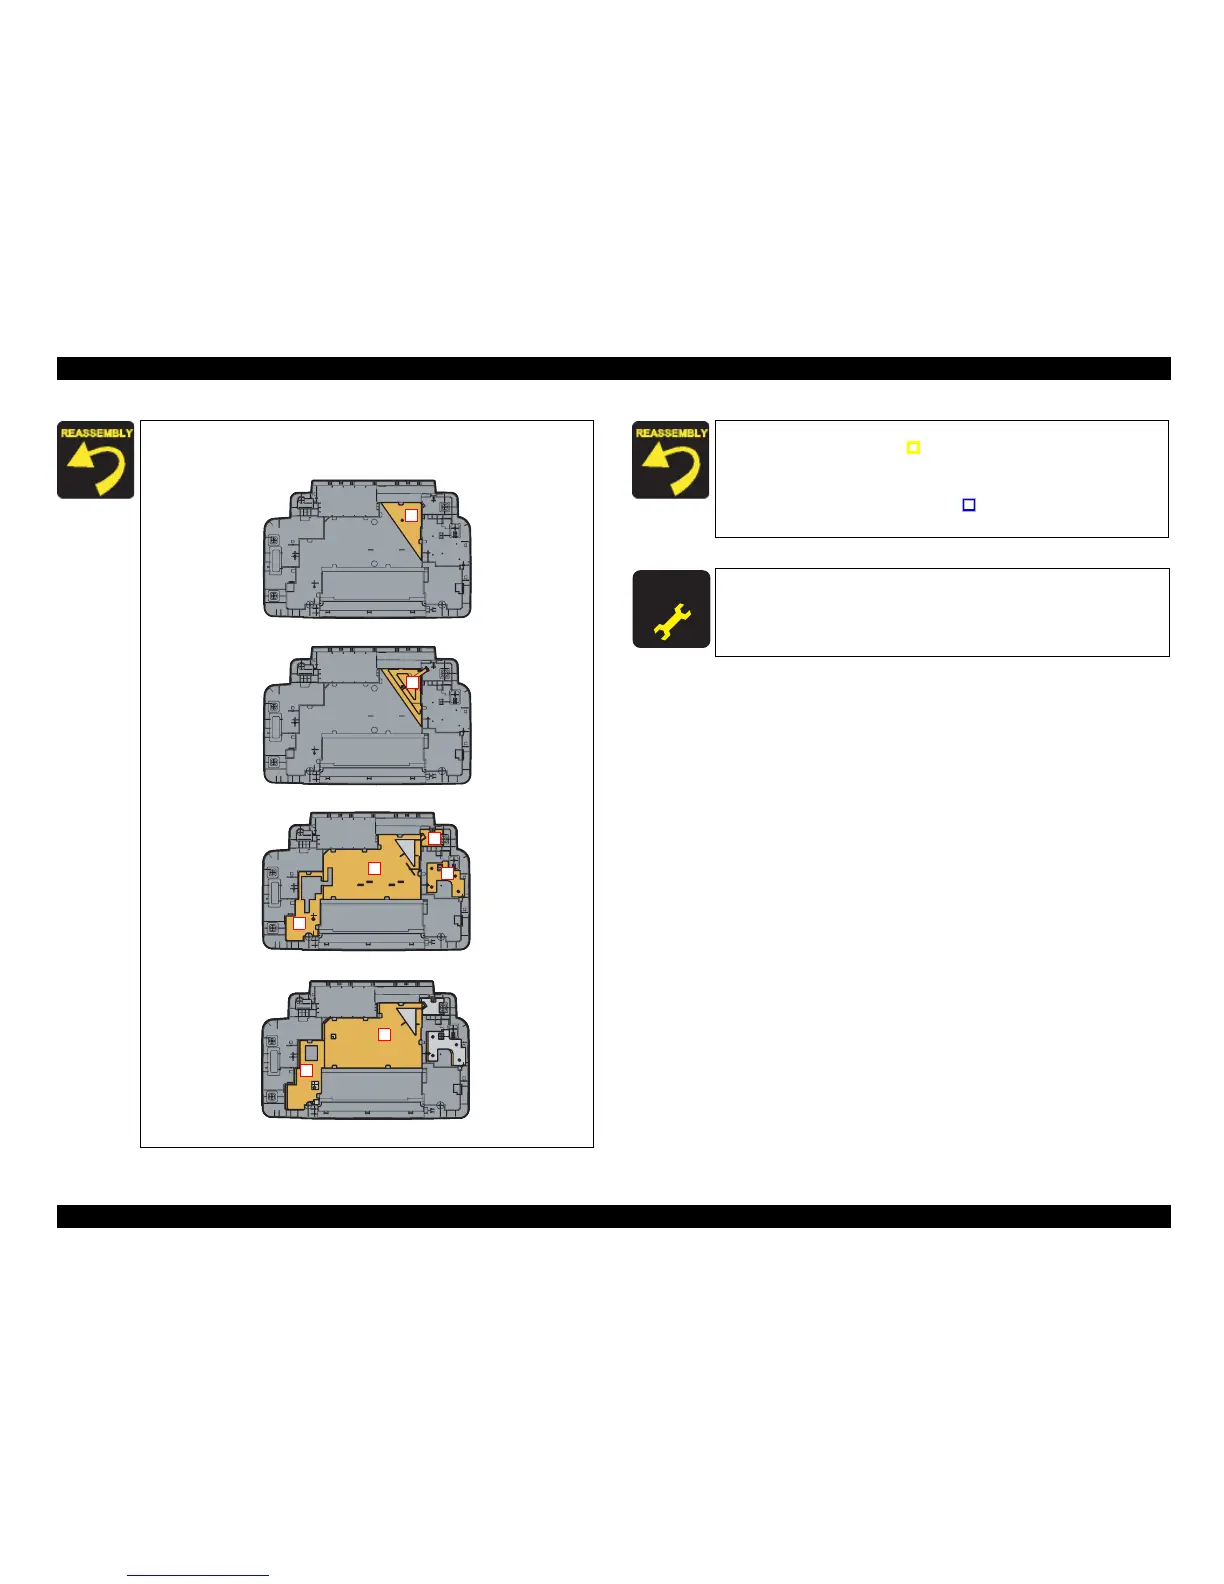
When installing the Waste Ink Pads, Waste Ink Cover and the
Diffusion Sheet, be sure to follow the steps below.
Figure 4-21. Installing Waste Ink Pads
Step 1
Step 2
Step 4
1
2
3
4
5
6
7
8
Step 3
When installing the Waste Ink Cover to the Housing, Lower,
match the guide pin (x1,
) of the Housing, Lower with the
positioning hole (x1) of the Waste Ink Cover.
When
installing the PG Lever Mounting Plate to the Housing,
Lower, match the guide pins (x2,
) of the Housing, Lower with
the positioning holes (x2) of the PG Lever Mounting Plate.
A D J U S T M E N T
R E Q U I R E D
After replacing the Waste Ink Pads, perform the adjustment
referring to Table 5-1."Required Adjustments" (p172)

 Loading...


