5 Conversion and maintenance
Festo – P.BE-MPA-E N – 1309f – English 121
The formation of pre ssure zones with the aid of separating seals is described subsequently.
Note
Note the following if the MPA-S valve terminal is subsequently e xtended or converted:
The separating seals for forming pressure zones are divided into two groups
( chapter 2, Tab. 2.9):
– Separating seals for MPA-S valve terminals equipped with flat plate silencers.
– Separating seals for MPA-S valve terminals equipped with exhaust plates.
For converting the valve terminal, you will require t he following components for each pressure zone:
– Separating seal with pressure zone separat ion ( c hapter 2, Tab. 2.9)
– If not already present, one of the following pneumatic air supply units with exhaust plate or flat
plate silencer:
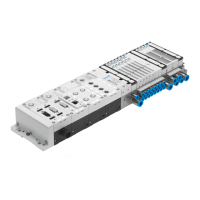
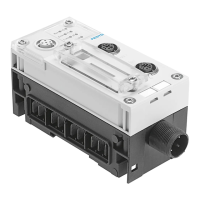
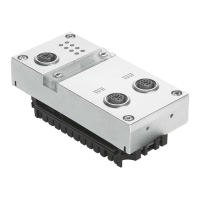
Pneumatic air supply plates for the MPA-S valve terminal with ...
CPX terminal Multi-pin plug connection plate
VMPA…-FB-SP or VMPA…-FB-SPU VMPA-FB-SP or VMPA-FB-SPN
Tab. 5.8 Pneumatic air supply plates
– Whe n adding a pneumatic air supply plate:
– MPA-S valve terminal with multi-pin plug conn ection:
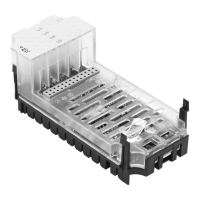
a correspondingly lengthened interlinking board ( section 5.3.8).
– Valve terminal MPA-S with CPX terminal:
for the pneumatic air supply plate, the corresponding interlinking board type: MPA1-FB-EV-V.
Dismantling
Proceed as follows:
1. Loosen the electrical and pneumatic connections and then remove the MPA-S valve terminal from
the mounting surface ( chapter 3).
2. Place the MPA-S valve terminal on a flat working surface.
3. Loosen the sub-base whe r e the separating seal for pressure zone separation is to be inserted
( section 5.3.7).
Mounting
Proceed as follows:
1. Insert the separa ting seal for t he pressure zone separation.
2. If not already present, mount a corresponding pneumatic air supply plate fo r each of the pressure
zones 2 … 8 ( section 5.3.7).
3. MP A-S valve terminal with multi-pin plug connection:
A lengthened version of the interlinking bo ard is required for bridging the pneumatic air supply
plate. In the sub-base which follows the pneumatic supply plate, replace the short interlinking
board with a longer version ( section 5.3.8).
4. Mount the sub-base ( section 5.3.7).
5. Mount the MPA-S valve terminal onto the mounting surface ( chapter 3, “Wall mounting” or
“H-rail mounting”).
6. Then install the pneumatic and electrical connections ( chapter 3).