SECTION 6 – SYSTEM MAINTENANCE
UL / ULC Ex4623 Fike Clean Agent System w/ FM-200™ Page 3 of 3
FM 3010715 Manual P/N: 06-215 (Rev G) Revision Date: January, 2010
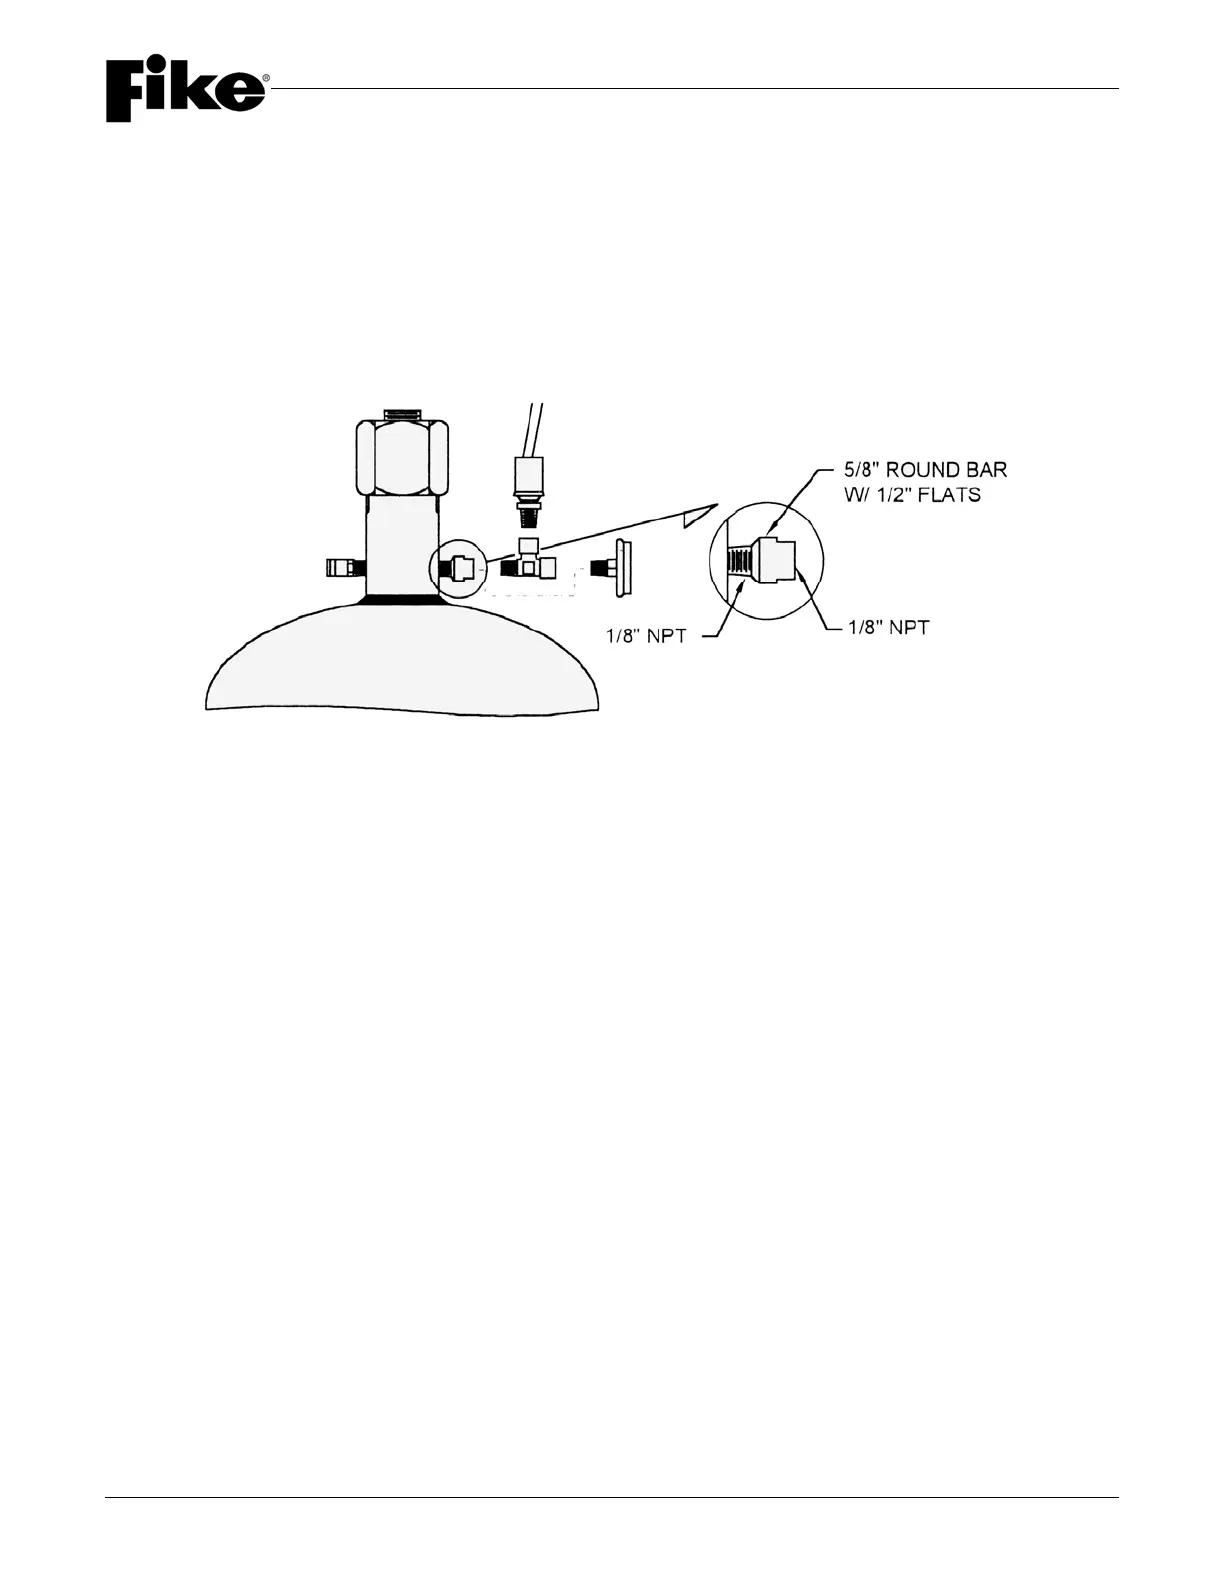
6.6 PRESSURE GAUGE & LOW PRESSURE SWITCH MAINTENANCE
All Fike Containers provided with a Removable Gauge Adapter (P/N 70-1574) allow the user to add or replace the
pressure gauge and/or low pressure switch – even when the container is charged. This can be accomplished
easily with a little planning and preparation. If you have the parts ready and the tools that you need on-hand, the
process is easy.
CAUTION: When replacing a gauge or switch on a charged container (or adding a Low Pressure switch), do
not allow the pressure port to remain open (disconnected) for an extended period of time. A
significant quantity of HFC-227ea could be lost from the container.
6.6.1 REPLACING A PRESSURE GAUGE OR LOW PRESSURE SWITCH
Follow these procedures to replace a pressure gauge or low pressure switch on a charged container.
1. Place Teflon tape on the male thread connection of the device(s) being replaced. DO NOT overlap the end of
the connection – the first thread should be uncovered.
2. Remove the device to be replaced.
3. Install the replacement device. It may be necessary to have a second wrench on hand to hold the tee or
removable gauge adapter in place while you perform this step.
4. Check the assembly for leaks using a suitable leak test device. (Refer to the Recharge Manual for
recommendations and leak test procedures.)
6.6.2 ADDING A LOW PRESSURE SWITCH
Follow these procedures to add a low pressure switch to a charged container.
1. Place Teflon tape on the male thread connections of the pressure switch and street tee provided with the
assembly. DO NOT overlap the end of the connections – the first thread should be uncovered.
2. Remove the pressure gauge from the removable gauge adapter. You will need to have a second wrench on
hand to hold the removable gauge adapter in place while you perform this step. DO NOT allow the adapter to
turn – this may cause a leakage problem.
3. Thread the street tee into the adapter and tighten – the tee should be positioned in the horizontal plane when
complete. A second wrench is required for this step as well. DO NOT allow the gauge adapter to turn.
4. Install the low pressure switch in the side outlet of the tee. Tighten the switch with a wrench. Use a second
wrench to hold the tee in place during this operation.
5. Install the pressure gauge in the tee. The gauge should be facing you and positioned where it can be read
correctly. Use a second wrench to hold the tee in place during this operation.
6. Check the assembly for leaks using a suitable leak test device. (Refer to the Recharge Manual for
recommendations and leak test procedures.)