INSTALLATION
49
PULSE Installaon, Commissioning and Servicing Manual - Revision 19
7.6 LPG Trade Measurement Verification Process - Version 1.11
1. Before commencing this procedure, check that the two meter housing covers are
secured in place with wire/lead seals.
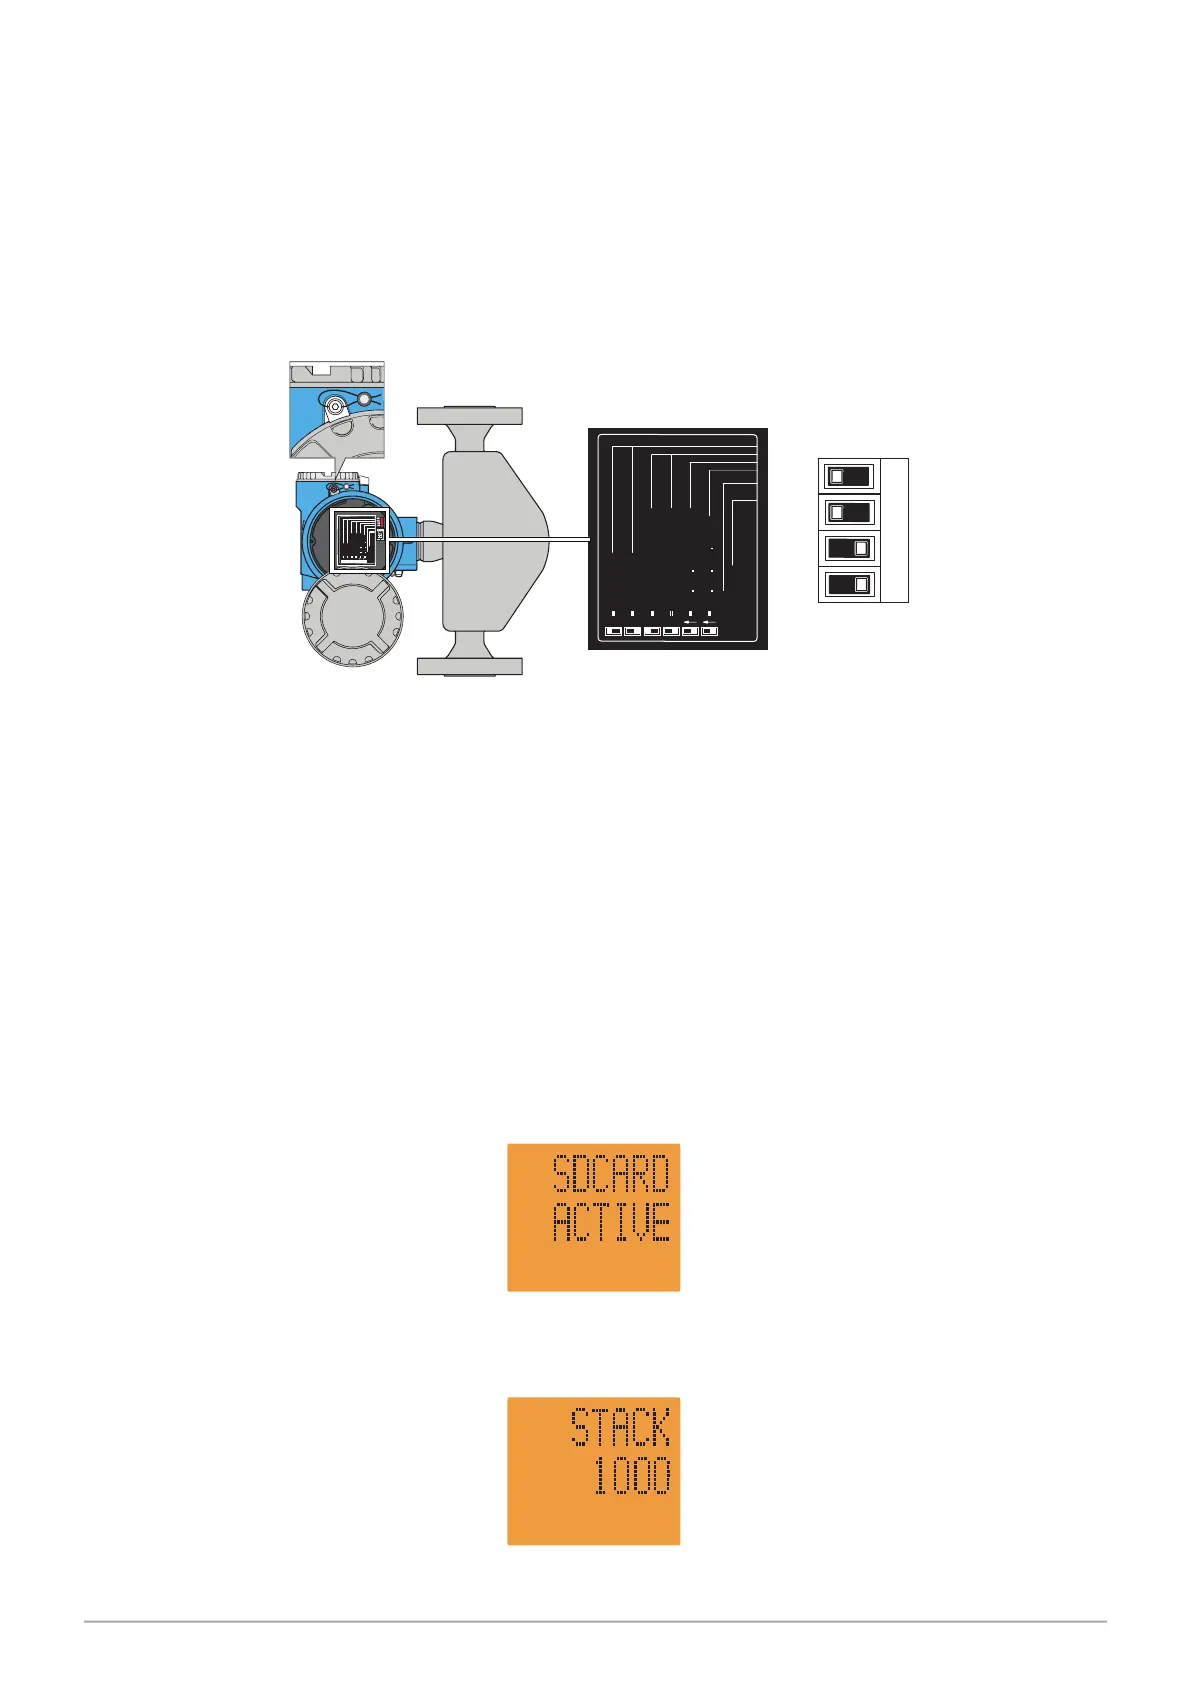
2. If the seals are not in place, then remove the large cover to inspect the dipswitch
settings. You will be opening a flameproof enclosure, so ensure the dispenser power
is off and be careful not to damage threads or mating faces.
Service Connector
Status LED
= VolumeCorrection OFF
= VolumeCorrection ON
= Fact.Sett. All Parameter
= Fact.Sett. Com. Para.
= SecurityON
= SecurityOFF
3 41
2
Service Connector
Status LED
= Volume Correction OFF
=
Volume Correction ON
= Fact. Sett. All Parameter
=
Fact. Sett. Com. Para.
= Security ON
=
Security OFF
ServiceConnector
StatusLED
=Volume Correction OFF
=
VolumeCorrection ON
=Fact. Sett. AllParameter
=
Fact.Sett. Com. Para.
=Security ON
=
SecurityOFF
3 4
1 2
ON OFF
Figure 22. Location of Dipswitches
3. The dipswitches must be in these positions.
Do not move switches unless advised to by Gallagher technical staff. If moved,
essential settings will be lost needing specialist tools to reset.
4. Replace the meter cover before re-powering the dispenser.
5. If the dispenser is online to the point of sale system, then disable the pump comms
and put the dispenser in stand-alone mode (see Servicing - Section 12.12).
6. Put the dispenser in verification mode by going into Service Mode, using the FILL
key and password (see Servicing - Section 12.1).
7. Using the 2 or 8 keys, scroll to STACK 1000.
$
L
$
L