GE MEDICAL SYSTEMS
D
IRECTION 2380207, REVISION 7 LOGIQ™ 5 PRO SERVICE MANUAL
Chapter 8 Replacement Procedures 8 - 31
8-4-8-4 Removal Procedure (cont’d)
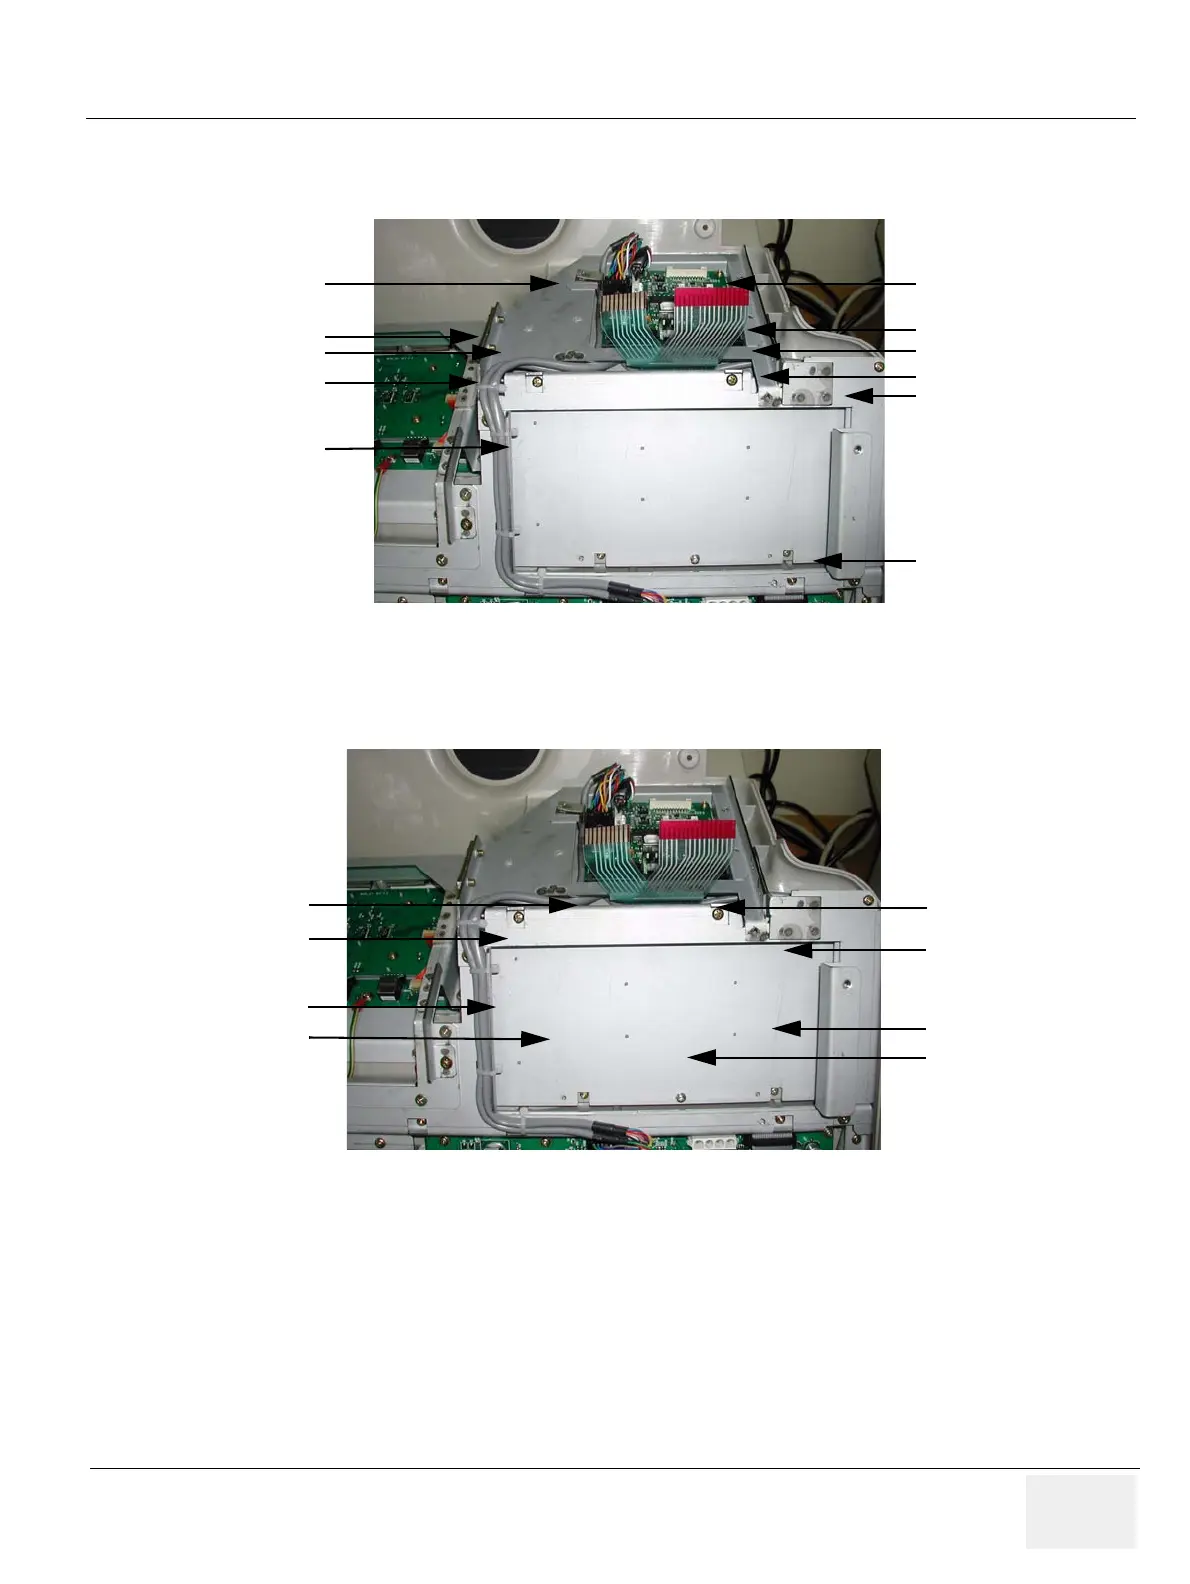
3.) Unscrew eleven (11) screws (1-11) to remove the A/N keyboard prefix bracket. Refer to Figure 8-32.
4.) Remove the A/N keyboard prefix bracket.
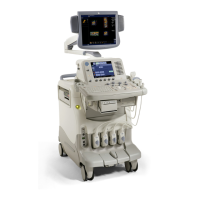
5.) Unscrew eight (8) screws (1-8) to remove the A/N keyboard Assy. Refer to Figure 8-33.
6.) Lift the A/N keyboard Assy Carefully.
Figure 8-32 Unscrew 11 screws
Figure 8-33 Unscrew 8 screws
(1)
(2)
(3)
(4)
(5)
(6)
(7)
(8)
(9)
(10)
(11)
(1)
(2)
(3)
(4)
(5)
(6)
(7)
(8)


 To Next Page